Spark Plug and Ignition Coil Replacement: DIY vs Professional
An objective, in-depth comparison of DIY vs professional spark plug and ignition coil replacement, with practical guidance, tool lists, cost considerations, and maintenance tips.

Replacing spark plugs and ignition coils together is often the most reliable approach for many engines. DIYers can tackle the job with the right tools and safety precautions, but some engines require specialist access. For best results, follow the vehicle manual and ensure you use matched, quality parts. This MultiPlugging guide helps you diagnose, replace, and verify installation safely.
Why spark plug and ignition coil replacement matters
A well-timed spark plug and ignition coil replacement is central to engine reliability, fuel economy, and smooth operation. When either component wears, you may notice hard starting, rough idling, or reduced power. Replacing both parts as a coordinated upgrade often yields the same or better performance than sporadic fixes. For many vehicle owners, this is a practical, cost-effective maintenance task that can prevent more extensive engine damage down the line. According to MultiPlugging analyses in 2026, engines with worn ignition components show higher misfire rates and reduced throttle response, especially in cold starts. By planning a replacement around your vehicle’s maintenance schedule, you can minimize downtime and preserve optimal performance for the long term. This guide covers diagnosis, tool requirements, step-by-step instructions for spark plugs and ignition coils, and decision points about DIY versus professional service.
Top benefits of timely replacement
- Restored fuel efficiency and smoother idle when ignition is firing reliably
- Improved cold-start performance and reduced emissions due to consistent spark delivery
- Lower risk of engine damage from misfires or unburned fuel washing the oil
- Enhanced starting reliability and reduced crank times in cold weather
- Potentially longer engine life when components are kept up to date
In practice, a coordinated replacement approach helps ensure the new parts work well together, minimizing the odds of mismatched timing or weak spark. The MultiPlugging team emphasizes that using a matched set of high-quality plugs and coils reduces the chances of quick wear and mismatch-related symptoms. Always consult your owner’s manual for interval guidance and torque specs to avoid over- or under-tightening.
Diagnosing the need for replacement: symptoms and tests
Look for telltale signs that the ignition system is degrading. Common symptoms include hesitations during acceleration, frequent misfires indicated by the check engine light or diagnostic codes, and decreased power under load. A rough idle, increased fuel consumption, and trouble starting in cold weather can also signal worn spark plugs or aging ignition coils. A quick diagnostic plan from MultiPlugging involves:
- Checking for misfire codes (P0300 range) with an OBD-II scanner.
- Inspecting spark plug condition (plug color, fouling, gap integrity).
- Verifying coil-on-plug boots for cracks or swelling and checking coil resistance if you have the proper tools.
- Performing a swap test in a controlled way to isolate misfire sources when needed.
If symptoms align with both components, planning a combined replacement is often the most efficient path.
Tools, safety, and best practices for a clean job
Before you begin, gather quality tools: a torque wrench, a spark plug socket, a gap gauge, a flat-head screwdriver, and insulated pliers or bite-type pliers for coil connectors. Safety basics matter: disconnect the battery, work in a well-lit, ventilated space, and wear eye protection. For engines with compact or tight engine bays, you may need a small mirror, flexible extension, or specialized adapters. A clean workspace and magnetic parts trays help prevent dropped fasteners. When replacing ignition coils, handle the coils gently to avoid damaging brittle boots or cracked connectors. Use anti-seize on plugs only if the manufacturer recommends it; otherwise, rely on manufacturer torque specs and clean threads. This approach minimizes thread galling and ensures proper seal without over-tightening.
Step-by-step: replacing spark plugs (general approach)
- Locate the spark plugs and remove the ignition coil boots carefully to avoid tearing.
- Clean the area around the plug to prevent debris from embedding in the threads.
- Use a proper spark plug socket and a torque wrench set to the manufacturer’s specification.
- Gap the new plugs if required, then install by hand to avoid cross-threading before final torque.
- Reconnect ignition coils and ensure all electrical connections are snug.
- Start the engine and perform a test drive to verify smooth operation and absence of misfires.
Note: Some modern engines use coil-on-plug designs where you replace the coil assemblies rather than standalone plugs in some cases. Check your service manual for engine-specific steps. The goal is consistent electrical contact, correct torque, and clean threads for a reliable seal.
Step-by-step: replacing ignition coils (general approach)
- Identify coil locations and disconnect the electrical connectors with care to avoid pinched wires.
- Remove the coil mounting bolt(s) if present and gently pull the coil assembly free from the spark plug.
- Inspect the coil boot and connector for wear, cracks, or oil contamination; replace if needed.
- If your engine uses individual coils, label each coil to match its cylinder position for reinstallation.
- Install the new coil, torque bolts per spec, and reconnect electrical connectors securely.
- After installation, clear any codes and test start the engine to confirm a solid spark and even combustion.
Always refer to your vehicle’s service manual for exact torque values and sequence, as coil torque can vary by model and design. MultiPlugging recommends confirming coil resistance checks only if you have the proper diagnostic equipment and reference values from the manual.
Common pitfalls and how to avoid them
- Not following torque specifications can lead to stripped threads or blown plugs; always use a torque wrench and verify specs.
- Mixing up cylinder positions or misaligning boots can cause misfires; label or photograph connections before removal.
- Using dirty or oily tools can transfer contaminants to the plug threads or coil seats; work clean and use lint-free rags.
- Skipping the battery disconnect step may cause short circuits; always disconnect power before starting.
- Over-torquing plugs or coils can crack seats; if you feel resistance, stop and recheck alignment and seating.
Being methodical reduces rework and ensures consistent performance after completion. The MultiPlugging team notes that planning the workflow, having spare replacement parts available, and testing one cylinder at a time helps catch issues early and minimize engine downtime.
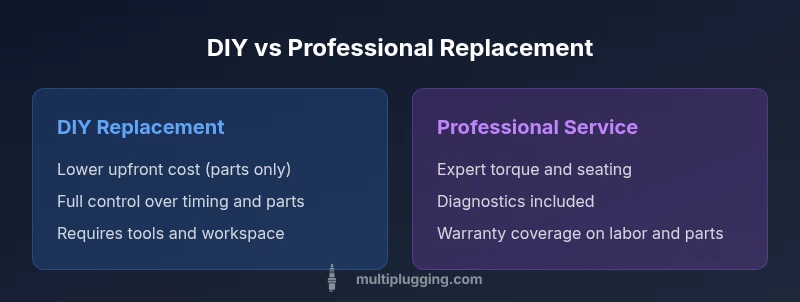
DIY vs professional: cost, time, and risk considerations
DIY replacement can save labor costs and allow you to learn a handy skill, but it requires the right tools, time, and patience. For many engines, a well-executed DIY job yields excellent reliability and a clear sense of accomplishment. However, some designs have restricted access, complex ignition plumbing, or safety concerns that favor professional service, especially for newer vehicles with advanced coil systems or limited-service intervals. When deciding, consider the vehicle’s service manual, the availability of quality replacement parts, and your comfort level with disassembly and reassembly tasks. A cautious approach includes purchasing a matched set of plugs and coils, inspecting for oil leaks or gasket wear, and confirming no stored fault codes remain after replacement. The MultiPlugging perspective emphasizes prioritizing reliability and safety over speed, and to use professional help if you encounter unfamiliar components or limited access.
Maintenance after replacement: extending the life of the setup
After replacement, establish a light-break-in period: drive at varied speeds and load to ensure even burn and verify there are no misfires. Keep an eye on fuel economy and acceleration performance for the first few hundred miles. Periodically re-check the ignition system, especially in high-mileage vehicles where the coil boots, connectors, or wiring can degrade due to heat and vibration. Using quality OEM or OE-equivalent parts tends to support longevity, while aftermarket options can vary in performance. Establish a routine inspection cadence aligned with your vehicle’s maintenance schedule and consider keeping spare gaskets and a small diagnostic scanner on hand for quick checks. The goal is to maintain reliable ignition across the entire engine, reducing the likelihood of future failures.
Troubleshooting after replacement: what to do if problems persist
If you still experience misfires, rough running, or starting difficulties after replacement, re-check the installation. Verify that plugs are correctly gapped, seated, and that ignition coils are fully plugged in with secure connections. Look for signs of oil or coolant intrusion that could indicate a valve cover gasket or a cracked seal. If the check engine light returns, pull fault codes and retest with up-to-date software. In some cases, a wiring harness or harness connector may be the root cause, not the plugs or coils themselves. If uncertainty remains, consult a professional technician or use trusted diagnostic resources, as continued driving with ignition faults can cause catalytic converter damage or exhaust contamination.
Practical takeaway: planning your replacement synergy
Pairing spark plug and ignition coil replacement is advantageous when symptoms implicate multiple ignition components. The coordinated approach ensures matching performance, reduces the risk of residual misfires, and simplifies maintenance records. For DIY enthusiasts, investing in quality tools and following manufacturer torque specs reduces risk and adds confidence. For owners who lack space, time, or comfort, professional service offers efficient, reliable installation with warranties that cover labor and parts. MultiPlugging’s guidance is to weigh access, tool availability, and your long-term maintenance goals when deciding who does the job.
Comparison
| Feature | DIY Spark Plug & Ignition Coil Replacement | Professional Replacement Service |
|---|---|---|
| Ease of DIY | High for common engines with accessible bays | Moderate to high depending on engine design and coil layout |
| Time to complete | Typically 60-180 minutes for plugs and coils, plus setup | Often 1-3 hours, depending on access and diagnostics |
| Tooling required | Basic socket set, gap gauge, torque wrench | Specialty tools may be needed, plus diagnostic equipment |
| Cost to you (parts/labor) | Low-to-mid for parts if DIY, plus your time | Labor charges plus parts; sometimes higher for OEM sets |
| Risk of improper install | Moderate if torque and gap are correct; cross-threading risk | Low when performed by trained techs with proper torque specs |
| Warranty implications | Parts warranty applies; some DIY warranties require professional service for coverage | Labor warranty may apply; provider ensures torque and integrity |
Strengths
- Potential cost savings with DIY if you have the right tools
- Hands-on knowledge increases confidence and independence
- You control the parts quality and timing
- Learning how ignition components work improves long-term maintenance
Negatives
- Risk of incorrect torque or gaps leading to leaks or misfires
- Engine access on some vehicles is cramped and challenging
- Mistakes can cause misfires or damage to new parts
- DIY time investment may be significant for busy owners
DIY replacement is generally the best option for accessible engines; professional service is advisable for complex layouts or limited time.
Choose DIY when you have a comfortable workspace and the engine layout is straightforward. For tight bays or newer vehicles with integrated coil packs, a pro ensures torque accuracy and proper diagnostics, backed by a warranty.
FAQ
When should I replace spark plugs and ignition coils together?
If misfires or symptoms point to both components, replacing them together can prevent repetitive repairs and ensure compatible performance. Check the vehicle manual for recommended intervals and note whether coil-on-plug designs require coil replacement more frequently.
If you notice misfires or rough running and your manual suggests it, replacing both at once is often the most reliable approach. Always use matched parts for best results.
Can I do this job myself if I don’t have special tools?
Basic tools suffice for many engines, but some designs need torque wrenches, diagnostic readers, and specialty adapters. If you lack essential tools, you risk improper torque or missing faults. Consider renting tools or seeking professional help for specific models.
Yes, for many engines you can do it with common tools, but verify your model’s torque specs and use the right adapters.
What are common signs my ignition system is failing?
Common signs include hard starting, rough idle, misfires, reduced power, and decreased fuel economy. A diagnostic scan can confirm ignition coil or plug faults via specific codes and resistance checks.
Watch for rough idle and hard starts; a diagnostic scan can pinpoint ignition issues.
How long should I expect parts to last after replacement?
Lifespan varies by brand, engine, and conditions, but quality plugs and coils typically offer several years of reliable service. Best practice is to recheck at the factory maintenance interval and monitor performance.
Good parts should last several years; follow the maintenance schedule for rechecks.
Are OEM parts always the best choice?
OEM parts ensure compatibility and factory standards, but high-quality aftermarket parts can perform similarly. Compare warranties, performance data, and compatibility for your model before deciding.
OEM parts fit the way the manufacturer intends, but reputable aftermarket options can work well too.
What safety precautions should I take during replacement?
Disconnect the battery, work in a well-ventilated area, and wear eye protection. Keep tools organized and avoid touching hot engine components. If in doubt, pause and seek professional help.
Always disconnect power and wear protection; work calmly and stay organized.
Main Points
- Assess engine accessibility before starting
- Replace plugs and coils together when symptoms point to both
- Use matched parts and follow torque specs
- Invest in quality tools to minimize risk
- Consider professional help for complex layouts