Spark Plug and Wire Replacement: DIY vs Professional Guide
A rigorous, analytic comparison of DIY spark plug and wire replacement versus professional service, with practical steps, tool lists, and maintenance tips to maximize ignition reliability.

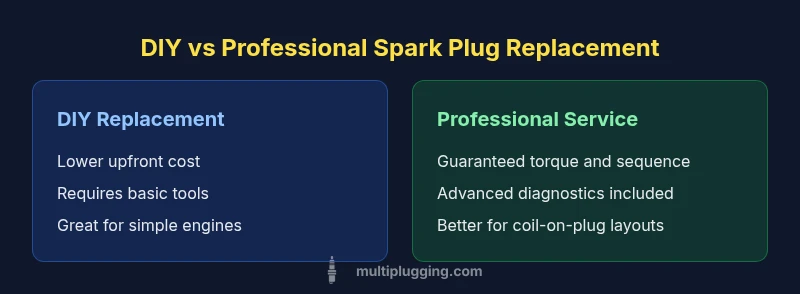
For most straightforward engines, a DIY spark plug and wire replacement is a viable option that saves time and money when you follow the vehicle’s service manual and torque specs. If your engine uses coil-on-plug systems, or you’re unsure about accessing difficult-to-reach plugs, consider professional service to ensure proper torque, wiring sequence, and diagnostics. See our detailed comparison chart for scenarios that are best suited to each path.
Why replacement matters for ignition efficiency and fuel economy
Spark plug and wire replacement is a foundational maintenance task that keeps your ignition system functioning as designed. Worn or fouled plugs struggle to ignite air-fuel mixtures, leading to rough idle, hesitation, and reduced power on acceleration. Worn wires or aging coil connections can introduce misfires and inconsistent spark delivery, which harms combustion efficiency and fuel economy. Regular replacement at manufacturer-recommended intervals helps maintain peak performance and lowers the risk of more expensive engine damage down the line. According to MultiPlugging, a methodical approach to ignition-system maintenance pays off in reliability and driveability, especially for everyday drivers who rely on their cars for daily commuting. Throughout this guide, we compare two common paths for spark plug and wire replacement—DIY replacement and professional service—while outlining how to choose the right parts, the tools you’ll need, and safe, proven steps. The focus stays practical: accuracy, safety, and value for car owners performing their own maintenance, with a clear view of when to call in an expert.
DIY vs Professional: The core decision
Choosing between DIY spark plug and wire replacement and hiring a professional hinges on engine design, your mechanical comfort, and access to the right tools. For many older or simple engines with traditional plug wires, a careful home replacement is entirely doable and can deliver solid results if you follow torque specs and wiring routing precisely. In contrast, modern engines with coil-on-plug systems, variable dwell, or tight engine bays may demand specialist tools, specialized diagnostics, and the safety margin a trained technician provides. The MultiPlugging team notes that, for straightforward layouts, DIY work can save money and build confidence as long as you respect the service manual and avoid shortcuts. When in doubt, assess whether your vehicle requires cylinder-by-cylinder access, if you’re dealing with hard-to-reach plugs, or if you’re unsure about correctly disconnecting coils without triggering fault codes. The goal is to minimize risk while maximizing reliability and performance.
Tools, parts, and compatibility notes
Prepare a clean workspace, good lighting, and the right toolkit: a spark plug socket with a rubber insert, a torque wrench, gauge-style feeler or plug-gap tool, a ratchet, extensions, and anti-seize compound (where recommended by the manufacturer). Collect the correct type and size of spark plugs for your engine model, along with fresh ignition wires or coils if your plan includes a full wire kit. Always check your owner’s manual or a trusted parts lookup to confirm thread size, heat range, and reach. Some engines require a specific torque setting and a precise gap; applying too little torque or over-tightening can strip threads or cause cross-threading. If your car has coil-on-plug ignition, you may need a narrow torque wrench and a gentle touch to avoid damage when removing coil packs. Finally, replace the intake and throttle-body gaskets only if you notice wear or if the service interval calls for it.
Step-by-step DIY replacement walkthrough
- Gather tools and parts, then disconnect the negative battery terminal to prevent shorts. 2) Locate the spark plugs and remove the ignition coil or wire boot with care, avoiding a tug on the wire itself. 3) Clean the spark plug well and thread the plug counterclockwise by hand to feel for any resistance. 4) Check the thread condition; if needed, chase the threads with a proper tap before installing the new plug. 5) Thread the new plug by hand until snug, then torque to the manufacturer’s specification using a torque wrench. 6) Reconnect the coil or wire, ensuring the boot seats fully and clicks into place. 7) Repeat for each cylinder, keeping track of which plug corresponds to which coil. 8) After installation, reconnect the battery and perform a careful test run; listen for misfires, and check for a smooth idle. 9) If applicable, replace wires or coil packs in the recommended sequence and reset any fault codes with the appropriate scan tool.
Common mistakes to avoid
Neglecting to disconnect power before working can cause shorts or injury. Reusing old gaskets or sealing surfaces can lead to leaks or compression problems. Failing to gap new plugs or over-tightening threads can cause misfires or engine damage. Skipping a final tension check after a warm-up period can let hardware relax and loosen. Not labeling or organizing the old parts can cause confusion when you reassemble, especially in engines with multiple cylinders. Finally, ignoring the service manual that specifies torque, seating, and replacement intervals invites avoidable problems.
Troubleshooting after replacement
If the engine runs rough or misfires after a plug or wire replacement, start with simple checks: a loose boot, a fouled plug, or a crossed spark plug wire. Use a scan tool to check for fault codes and confirm misfires by cylinder. If codes persist, recheck the plug gap and torque, and inspect the wires for cracks or resistance. A lingering misfire could indicate a failing coil pack, faulty injector, or ignition-system wiring fault. If in doubt, seek professional assistance rather than chasing symptoms with more parts.
Maintenance tips to extend life after replacement
Keep your ignition system clean by using high-quality fuel and a clean air filter. Inspect plugs and wires at regular service intervals, noting any signs of wear, arcing, or cracking. Avoid aggressive engine heat exposure by ensuring cooling systems are operating correctly. Use OEM-spec parts or reputable aftermarket brands that meet your vehicle’s requirements. In coil-on-plug systems, be mindful of heat and lubrication around the coil boots and connectors. Finally, log your maintenance activities so you can track when plug replacement or wire kits are due again and stay within recommended service windows.
When to consider professional service
Consider professional service when your engine uses coil-on-plug ignition, has hard-to-reach spark plugs, or shows recurrent misfires after a DIY replacement. A technician can perform accurate torque, verify proper wiring sequence, and diagnose related ignition issues with specialized equipment. For vehicles under warranty or with advanced emission-control systems, having a certified technician perform spark plug and wire replacement can help protect the warranty and ensure compliance with manufacturer specifications. If you lack the tools or confidence for the job, or if you want diagnostics beyond basic replacement, professional service is the safer option.
Cost considerations and warranties
DIY spark plug and wire replacement typically involves only part costs and maybe a few new tools; the total expense is generally lower than a shop visit, but it varies with parts quality and your existing tool set. Professional service includes labor and parts, and the total cost can rise with the number of cylinders and the engine layout. Where a parts warranty exists, it usually applies to the new plugs and wires, while labor warranties depend on the shop's policy. Always review the warranty language and manufacturer guidance for your vehicle, especially if you’re dealing with newer engines or specialized ignition systems.
Troubleshooting for different engine layouts
Conventional engines with traditional spark plug wires allow easier access for DIY replacement. For coil-on-plug engines, you’ll need to remove coil packs and possibly sensor brackets, which can be more time-consuming but still manageable with care. Engines with distributor-based ignition require attention to distributor cap integrity and rotor alignment. Always ensure that you’re following the exact sequence of firing order for the reinstalled plugs, since a mismatch can cause rough running or misfires. If you are not sure which layout your engine uses, consult the service manual or a trusted guide before starting.
Quick reference checklist for spark plug and wire replacement
- Confirm correct plug type and heat range for your engine model.
- Verify gap on the new plugs.
- Use proper torque when seating plugs.
- Inspect and replace wires or coil packs if showing wear.
- Disconnect battery before starting, reconnect and test after.
- Keep the work area clean and organized to avoid cross-contamination.
- Document replacement and maintenance schedule for future reference.
Comparison
| Feature | DIY replacement | Professional service |
|---|---|---|
| Estimated total cost (parts + basic tools) | low to moderate | moderate to high |
| Time to complete | roughly 1-2 hours for the entire job (depending on engine layout) | typically a few hours including diagnostics and teardown |
| Skill level required | moderate DIY skills; comfortable with hand tools | professional training and experience required |
| Quality/fitment guarantee | part warranty applies; user is responsible for assembly quality | labor and parts come with shop warranties |
| Best for | cost-conscious, confident hobbyists with simple engines | complex engines or tight spaces; warranty and diagnostics matter |
| Risks if done wrong | misfiring, cross-threading, or damaged wires | risk is mitigated by professional torque, sequence checks, and diagnostics |
Strengths
- Potential cost savings with DIY replacement
- Increased understanding of your engine
- No appointment needed, convenient scheduling
- Immediate feedback from testing after install
- Control over parts quality and timing
Negatives
- Risk of incorrect torque or foul wiring
- Damage to threads or gaskets if done poorly
- Time investment and tool costs for beginners
- Potential void of warranty for some vehicles if not done by a mechanic
DIY is the recommended first option for simple engines; professional service is advised for modern, complex ignition systems.
Choose DIY if you have basic mechanical skills and a straightforward ignition system. For coil-on-plug setups or hard-to-reach plugs, professional service offers diagnostic support and proper torque, reducing risk.
FAQ
What are the signs that my spark plugs and wires need replacement?
Common indicators include rough idle, misfires, reduced power, slow acceleration, and decreased fuel economy. A failing plug or wire can also cause the check engine light to come on. If you notice any of these, inspect the ignition components and consider replacement.
Look for rough idle, sluggish acceleration, or a check engine light. Inspect ignition parts and plan replacement if you notice poor performance.
Can I replace spark plugs and wires in one afternoon?
For many vehicles, a DIY replacement can be completed in a few hours with the right tools and a clear manual. Complex engines or hard-to-reach plugs may take longer. Plan for a comfortable block of time and pauses if you encounter stuck components.
Yes, many people finish in a few hours with the right setup. If your engine is complex, expect more time.
Should I gap the spark plugs?
Yes. Check the recommended gap for your engine and adjust with a feeler gauge if required. Using the correct gap improves ignition efficiency and reduces misfires.
Yes—check and set the gap to spec before installation.
Are OEM wires better than aftermarket?
OEM wires match the original specifications and are generally reliable. Aftermarket wires can be suitable if they meet your vehicle’s specs and quality standards; choose reputable brands and verify compatibility.
OEM parts usually align with the original design; reputable aftermarket parts can work if they meet specs.
Is it safe to reuse old spark plugs?
Reusing old plugs is generally not recommended. New plugs ensure correct heat range, sealing, and longevity, reducing the risk of misfires and engine damage.
Better to use new plugs for reliability and performance.
Main Points
- Assess engine layout before starting
- DIY suits simple layouts; pro suits complex systems
- Follow torque specs and correct plug gaps
- Use quality parts and keep a clean workspace
- Verify success with a road test and diagnostics