How to Change Spark Plug in Bike: A Practical DIY Guide
Learn to inspect, remove, gap-check, and replace spark plugs on a motorcycle or bicycle motorcycle-style engine with a clear, step-by-step approach, tool lists, and maintenance tips from MultiPlugging.

Goal: Learn how to change a spark plug in a bike quickly and safely. You’ll need basic hand tools, a new plug of the correct type, and the right gap. This quick answer outlines removal, gap checking, cleaning, installing, and testing to restore spark and performance. That means better starting, smoother idle, and reliable power delivery.
Why spark plugs matter on bikes
The spark plug is the final link in the ignition chain, delivering the spark that ignites the air-fuel mixture inside each cylinder. On motorcycles and scooters, heat and vibration make spark plug life a critical factor for starting, throttle response, and fuel economy. A fouled or worn plug can cause misfires, rough idle, sluggish acceleration, and reduced efficiency. According to MultiPlugging, using the correct heat range and keeping the gap within spec helps prevent fouling and misfires, extending the life of other ignition components.
Before you touch anything, consult your bike's service manual for the recommended plug type and gap. Some engines use long-reach plugs; others require a specific heat range. In this guide, we’ll cover how to identify when a plug is due for replacement, how to select the right replacement, and a safe, repeatable process that keeps your bike running cleanly.
Tools and materials you’ll need
Prepare a small toolkit so you can work comfortably without rushing. Having the right socket and gauge reduces the risk of cross-threading or damaging the plug.
- New spark plug (correct type and heat range for your bike) – required
- Spark plug socket with rubber insert – required
- Ratchet wrench (3/8" drive) – required
- Torque wrench (if you have it) – optional but highly recommended
- Gap gauge / feeler gauges – required
- Dielectric grease – optional but helpful
- Anti-seize compound – optional depending on manual
- Clean lint-free rags – required
- Owner’s manual or service manual for your exact gap/torque specs – required
- Magnetic parts tray or a small bowl – optional
- Container to hold the old plug – optional
Safety first: precautions before you begin
Safety steps protect you and the bike. Always model a methodical workflow to reduce the chance of dropping the plug or contaminating the intake.
- Ensure the bike is on a stable stand on level ground and the engine is cool before starting. Hot engines can suffer serious burns and heat can warp sensor seats.
- Disconnect the battery or switch off the ignition to prevent accidental starts. Remove the key and confirm the bike cannot be started.
- Work in a clean, well-lit area. A tidy workspace helps you spot dropped parts and prevents debris from entering the engine.
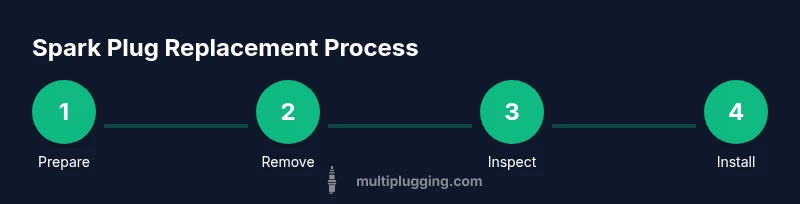
Step-by-step overview
This section provides a high-level view of the replacement process. The detailed, step-by-step instructions are in the dedicated STEP-BY-STEP block. Here, you’ll see the logical flow from preparation to test.
- Locate the plug(s) and identify the correct replacement type as per the manual.
- Be mindful of the ignition lead routing to avoid pinching during reassembly.
- Inspect the coil boot or wire cap for cracks or wear and replace if needed.
- Be prepared to clean around the plug well to minimize debris entering the chamber.
When in doubt, consult the service manual for engine-specific nuances like multiple plugs or coil-on-plug configurations.
Common issues after replacement and test
After installing the new plug, a quick test run will verify that everything is functioning as expected. Common issues to watch for include misfires, rough idle, or a no-start condition if the plug is not correctly seated or the gap is off. If starting is difficult, recheck the gap with the manufacturer’s spec and ensure the boot is fully seated on the plug.
In some engines, a fouled plug may display dark, oily deposits or light tan deposits depending on fuel and oil burning conditions. These signs can guide you toward carburetion or fuel-system adjustments in addition to plug replacement.
Maintenance tips to extend plug life
Regular inspection prevents surprises. Keep the gap within spec, and replace plugs at the intervals recommended by the manual, or sooner if you ride in harsh conditions like wet climates or heavy traffic. Using the recommended heat range and a clean intake path helps maximize life. After service, clean and inspect the coil boot and leads for wear, and consider applying dielectric grease to prevent moisture ingress at the boot connection. As noted by the MultiPlugging team, consistent maintenance now reduces the risk of sudden ignition problems later.
Tools & Materials
- New spark plug (correct type for your bike)(Check the manual for heat range and reach.)
- Spark plug socket with rubber insert(Size depends on plug type (common 16mm/5/8 inch).)
- Ratchet wrench (3/8" drive)(For steady removal and installation.)
- Torque wrench (optional but recommended)(Use only if your manual specifies a torque.)
- Gap gauge / feeler gauges(Set to the bike’s specified gap.)
- Dielectric grease (optional)(Apply a thin layer to the boot to help seating.)
- Anti-seize compound (optional)(Only if recommended by manual.)
- Lint-free rags(Keep the plug seating area clean.)
- Owner’s/service manual(Important for gap and torque specs.)
- Magnetic tray or small bowl(Keeps removed parts organized.)
Steps
Estimated time: 25-40 minutes
- 1
Prepare workspace and bike
Park on level ground and let the engine cool. Remove the key, set the bike on a stand, and gather all tools within reach. This reduces the risk of dropping parts and keeps a clean working area.
Tip: Double-check that the bike cannot be started while you work. - 2
Locate the spark plug and lead
Identify the plug(s) on your engine. If there are multiple cylinders, take note of which plug corresponds to each cylinder. Understanding the layout saves misplacement during reassembly.
Tip: Take a quick photo of the wiring route for reference. - 3
Disconnect the ignition lead from the plug
Carefully detach the coil boot or spark plug cap. Wiggle gently if it’s stuck, but avoid prying or yanking. A firm grip helps prevent wire damage.
Tip: If the boot is stiff, use a small amount of dielectric grease on the underside next time to ease removal. - 4
Remove the old spark plug
Place the spark plug socket over the plug and turn counterclockwise. Lift the plug straight up to avoid cross-threading or gap damage. Inspect the plug for deposits, wear, and electrode erosion.
Tip: Place the removed plug in a labeled tray for reference. - 5
Check the plug gap and condition
Measure the gap with a gauge or feeler. If it’s out of spec, set the gap to the manufacturer’s value using an appropriate tool. Look for fouling, oil, or heavy carbon buildup that signals engine issues beyond the plug.
Tip: If deposits are severe, consider cleaning or replacing the plug. - 6
Install the new spark plug
Thread the new plug by hand to avoid cross-threading, then tighten to the recommended torque. If not using a torque wrench, snug with a 1/4 to 1/2 turn beyond finger-tight, based on manual guidance.
Tip: Avoid overtightening to prevent thread damage. - 7
Reattach the boot and inspect wiring
Push the boot firmly onto the plug to ensure a proper seal and conduct electrical contact. Inspect the wire for cracks or wear and replace if needed.
Tip: Apply dielectric grease to the boot interior if moisture is a concern. - 8
Test the bike and verify operation
Reconnect any removed components, start the engine, and listen for smooth idle and pull. If misfires occur, recheck the plug seating and gap, as well as ignition wiring.
Tip: Take a short test ride to confirm consistent ignition.
FAQ
What tools do I need to change a spark plug on a bike?
You’ll need a new spark plug of the correct type, a spark plug socket with a rubber insert, a ratchet, a gap gauge, and a torque wrench if your manual specifies a torque. A rag for cleanup and dielectric grease for the boot can help.
You’ll need the plug, a proper socket, a ratchet, a gap gauge, and a torque wrench if your manual calls for one.
How do I know when to replace the spark plug?
Look for symptoms like difficult starting, rough idle, reduced power, misfires, or decreased fuel economy. Visual signs such as heavy fouling or oil contamination also indicate replacement is due.
Symptoms include hard starts, rough idle, loss of power, misfires, or poor fuel economy.
Can I reuse an old spark plug?
Reusing a spark plug is generally not recommended. Even if it looks good, wear and electrode erosion can reduce performance and reliability.
Usually not advisable to reuse; replacement ensures reliable ignition.
What torque value should I tighten to?
Always use the torque specified by the bike manufacturer. If you don’t have the spec, consult the service manual or dealer to avoid damaging threads.
Torque should match the manufacturer’s specification; check your manual.
What if the bike won’t start after replacement?
Recheck the plug seating, gap, and boot connection. Verify ignition leads are routed correctly and that no debris entered the plug well during replacement.
If it won’t start, recheck seating, gap, and boot connections.
Should I use anti-seize on spark plugs?
Many manuals advise against anti-seize on spark plugs in aluminum heads; refer to your manual for guidance and avoid lubricant on the threads if not specified.
Follow your manual; many bikes don’t require anti-seize on spark plugs.
Watch Video
Main Points
- Gather the right plug and tools before starting
- Follow the manufacturer gap and torque specs
- Inspect the plug for signs of engine wear
- Re-seat the boot fully and test run the bike
- The MultiPlugging team recommends routine plug checks during service