Motor Bike Spark Plug: Diagnosis, Replacement & Maintenance
Learn how to inspect, test, and replace a motor bike spark plug with step-by-step instructions, safe practices, and maintenance tips from MultiPlugging.

You will learn how to inspect, test, and replace a motor bike spark plug safely, and how to select the right heat range and type for your bike. This quick guide outlines needed tools, step-by-step actions, and maintenance tips to keep ignition efficient. Whether you are a beginner or seasoned DIYer, you will gain confidence. Follow along for practical checks, safety reminders, and cost-saving replacement strategies.
Understanding spark plugs for motor bikes
Spark plugs are small but mighty components that ignite the air-fuel mixture inside your engine. For a motor bike, the plug's condition directly influences starting reliability, idle smoothness, and fuel efficiency. A typical plug consists of a metal shell, ceramic insulator, and a center electrode that creates the spark when high voltage travels from the ignition coil. The spark jet must reach the fuel-air mixture reliably and consistently across compression strokes. According to MultiPlugging, spark plug upkeep is a cornerstone of reliable motorcycle performance, especially in varied riding conditions. Different engines and climates require different heat ranges and plug types, so understanding your bike’s requirements matters. Common failure modes include fouling from oil or fuel-rich mixtures, carbon buildup on the insulator, and electrode wear that enlarges the gap and weakens ignition. Recognizing these signs early helps you avoid misfires, rough starts, and reduced performance. This section lays out the basics, from how plugs work to the choices you’ll face when replacing them. By knowing the roles, you can diagnose issues quickly and plan preventive maintenance that keeps your motor bike running strong mile after mile.
How to choose the right spark plug for your motor bike
Selecting the right spark plug starts with your bike’s service manual, which lists the recommended heat range, thread size, and reach for your engine. Spark plug materials differ in performance and longevity: copper core plugs heat up and dissipate faster, while platinum and iridium gadgets last longer and resist wear, though they can be pricier. For many street motorcycles, a middle-ground heat range balances cold starts with hot running performance. Electrode design also matters: a fine-wire or iridium electrode can reduce tip wear and maintain a consistent gap longer between replacements. Pay attention to the thread reach and conical seat type, because installing a plug with the wrong reach can cause poor sealing or misfiring. If your rider manual specifies a gap, use a gap gauge to confirm it before installation. If you ride in cold climates or aggressive throttle, you may benefit from a plug with a slightly different heat range. The goal is a clean, fast combustion with a stable arc and minimal fouling across your typical riding conditions.
Symptoms that signal replacement or cleaning is needed
A plug may need replacement if your engine starts hard, runs roughly at idle, or stalls during acceleration. Misfires often produce a rough sensation through the throttle and a drop in smoothness. Fouling colors provide clues: light tan or gray insulators indicate normal wear, while black, sooty deposits suggest rich fuel mixture or oil leakage. Worn electrodes appear rounded or eroded after many miles, increasing the gap and weakening the spark. Oil fouling can stem from worn piston rings or valve guides, while carbon buildup points to incomplete combustion or prolonged short trips. If you notice reduced fuel efficiency without other obvious causes, inspect the spark plug as part of a quick diagnostic. Visual checks are not a substitute for measurement; use a feeler gauge or a plug tester if available. In many cases, plugging a faulty plug immediately restores idle stability and power delivery. This section helps you identify common symptoms and decide whether a service interval is due.
Tools, safety, and planning for a spark plug change
Before you begin, assemble the tools and gear you will need and set aside a clean workspace. Essential items include a spark plug socket with a rubber insert, a ratchet wrench, a torque- or torque-lite wrench for proper tightening, a gap gauge, a clean rag, and spare plugs of the correct heat range. Have dielectric grease on hand to seal the boot and protect the threads, plus a small brush to clean the plug area. Safety basics: ensure the bike is on level ground, the engine is cool, and disconnecting the battery negative terminal is optional but prudent to prevent shorts while you work. Wear eye protection and gloves to guard against sharp edges and hot components. Checking fuel and oil levels, removing any heat shields or panels that obstruct access, and planning your route of movement will save time and frustration. Reading the service manual for your exact model can prevent missteps, especially for bikes with recessed plugs or tight spaces.
Quick-checks before you remove the old plug
Start with a visual scan of the area around the spark plug to reduce the risk of dropping debris into the combustion chamber. Confirm you have the correct replacement plug and that the air filter is clean so no debris can contaminate the new plug. Loosen the cap or boot slowly to avoid damaging the coil, then twist the boot off by pulling at the boot—not the wire. If the boot is stiff, warm the area slightly to ease removal but do not force it. Wipe the surrounding area with a clean rag to minimize dirt entry. Ground yourself to avoid static when working near sensitive ignition electronics. Turn the bike off and wait for any stored pressure to dissipate if you opened the fuel system in the process of access. This pre-removal stage minimizes contamination and ensures a safer, smoother plug change.
How to perform a safe spark plug replacement (overview)
This overview maps to the step-by-step instructions that follow. You will remove the old plug with a spark plug socket, inspect the threads, check the gap on the new plug, and install it to the recommended torque. After installation, reattach the cap, reconnect the battery if you removed it, and test the engine to confirm normal firing. Keep the plug you removed as a reference for wear and use; noting its color and deposits helps you gauge engine health. Following the steps carefully reduces the risk of cross-threading, damaging the sealing surface, or leaving debris in the combustion chamber. Use a torque wrench where possible and avoid over-tightening, which can strip the threads.
Maintenance and long-term care for motor bike spark plugs
Spark plugs benefit from routine inspection as part of a broader motorcycle maintenance routine. Check gap and condition every few thousand miles or during big temperature changes, or after riding in dusty or wet conditions. Replace plugs when gaps grow noticeably or deposits accumulate beyond cleaning capability. Store spare plugs in a clean, dry container and label them for your bike model. Consider keeping a spare set in your toolkit for quick changes on the road. Regular air and fuel system checks complement spark plug maintenance and can improve overall performance, fuel economy, and starting reliability. Adopting a proactive maintenance cadence with a focus on ignition components pays off in fewer roadside surprises.
Environmental and safety considerations during plug service
Handling used plugs responsibly protects the environment. Place spent plugs in a sturdy container and recycle through local automotive waste programs. Avoid mixing used plugs with other waste; seal them to prevent leakage during transport. Dispose of gloves, wipes, and cleaning rags as appropriate. Safety matters: always work in a well-ventilated area, keep flammable liquids away from ignition sources, and maintain a dry workspace to prevent slips. If you are replacing plugs on a bike in a crowded garage, keep bystanders clear and use proper lighting so you can see the boot seats and plug threads clearly. This section helps you maintain a safe, eco-friendly approach to motor bike spark plug service.
Tools & Materials
- Spark plug socket with rubber insert(Typically 12-16mm; ensures a secure grip without dropping the plug.)
- Ratchet wrench (3/8" drive preferred)(For maneuverability in tight bike spaces.)
- Torque wrench(Used to apply manufacturer specified torque.)
- Spark plug gap gauge or feeler gauge(Use to verify correct electrode gap on new plugs.)
- Replacement spark plugs (correct heat range)(Select according to manual; has to match your engine.)
- Dielectric grease(Helps seal the boot and prevent corrosion.)
- Small brush or compressed air(Cleans around the plug area before removal.)
- Anti-seize compound (optional)(Only apply if recommended by the manufacturer.)
- Owner manual or service manual(Consult model-specific torque and gap specs.)
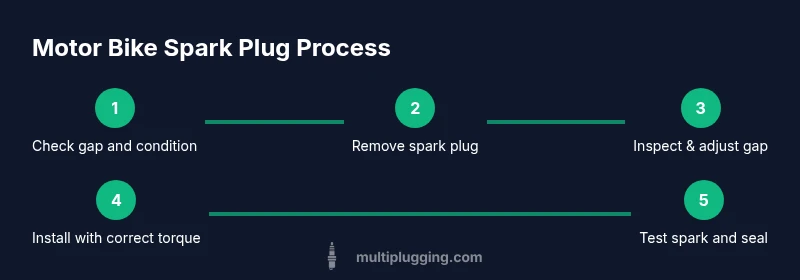
Steps
Estimated time: 30-60 minutes
- 1
Prepare workspace and safety
Park the bike on level ground and allow the engine to cool. If you choose, disconnect the battery negative terminal to prevent shorts. Gather all tools and a clean work area to keep parts free of dirt.
Tip: Keep a magnet tray handy to catch small screws or caps. - 2
Locate plug and remove trims
Open the side panels or seat area to access the plug region. Identify the spark plug boot and all nearby wiring, then carefully loosen anything that blocks access.
Tip: Take a quick photo of the wiring path to aid reassembly. - 3
Disconnect spark plug boot
Gently twist and pull the boot from the plug, avoiding yanking on the wire. If resistance occurs, use a small amount of penetrating spray and let it sit for a minute.
Tip: Do not pull on the wire; the boot is designed to detach at the base. - 4
Remove the old plug
Fit the spark plug socket over the plug, hold the base, and turn counterclockwise to loosen. Lift the plug straight out without twisting the ceramic.
Tip: Keep the socket perpendicular to the plug to avoid cross-threading. - 5
Inspect the old plug
Check electrode wear, deposits, and insulator color. Compare with a new plug to gauge engine health and decide if replacement is necessary.
Tip: Use this as a reference for diagnosing engine condition. - 6
Check new plug gap
Measure the new plug gap with a gauge and adjust to the manual specification if required. Do not rely on the old gap for a new plug.
Tip: An incorrect gap can cause misfires or poor combustion. - 7
Install the new plug
Thread by hand to avoid cross-threading, then snug with a torque wrench to the manufacturer spec. Do not over-tighten, as this can damage threads.
Tip: If a torque spec is not available, tighten until seating is firm but not forced. - 8
Reconnect boot and test
Reattach the spark plug boot, reassemble any panels, reconnect the battery if removed, and start the engine to verify smooth operation.
Tip: Listen for a clean idle and even power delivery.
FAQ
How do I know if my motor bike spark plug needs replacement?
If the engine starts hard, runs rough, or experiences misfires, the plug may need replacement. Also check for wear on the electrode and abnormal deposits that cleaning cannot fix.
If your bike is hard to start or misfiring, you likely need a spark plug replacement.
What is the correct gap for most motorbike plugs?
Gap requirements vary by engine. Always check the service manual and measure the gap with a gauge before installing a new plug.
Always verify the exact gap in your manual and measure before installing the plug.
Can I reuse a spark plug after cleaning it?
Cleaning a fouled plug is not reliable. Replacement is typically recommended for dependable starting and performance.
Cleaning is not a reliable fix; replace the plug for best results.
Do I need a torque wrench for installation?
A torque wrench helps achieve correct tightness and seal. If you lack one, tighten to the manufacturer specification with caution.
Yes, use a torque wrench when possible to avoid under- or over-tightening.
How often should spark plugs be replaced on a motorcycle?
Intervals vary by model and riding conditions. Follow the official service schedule and monitor performance signs.
Follow the service schedule and watch for symptoms indicating wear.
What safety steps reduce risk during replacement?
Cool engine, disconnect battery if needed, avoid dropping debris, and work in a well ventilated, dry area.
Cool the engine and wear gloves; keep the work area clean and well lit.
Watch Video
Main Points
- Inspect plug gap and condition at every service
- Choose the correct heat range and plug type for your bike
- Torque to spec to prevent thread damage
- Test ignition after replacement for reliable starts
- Regular ignition maintenance boosts fuel economy and reliability