Spark Plug in Bike: DIY Diagnosis, Replacement & Maintenance
Learn to diagnose, replace, and maintain spark plugs on motorcycles with clear, step-by-step guidance from MultiPlugging. Safety first, the right tools, and practical tips for reliable starts and smooth riding.

You will learn how to diagnose, inspect, and replace a spark plug in bike to restore reliable starting and smooth running. With the right tools, safety gear, and the correct plug type for your motorcycle, you can complete the job with confidence. This quick answer previews the core steps and safety notes; continue to the body content for the full, bike-specific guide.
Understanding spark plugs in bikes
A spark plug is a small but essential part of your bike's ignition system. In motorcycles, the spark plug has to ignite the air–fuel mixture in a compact, hot environment. The right spark plug for a bike depends on engine design, compression, and riding conditions. According to MultiPlugging, the basic role of a spark plug is to provide a consistent electric spark at the correct timing to ignite the air–fuel mixture. This simple device sits at the end of a platinum or copper core electrode, and its condition directly affects starting reliability, idle quality, and overall engine performance. When a spark plug in bike stays clean and properly gapped, it helps maintain efficient combustion and reduces fouling caused by oil or fuel additives. Understanding what your plug does lays the groundwork for smarter maintenance rather than blind replacements.
- Spark plug type matters: Iridium and platinum plugs offer longer life but may require different torque and heat-range considerations.
- Heat range is critical: A plug that is too hot or too cold can cause misfiring or fouling.
- Access and maintenance vary by bike: Some models place the plug deep in the head or behind components, requiring careful disassembly.
Symptoms that indicate a spark plug needs service in a motorcycle
A worn or fouled spark plug can degrade combustion, causing rough idle, misfires, hard starting, or reduced power, especially under load or at higher RPM. In a spark plug in bike, these symptoms often show up as a stumble or hesitation when cracking the throttle, and a noticeable drop in fuel efficiency. You may also notice a sooty, oily, or oily-black deposit on the electrode, which points to fouling or misfueling. If ignition timing is off or you hear popping from the exhaust, that can also signal a plug issue. Regular inspection helps you differentiate between a plug problem and other ignition or fueling faults. As a rule, if the plug appears damaged, heavily worn, or fouled after a short interval, replacement is usually the best path. In some cases, adjusting the gap or switch to a plug with a different heat range can resolve intermittent misfires. Based on MultiPlugging research, consistent plug performance is a reliable indicator of engine health and maintenance rigor over time.
Choosing the right spark plug for your bike
Choosing the right spark plug for a motorcycle means matching electrode design, heat range, and thread size to the engine's requirements. Copper-core plugs typically offer good conductivity and lower cost, while platinum and iridium variants provide longer life and resilience in high-rev or hot-running conditions. For most modern bikes, manufacturers specify a preferred plug type and gap; deviating from this recommendation can affect combustion efficiency and emissions. Always consult the owner's manual or a trusted service resource to confirm the correct heat range and connector type. When possible, select a plug with a corrosion-resistant coating and a geometry that suits your engine’s compression and firing order. Remember that the gap should be set to the manufacturer’s specification, and if a pre-gapped plug is used, you should re-check before install.
How to inspect a spark plug for bike maintenance
Inspecting a spark plug before replacement or re-use is a quick, visual check that saves time and trouble. Remove the plug boot, clean the area around the spark plug to prevent debris from entering the cylinder, and then thread the plug out with a proper socket. Look at electrode wear, insulator cracking, and any deposits. A healthy plug should have a light tan or grayish electrode color; heavy black carbon deposits indicate rich fuel or oil contamination, while shiny metallic wear may reflect normal aging. Fouling can point to oil leakage, poor sealing, or misfiring from ignition components. If the insulator tip is cracked or the gap looks visibly widened, replace the plug rather than reusing it. Keep in mind that some bikes require a specific torque and may not respond well to improvised torqueing methods, so always verify torque specs from the manual before reinstall.
Replacing a spark plug in a bike: what to know before you start
Before you replace the spark plug in bike, review the service manual for the exact plug type, gap, and torque specification. Use a clean workspace and a dedicated spark plug socket with a rubber insert to prevent dropping the plug. If your bike sits under a fairing or requires panel removal, plan the necessary disassembly so you’re not scrambling mid-process. Apply a light coat of anti-seize on the threads only if your manual recommends it; some modern plugs already include coatings that reduce thread galling, and anti-seize can skew torque readings. Prepare a torque wrench and a gap gauge, and confirm you’re using the correct plug depth for the cylinder head. Finally, take a moment to inspect the boot and ignition coil seat for wear or cracking, as a bad boot can mimic a plug problem.
Maintenance practices to extend spark plug life
Longer plug life comes from good overall engine health and clean fuel. Regular air filter maintenance, clean fuel, and using quality oil can reduce combustion deposits and prolong plug life. Schedule periodic checks to ensure the ignition system remains in good condition and that heat range and gap stay aligned with the engine’s needs as riding conditions change. When you ride aggressively or in hot, dusty conditions, you may see different wear patterns; adjust your plug selection accordingly. Keeping a maintenance log helps you spot trends and anticipate when a plug will likely need replacement, rather than reacting to performance issues alone. By following best practices and using the right plug for your bike, you can maximize reliability and minimize mid-ride failures.
Tools & Materials
- Spark plug socket with rubber insert(Essential for removing/installing plugs without dropping them)
- Torque wrench(Use to torque to manufacturer specs; check manual)
- Gap tool or feeler gauge(Needed to confirm correct electrode gap on the new plug)
- Anti-seize compound (optional)(Only use if recommended by the bike manufacturer)
- Clean rag or shop towels(For cleaning around the plug area and wiping excess)
- Small brush or compressed air(To clear debris from the plug well before removal)
- Replacement spark plug (correct type for bike)(Ensure it matches heat range, thread size, and gap)
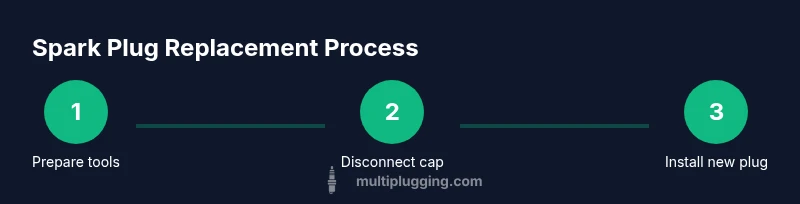
Steps
Estimated time: 45-60 minutes
- 1
Prepare workspace and tools
Set your bike on a stable stand on level ground. Gather the spark plug socket, gap tool, torque wrench, and a replacement plug. Have a rag handy to clean the area and a safe place to set used parts. This preparation reduces the risk of dropping parts and makes the process smoother.
Tip: Pro-tip: Work in a well-lit area and keep a spill tray ready for any fuel drips. - 2
Power down and access the plug
Turn off the engine and remove the key. If your bike’s plug is behind panels or under the fuel tank, carefully remove the necessary fairings following the manual. Allow the engine to cool fully before handling the plug to avoid burns.
Tip: Warning: Hot engine components can cause burns; wait to cool if recently run. - 3
Disconnect the spark plug cap
Grip the spark plug boot and gently pull it away from the plug. If the boot is stubborn, twist slightly while pulling to avoid damaging the wire. Do not yank, which can damage the coil wire or cap.
Tip: Pro-tip: If the boot sticks, use a small amount of battery-grade silicone spray on the boot tip to ease removal next time. - 4
Inspect the old plug and decide on replacement
Take out the old plug with the socket. Visually inspect the electrode and insulator for wear, deposits, or cracks. If there are heavy signs of fouling or wear, replace with a new plug; otherwise, you may re-gap and reuse if the plug is in good condition and matches the manual.
Tip: Pro-tip: Compare the old plug to the new one for thread length and reach to ensure correct seating. - 5
Gap the new plug (if required)
If the new plug is not pre-gapped, use the gauge to set the correct electrode gap to the manufacturer’s specification. Do not force a gap beyond its recommended range; improper gap can cause misfires.
Tip: Pro-tip: Double-check the gap after setting and before installation; small changes matter for ignition timing. - 6
Install the new plug and torque to spec
Thread the new plug in by hand to avoid cross-threading, then snug with a wrench and finish with a torque wrench to the specified value; avoid over-tightening. Reconnect the spark plug cap firmly and align it so it sits seated without stress on the connection.
Tip: Warning: Using anti-seize can affect torque readings on some plugs—follow the manual. - 7
Test the bike and inspect for leaks
Reassemble any panels you removed, reconnect the battery if needed, and start the bike to ensure it fires cleanly. Listen for any misfires, rough idle, or backfires. Check around the plug area for fuel leaks or loose wiring.
Tip: Pro-tip: A short test ride under light throttle can help confirm normal operation before concluding the job. - 8
Dispose of old plug and clean up
Allow cool-down, then dispose of the used plug in accordance with local regulations. Wipe down tools and store them in a dry place to prevent corrosion. Keep a log of the service date and plug type for future maintenance planning.
Tip: Note: Recording the plug type and date helps predict when you’ll need another replacement.
FAQ
Why does my bike misfire at idle?
A misfire at idle can be caused by a worn or fouled spark plug, improper gap, ignition coil issues, or fuel delivery problems. Start by inspecting the plug, then check the gap and timing. If the problem persists, test other ignition components.
An idle misfire can come from a worn spark plug, the gap being off, or ignition and fuel delivery issues. Check the plug first, then the gap and timing, and if it continues, inspect the ignition system.
Can I reuse an old spark plug?
Reuse is generally not recommended if the plug shows wear, fouling, or insulator damage. If the old plug is clean, properly gapped, and within the service limits, it may be reused on some bikes. Always verify against the manufacturer’s guidance.
Usually better to replace worn or fouled plugs. If it's clean and within spec, some bikes allow reuse; verify with your manual.
How often should I replace spark plugs on a bike?
Replacement intervals depend on plug type, riding conditions, and engine design. Use the bike’s manual as the primary guide, and perform a visual check during routine maintenance to catch fouling early.
Follow the manual for interval guidance, and visually inspect the plug during service to catch fouling early.
What is the correct torque for motorcycle spark plugs?
Torque should be set to the manufacturer’s specification for your model. Use a calibrated torque wrench and avoid guessing. Over-tightening can strip threads; under-tightening can cause poor sealing.
Always torque to the manual’s spec using a torque wrench; don’t guess or skip.
Is anti-seize recommended on motorcycle spark plugs?
Anti-seize is not always recommended; many modern plugs include coatings that reduce seizing. Follow the manual; using anti-seize can alter torque readings and cause damage if not advised.
Check if your bike requires anti-seize; many plugs don’t need it and it can affect torque readings.
Watch Video
Main Points
- Identify the correct plug type for your bike and follow the manual.
- Inspect, gap, and replace with proper torque—never guess.
- Test run to confirm smooth operation after replacement.
- Maintain a log of plug changes for proactive maintenance.