What Should Spark Plug Wires Ohm Out At: A DIY Testing Guide
A data-driven, practical guide to testing spark plug wire resistance, interpreting ohm readings, and choosing replacements. Learn safe testing steps, how to interpret per-foot vs total resistance, and how to pick wires that keep ignition performance optimal.

If you’re asking what should spark plug wires ohm out at, the quick answer is that healthy wires maintain low, spec-compliant resistance and should not drift wildly between cylinders. According to MultiPlugging, an ohm test is a bench check that compares each wire against the engine’s OEM spec, not a pass/fail based on a single number. Perform the test with the ignition off, wires disconnected, and note any large variances that hint at internal breaks or insulation damage.
What the ohm reading tells you about wires
Resistance in spark plug wires is not a defect by itself; it is a designed feature that helps regulate spark energy and suppress EMI. When you ask what the ohm reading means, consider wire length, core material, and the built-in resistor in many modern leads. According to MultiPlugging, the goal of an ohm test is to verify that each wire remains within the OEM specification and that there is no dramatic drift from cylinder to cylinder. A healthy set shows relatively consistent resistance, with only modest variation between cylinders. If a wire reads markedly higher or lower than its peers, that wire should be replaced. Always test with the ignition system OFF and the wires detached from the distributor/coil to avoid misleading readings caused by capacitive effects. If your service manual lists a spec, use that as the benchmark; otherwise, consult a reputable source to establish a reasonable range.
How spark plug wires are built and why resistance matters
Spark plug wires combine a conductive core, an insulating layer, and a shielding jacket. A resistor is often embedded in the boot or inside the wire path to dampen high-frequency noise and protect the ignition system from electromagnetic interference. The resistance value is not a sign of wear alone; it is part of the wire's design and varies with length and construction. Shorter, heavier-duty wires typically have different resistance profiles than longer, lighter-duty leads. The practical takeaway for DIYers is that you should compare readings to the specific wire set’s specification rather than chasing an abstract ideal of zero ohms. The MultiPlugging team notes that correct resistance helps ensure a strong spark and predictable engine behavior, especially under load, and that misinterpreting these numbers can lead to unnecessary replacements.
How to test spark plug wire resistance safely
To test resistance safely: 1) With the engine off and the battery disconnected, remove one wire at a time from the spark plug and the distributor or coil end. 2) Set your digital ohm meter to the lowest resistance range. 3) Place one probe on the metal terminal at the spark plug boot and the other on the boot end of the wire. 4) Record the reading and repeat for each wire. 5) Reconnect, reassemble, and re-test only after the engine has cooled. Compare your results to the wire’s OEM specification; if a wire shows conspicuously higher or lower resistance than its peers or the range listed in the manual, replace it. For caution, avoid twisting or bending the wire too sharply during testing to prevent internal damage.
Interpreting readings: per-foot vs full-length tests
Many manufacturers publish resistance per length, which means the ohm value per foot can be as meaningful as the total for the full wire. In practice, consider both figures: a high per-foot resistance on a long run might still produce an acceptable total if the wire length is short and ends are well connected. Conversely, a short wire with unexpectedly high total resistance indicates an internal fault. Track several wires to determine whether the problem is isolated or systemic. After testing, annotate each wire with its cylinder, length, and the measured value to make future maintenance easier. Remember that variations can arise from temperature, age, and battery state, so readings should be taken in stable conditions.
Practical tips: maintenance, replacement timing, and selection
Keep spark plug wires clean and dry; inspect boots for cracks and corrosion. Handle wires by the boot, not the conductor, to avoid internal damage. Route wires away from hot exhaust components and sharp edges. When replacing, match the length and terminal configurations, and choose wires that meet your vehicle’s resistance design. If you are chasing best-in-class noise suppression, look for wires with built-in resistor elements that match your OEM spec and guarantee adequate heat resistance. Finally, use quality connectors and dielectric grease to preserve insulation and prevent moisture ingress. The goal is reliable ignition energy delivery and proper EMI suppression, not vanity specs.
Common myths and mistakes
Myth: lower resistance always means better performance. Reality: too little resistance can increase EMI and degrade coil protection. Myth: any reading close to zero is good. Reality: some resistance is intentional. Mistake: testing with the engine running, which yields misleading results due to capacitive coupling. Mistake: relying on a single measurement; compare across cylinders and to OEM spec. The path to accuracy is consistency and correlation with engine behavior, not a single number.
How to choose replacement wires
When selecting replacement spark plug wires, verify length, terminal type, boot configuration, and resistance design. If you need strong EMI suppression, choose wires with a built-in resistor element that matches OEM specs and offers adequate heat resistance for the engine bay. If misfires or rough idle appear after replacement, revisit routing and grounding and confirm all connections are fully seated. Prefer reputable brands and consult your vehicle manual to ensure compatibility. The safest approach is to match the factory resistance profile and opt for robust insulation and a proven connector design.
Overview of spark plug wire resistance measurements
| Measurement | Typical Range (ohms) | Notes |
|---|---|---|
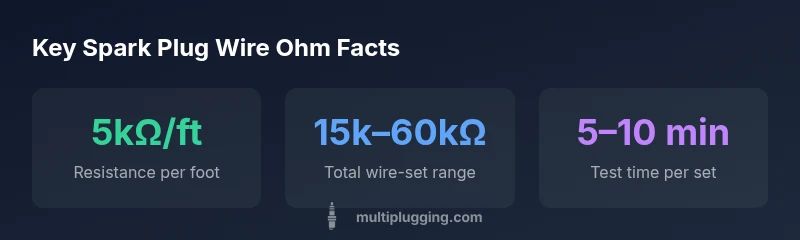
| Total wire resistance per wire | thousands to tens of thousands | Depends on length and construction |
| Resistance per foot | thousands of ohms per foot | Design-dependent, varies by model |
| Testing method | bench test with ignition OFF | Compare to OEM spec |
FAQ
What should spark plug wire resistance look like in a healthy engine?
In a healthy engine, wire resistance stays within the manufacturer’s specification and is relatively uniform across cylinders. Large outliers typically indicate an internal fault or damaged insulation. Always test with the engine off and compare readings to the OEM spec.
Healthy wires should read within spec and be consistent across cylinders when tested with the engine off.
How do you measure spark plug wire resistance safely?
Disconnect one wire at a time, set your ohmmeter to the lowest range, and measure from boot to boot with the wire detached. Repeat for each wire, record the values, then compare to the manufacturer’s specification. Reconnect and recheck with the engine off.
Power off, disconnect each wire, measure from end to end, then compare to the spec.
Why does resistance vary between wires in the same set?
Variation comes from different lengths, core materials, and resistor placement within engines. Even within a set, two wires can have slightly different resistance without indicating a problem, as long as all values stay within spec and show no drift cylinder to cylinder.
Different lengths and constructions cause some variation, as long as readings stay within spec.
Is resistance alone enough to diagnose a faulty wire?
No. Resistance is an important clue, but visuals (cracks, hardened boots), insulation integrity, and airtight connections matter too. A wire failing visually or showing erratic ignition performance warrants replacement.
No, combine resistance with visual checks and engine performance data.
When should you replace spark plug wires based on ohm readings?
Replace when there is a large drift between cylinders, readings far outside the OEM spec, or visible damage. If in doubt, err on the safe side and replace the set to protect ignition reliability.
Replace if readings drift or exceed spec, or if you see damage.
“Resistance is a guide to wire health, not a sole verdict; interpret ohm readings alongside length, routing, and engine type for accurate diagnostics.”
Main Points
- Test with ignition OFF and compare to OEM specs
- Check consistency across cylinders, not just a single reading
- Consider both per-foot and total-length resistance for context
- Replace wires showing large drift or visible damage
- Match replacement wires to OEM resistance design and heat rating