Ford F-150 Spark Plug Coil: Diagnose, Replace & Maintain
A practical guide to diagnosing and replacing the spark plug coil on Ford F-150 trucks, with tools, safety tips, and step-by-step instructions to restore ignition performance.

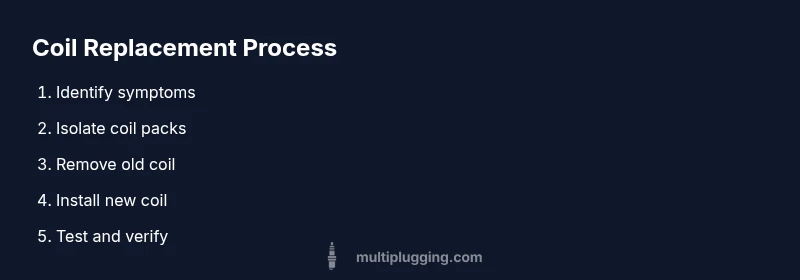
In this guide, you'll inspect and test the spark plug coil system for a Ford F-150, diagnose coil faults, and perform a safe replacement if needed. You'll learn signs of coil failure, required tools, torque specs, and step-by-step procedures to avoid misfires. By the end, you'll have a reliable ignition setup and improved engine performance.
Understanding the spark plug coil on Ford F-150 engines
According to MultiPlugging, the ignition coil is a critical part of Ford F-150's ignition system. In most modern F-150s, coils are part of a coil-on-plug (COP) setup, packaging a high-voltage coil directly atop each spark plug. Heat, vibration, moisture, and worn spark plugs can degrade coil performance over time, leading to misfires, rough running, and reduced fuel efficiency. This section explains how coils work, the common types found on Ford F-150 models, and how to recognize symptoms that point to coil health issues. Coil packs consolidate ignition into one or more units depending on engine design, and understanding whether your truck uses a COP design or individual coils helps you diagnose failures more accurately.
Coils work by transforming low battery voltage into a high-voltage surge that jumps the spark gap. In a COP system, each coil is mounted directly on top of a spark plug, delivering a precise pulse when the ignition control module requests it. Ford designs vary by year and engine family, but the principles are similar: a failed coil reduces spark quality, adds misfire risk, and creates uneven combustion that can damage catalytic converters over time. When a coil begins to fail, you may notice symptoms in one or more cylinders rather than across the board, which is a strong hint to inspect the affected coil pack. Understanding coil layout for your engine helps you diagnose issues faster and with less guesswork.
For Ford F-150s, coil architecture ranges from individual coils to coil packs containing multiple cylinders. The insider tip from MultiPlugging is to verify the exact configuration for your VIN before buying replacements; using the wrong coil type can worsen performance and cost you time. A healthy coil keeps ignition timing precise, improves fuel economy, and reduces harsh engine operation. This context sets the stage for practical diagnosis and safe replacement in later sections.
note
Tools & Materials
- Ignition coil pack for Ford F-150 (COP style)(Match your engine family (e.g., 4.6/5.4/3.5 EcoBoost) and cylinder count)
- Spark plug socket with rubber insert(3/8 in drive recommended; magnetic or securely seated insert helps)
- 3/8 in drive ratchet and extensions(Provide reach to all coil locations)
- Torque wrench(Use manufacturer torque spec for coil mounting bolts)
- Dielectric grease(Optional for boot-to-plug interface)
- Anti-seize compound(Optional – apply sparingly to mounting threads if recommended)
- OBD-II scanner(Verify misfire codes and read live data after replacement)
- Safety gloves and eye protection(Protect against shocks and debris)
Steps
Estimated time: 30-60 minutes
- 1
Power down and disconnect the battery
Park on a level surface, engage the parking brake, and disconnect the negative battery cable to prevent shocks. Wait 60 seconds for residual voltage to dissipate before touching ignition components.
Tip: Always disconnect power before handling electrical connectors to avoid sparks and shorts. - 2
Locate coil pack(s) on the engine
Identify the coil pack layout for your F-150 engine (COP vs. individual coil per cylinder). Visually inspect for cracks or moisture. Use the factory manual as a map for your specific year.
Tip: Coil position varies by engine; consult the service manual or repair database for your exact VIN. - 3
Disconnect electrical connectors
Carefully unplug the wiring harness from the coil, noting orientation. A small reach tool or needle-nose pliers may help, but avoid wiggling the connector to prevent pin damage.
Tip: Label connectors if removing multiple coils to avoid mix-ups. - 4
Unfasten and remove the old coil pack
Remove the mounting bolts or screws securing the coil; lift the coil straight up to avoid bending the boot. Inspect the boot for cracks or heat damage as you remove.
Tip: Do not pull on the wire; coil should lift with its bolts. - 5
Prepare and install the new coil
Install dielectric grease as recommended, align the new coil, and hand-tighten bolts before torquing to spec. Ensure the boot fully seats on the spark plug to prevent leaks.
Tip: Boot seating is critical; misalignment can cause misfires. - 6
Torque bolts and reattach harnesses
Torque bolts to the Ford-recommended value with a torque wrench. Reconnect all electrical connectors firmly and confirm lock tabs engage.
Tip: Over-tightening can crack the plastic coil housing. - 7
Reinstall any removed components and reconnect battery
Replace any covers, intake components, or brackets removed during access. Reconnect the negative battery cable and snug with proper torque.
Tip: Ensure no tools are left in the engine bay before starting. - 8
Test the engine and scan for codes
Start the engine and listen for smooth idle. Use an OBD-II scanner to confirm no misfire codes and to monitor live data for ignition performance.
Tip: If codes persist, recheck coil boot seating and connectors. - 9
Perform a quick road test and verify
Take a short drive to verify acceleration and idle quality under load. If symptoms recur, recheck parts and consider replacing spark plugs if they are near end-of-life.
Tip: Document any fault codes for future service records.
FAQ
What are common signs of a bad ignition coil in a Ford F-150?
Common signs include engine misfires, rough idle, reduced power, and a check engine light. If you notice erratic acceleration or fuel economy drops, inspect the ignition coil and related components.
Look for misfires, rough idle, or a check engine light to suspect a faulty coil.
Can I drive with a faulty spark plug coil?
Drivability may be affected, and continued driving can damage catalytic converters or other ignition parts. It’s best to diagnose and replace the coil promptly.
If the car runs rough, avoid long trips and get the coil checked soon.
Do I need to replace spark plugs when replacing coils?
If the spark plugs are worn or near end-of-life, replace them along with the coil to ensure consistent ignition and prevent future misfires.
Replace worn plugs when you replace coils for best results.
How do I test a Ford F-150 ignition coil?
Use a multimeter to measure primary and secondary resistance values per the service manual spec for your year. Look for open circuits or values out of spec, and verify with a known-good coil.
Test resistance with a multimeter following the manual.
What torque spec should be used for coil bolts on Ford F-150?
Consult the Ford service manual for the exact torque. Use a torque wrench to reach that specification to avoid damage or leaks.
Follow the official torque value from the manual.
Watch Video
Main Points
- Identify coil health early to prevent misfires
- Use the correct coil type for your F-150 engine
- Follow torque specs and safety steps
- Test ignition performance after replacement