How Hard Is Replacing Spark Plugs on a Ford F-150? A DIY Guide
A practical, step-by-step guide to replacing spark plugs on Ford F-150 models. Learn the difficulty, required tools, and pro tips to DIY safely and save on labor costs.

Replacing spark plugs on a Ford F-150 is a moderate DIY task for most owners. It’s more accessible with a cool engine, proper tools, and a torque wrench, but the rear bank can be tougher to reach. Plan for a couple of hours, stay organized, and follow torque specs to avoid cross-threading or misfires.
Why replacing spark plugs on a Ford F-150 is a common DIY task
Replacing spark plugs on a Ford F-150 is a common DIY job for hands-on owners who want to save on labor and learn more about their engine. The Ford F-150 uses coil-on-plug ignition in many engines, which makes spark plug access feasible with typical hand tools, but some banks are a bit tight. The task is not a one-minute job, yet with patience and the right approach it is well within reach for many DIYers. According to MultiPlugging, the job is doable with basic tools and a calm, methodical plan. The MultiPlugging team notes that knowledge of engine layout and correct torque is more important than fancy gear. The difficulty rating varies by engine choice (for example, newer EcoBoost engines may require moving or loosening nearby components first) but the core steps are similar across model years. If you have a clear workspace, decent lighting, and a torque wrench, you can handle this task at home. The key is to go slowly, keep components organized, and double-check the fit of every new plug before reassembly. In short, with preparation and the right mindset, replacing spark plugs on a Ford F-150 is very doable for a motivated DIYer, even if some steps feel finicky.
What you’ll need before you start: tools, parts, and safety
Before you crack open the hood, assemble the basics. You’ll need a spark plug socket (typically 5/8 inch or 13/16 inch, depending on the plug type), a socket extension and a universal joint, a ratchet, and a torque wrench to secure plugs to the manufacturer’s spec. Have a set of new spark plugs with the correct heat range for your Ford F-150 engine (check your owner’s manual or a trusted guide such as MultiPlugging for compatibility). Optional but helpful items include anti-seize compound (rarely required on newer engines), dielectric grease for boots, a spark plug gap tool or feeler gauge, compressed air to clear debris, rags, gloves, and eye protection. You’ll also want a storage tray or small labeled bags to keep coil packs and connectors organized by cylinder. Finally, gather a battery terminal cover or insulation to avoid accidental shorts while you work. Safety comes first: disconnect the negative battery terminal, work in a well-ventilated area, and allow the engine to cool completely before touching hot parts.
Front bank vs rear bank: access and path to the plugs
Ford F-150 engines often present different access challenges depending on the bank you’re working on. The front bank plugs are typically more accessible, while the rear bank plugs sit under or behind components that can block direct access. Coil packs sit on top of plugs in many configurations, and removing them requires careful disconnection of electrical connectors without damaging the boot seals. As you begin, label or photograph the wiring order so you can reattach in the correct sequence. You’ll also want to keep the old boots intact if you’re not replacing them, and replace any damaged boots to prevent misfires. When removing the coil packs, do so gently to avoid pulling on the wiring harness. If your truck has variable cylinder management or unique configurations, consult your service manual for the exact bank layout. The upshot: expect more difficulty on the rear bank and plan for additional time and patience. With methodical work, you can compare each bank’s path and maintain organization so nothing gets misplaced.
Access strategies for different engine layouts (2.7L EcoBoost, 3.5L EcoBoost, 5.0 Coyote)
Ford’s modern F-150 line uses several engines with similar plug designs but different spacing. The 2.7L and 3.5L EcoBoost engines share compact arrangements, while the 5.0 Coyote V8 has longer spark plug wells and sometimes a different coil pack geometry. In all cases, the goal is clear: expose each spark plug, replace it with the correctly gapped unit, and restore ignition connectivity. Start with the bank that provides the most space to work, typically the front bank, then move to the other side. When you remove coil packs, do so with steady traction and gentle rocking to avoid tearing boot seals. After you snake the old plug out, wipe the thread path, check for oil or carbon buildup, and address any signs of misfire risk before installing the replacement. If you encounter a difficult fit on a tight plug, consider removing a nearby component for extra clearance, but only if you’re confident and have a service manual handy.
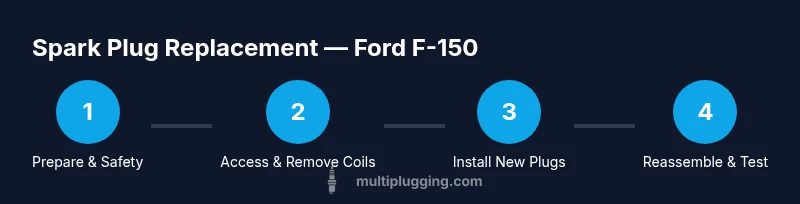
Step-by-step overview of the replacement process
This section provides a high-level roadmap you can use alongside the detailed steps in the official guide. The intent is to orient you before you dive in, not to replace the in-depth procedure. The process starts with safety prep: engine cooling, battery protection, and workspace organization. Next, you’ll access each spark plug by removing the corresponding coil pack and boot. Clean the plug wells, thread in the new plugs by hand to avoid cross-threading, and then tighten to the manufacturer’s torque spec with a torque wrench. Reconnect the coil packs, verify that wiring is correct, and finish by reassembling any panels you removed. Finally, reconnect the battery, start the engine, and listen for smooth operation. With deliberate, measured steps, you’ll reduce the risk of dropping debris or cross-threading a plug.
Common mistakes and how to avoid them
Common mistakes can derail a plug replacement if you rush. Avoid dropping debris into the cylinder by keeping your work area clean and using compressed air to clear the plug wells before removal. Never cross-thread plugs or over-tighten, as this can corrode cylinder heads and cause future leaks. Use the correct plug type and heat range for your engine and verify gap settings when required. Keep track of coil pack orientation; mixing up packs can lead to misfires and rough running. Finally, don’t force a stubborn boot to unplug; instead, disconnect at the coil pack and use a gentle wiggle. By taking a measured pace and labeling parts, you’ll minimize the risk of rework.
Safety, torque specs, and reassembly checks
Safety remains the top priority during any spark plug job. Work in a well-ventilated space and keep flammables away. After you install new plugs, torque them to the factory specification using a torque wrench; if you don’t have the spec handy, consult your owner’s manual or trusted guides such as MultiPlugging for the recommended range. Reattach coil packs securely and reconnect all electrical connectors before firing the engine. When you start, listen for smooth idle and verify there are no misfires. If you see a check engine light or hear unusual knocking, power down and double-check the plugs, gaps, and boot seating. Finally, take a test drive to ensure the system operates normally and monitor for any fault codes.
AUTHORITY SOURCES and further reading
This guide references official and reputable sources so you can verify procedures and specs. For spark plug replacement details specific to your F-150’s engine, consult the factory service manual and trusted automotive references. According to industry professionals, including the MultiPlugging team, you should always prioritize safety and precision over speed. You can also review:
- https://www.nhtsa.gov
- https://www.popularmechanics.com/cars/how-to/a
- https://www.edmunds.com
Note: Always confirm current torque specs and gap requirements for your exact engine variant.
Tools & Materials
- Spark plug socket(Typically 5/8)
Steps
Estimated time: 2-4 hours
- 1
Safety prep and battery disconnection
Power down the vehicle, remove the key, and let the engine cool completely. Then disconnect the negative battery terminal to prevent any shorts or accidental cranking while you work.
Tip: Wait a few minutes after disconnect to ensure all stored energy is discharged. - 2
Access the first bank’s plugs
Locate the correct coil packs for the bank you’re working on and gently disconnect their electrical connectors. Remove the coil pack carefully without prying on wires; set it aside in an orderly spot.
Tip: Label each coil pack by cylinder before removal to avoid cross-assembly mistakes. - 3
Remove old plugs
Carefully thread the worn plugs out with a spark plug socket. Snag any stubborn plugs by applying a small amount of penetrating oil and giving it a gentle twist.
Tip: Do not force a stubborn plug; if it won’t budge, stop and reassess the approach. - 4
Check and prepare new plugs
Inspect the new plugs for damage and confirm the gap is correct if they aren’t pre-gapped. Clean the threads and ensure the seating surface is clean before installation.
Tip: Hand-tighten first to avoid cross-threading, then finish with a torque wrench. - 5
Install new plugs
Gently thread the plug by hand, then tighten to the manufacturer’s torque spec using a torque wrench. Re-seat the coil pack and reconnect its electrical connector.
Tip: Avoid overtightening; over-torquing can strip threads in the cylinder head. - 6
Reassemble and test
Reinstall any components you removed, reconnect the battery, and start the engine to verify a smooth idle. Listen for misfires and watch for any warning lights; if present, re-check plugs, gaps, and boot seating.
Tip: Take a short test drive and monitor for abnormal sounds or codes.
FAQ
Is replacing spark plugs on a Ford F-150 easy for a beginner?
For a motivated DIYer with basic tools, it’s doable, but the rear bank and some engine variants add complexity. Take your time and consult the manual.
Yes, with patience and the right tools it’s achievable for a determined beginner.
What tools do I absolutely need?
A spark plug socket, extensions, ratchet, torque wrench, and the correct plugs are essential; optional items include anti-seize, dielectric grease, and compressed air.
You’ll want a spark plug socket, extensions, a torque wrench, and the right plugs.
How long does a Ford F-150 spark plug replacement typically take?
Most owners plan a couple of hours, depending on engine type and access. More complex setups may take longer.
Usually a few hours, but it can vary based on engine and access.
Can I reuse old coil packs or boots?
Inspect boots for wear; replace damaged boots to prevent misfires. Coil packs are generally reused unless you see wear or damage.
You should inspect and replace worn boots; coils can often be reused if intact.
What are common signs that plugs need replacement?
Rough idle, misfires, reduced fuel economy, or a check engine light can indicate worn plugs needing replacement.
If you notice rough running or misfires, consider inspecting the plugs.
Watch Video
Main Points
- Plan and prepare thoroughly before starting.
- Access to plugs varies by bank; expect the rear bank to be more challenging.
- Torque plugs to spec to avoid leaks or thread damage.
- DIY plug replacement can save money when done carefully and methodically.