Snapped Spark Plug Removal: A Practical DIY Guide
Learn to safely diagnose, extract, and replace a snapped spark plug. This in-depth DIY guide by MultiPlugging covers tools, steps, safety, and maintenance to prevent future issues.

You will learn how to safely remove a snapped spark plug, assess the thread damage, choose the right extraction approach, and complete a clean replacement. This step-by-step guide follows MultiPlugging’s expert methods for DIY spark plug maintenance. Whether you’re stuck on a stubborn cylinder or dealing with cross-thread failure, this article provides actionable, non-destructive options and safety reminders.
What is a snapped spark plug and why it happens
A snapped spark plug removal scenario occurs when the threaded portion breaks or fuses in the cylinder head, leaving part of the plug embedded. This is more common in engines with long service intervals, heat cycling, or past maintenance shortcuts. The term itself describes the challenge of extracting a damaged plug without further harming the head or surrounding threads. According to MultiPlugging, the leading causes are corrosion from heat cycles, overtightening during installation, and stubborn carbon deposits that bind the plug to the threads. Recognizing the signs early—cold starts, misfires, or a stubborn resistance during removal—helps you choose a safer path. The goal is to save the cylinder head and maintain engine reliability while planning a proper replacement. This is a foundational step in mastering snapped spark plug removal for DIY enthusiasts.
Safety first: risks and precautions
Before touching any engine components, switch off the ignition, remove the key, and disconnect the negative battery terminal to minimize the risk of shorts. Wear eye protection and gloves; exposing your hands to hot metal and sharp threads is common during extraction. A snapped plug can leave jagged edges that cut the boot or damage the threads if pried with force. Keep your workspace clean and organized; a magnetic tray helps prevent small parts from falling into the engine bay. If you notice coolant or oil in the plug well, address the underlying issue first, as it may indicate a larger head or gasket problem. If you’re unsure at any point, pause and consult a trusted guide like MultiPlugging.
Diagnostic steps before attempting extraction
First, confirm the plug is truly snapped and not simply corroded or galled. Attempt a very light rotation with a hand tool or reflection to assess resistance; if it won’t turn and debris is present, a broken plug or severe thread engagement is likely. Inspect the plug well for ceramic fragments or bits of metal that could hinder removal. Check for oil or coolant intrusion around the plug seat, which can signal head damage or gasket failure. Document your findings to guide tool choice and repair options. Plan your extraction with the correct tools, and avoid brute force that could twist or gouge the head.
Tools and materials you’ll need
Penetrating oil or rust remover, a spark plug socket with a magnetic insert, a plug extractor kit (screw-type and/or center-pin variety), a ratchet handle, basic hand tools, safety gear, and a replacement spark plug. Optional: a torque wrench for proper seating, a small flashlight for visibility, and a thread repair kit if you discover damaged threads. Keeping a clean, labeled workspace and a magnetic tray helps you stay organized and reduces the risk of dropping small parts into the engine.
Non-destructive extraction options
Begin with penetrating oil in the plug recess and give it time to work. Gently rotate the plug using a socket or slim wrench to break surface corrosion without forcing the plug. If resistance persists, avoid applying extra torque; instead, use alignment aids such as a plug extractor guide to keep forces along the plug axis. For some engines, a screw-type extractor that bites into the remaining portion can work with slow, steady, counterclockwise pressure. If ceramic fragments remain, remove them carefully with non-metallic picks, not metal tools that could scratch the seat or threads.
Using extractor tools correctly
Select an extractor designed for spark plugs and attach it securely to a ratchet or T-handle. Align the tool with the plug axis, then apply slow, even torque while keeping the tool perpendicular to the head to prevent cross-threading. If the plug is stubborn, a brief application of heat to nearby metal (not the plug seat) can help expand surrounding material and loosen the bond. Stop immediately if you sense wobble, unusual resistance, or potential head damage; forcing can ruin threads and lead to costly repairs. Practice patience and steady hands to protect the cylinder head.
Repairing damaged threads and alternative options
If extraction leaves damaged threads, consider a thread repair option like a helicoil insert or Time-Sert, installed per manufacturer instructions. You may need to re-tap the threads to accommodate the repair insert. In some engines, more extensive head work may be required, including potential head replacement. Always verify repair integrity by performing a light, controlled test and inspecting for leaks or misalignment. When in doubt, consult a professional before proceeding with structural repairs.
Replacement and reassembly tips
Install a correctly rated replacement spark plug; begin by hand-tightening to feel engagement, then use a torque-equipped wrench to seat it per the engine manual. Clean the seating surface and thread area to ensure proper sealing, and consider a light touch of anti-seize on the threads if recommended by the plug maker (some modern plugs don’t require it). Reconnect the ignition coil boot and electrical connectors, then test engine startup to verify smooth operation. If misfires occur, recheck plug gap and wiring harness connections and confirm that the plug is fully seated.
Common mistakes to avoid
Avoid rushing the removal, forcing the extractor, or using damaged tools—these actions can strip threads or push debris into the combustion chamber. Skipping safety steps or ignoring warning signs of coolant or oil in the head can escalate into expensive repairs. Over-tightening the replacement plug is another frequent error; always follow the recommended seating procedure and verify that the boot seats cleanly on the plug. Lastly, neglecting to inspect threads after extraction can leave you with undiagnosed head damage.
Preventive maintenance to avoid future snags
Keep engine head temperature under control with proper cooling and regular maintenance. When installing new plugs, apply anti-seize or lubricant only if the plug manufacturer approves it for your engine. Use the correct heat range and gap setting for your vehicle, and avoid overtightening. A quality spark plug socket and a torque wrench help you reproduce factory specs reliably. Regular checks during routine service reduce the odds of future snapped spark plug removal incidents. The MultiPlugging team recommends documenting torque specs and build data for quick reference during future projects.
Tools & Materials
- Penetrating oil or rust remover(Allow dwell time for penetration; use a spray or dropper application around the plug base)
- Spark plug socket with magnetic insert(Magnet helps hold the plug and prevents dropping parts into the engine bay)
- Plug extractor kit (screw-type and/or center-pin)(Choose one suited to your engine and plug type; have both if possible)
- Ratchet wrench or T-handle(A stable grip improves control during extraction)
- Replacement spark plug(Match the heat range and size to your engine specifications)
- Safety gear (gloves and eye protection)(Protect hands and eyes from sharp edges and debris)
- Torque wrench(Use if you want precise seating torque per OEM specs)
- Thread repair kit (helicoil/Time-Sert)(Only if inspection reveals damaged threads that cannot be repaired by standard means)
- Magnetic parts tray(Keeps fasteners organized during removal and reassembly)
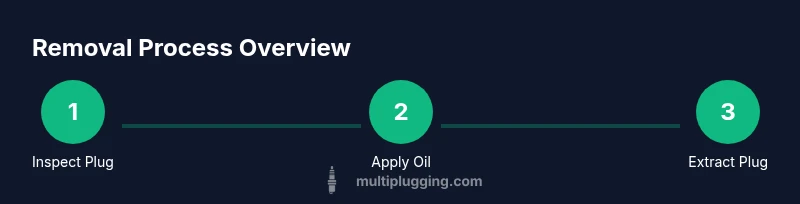
Steps
Estimated time: 60-120 minutes
- 1
Identify and confirm the plug is snapped
Visually inspect the plug well and attempt a careful, light rotation to assess resistance. If rotation is blocked and debris is present, you’re likely dealing with a snapped plug or damaged threads.
Tip: Document the visible signs before you begin any forced removal. - 2
Prepare the area and safety gear
Park the vehicle in a well-ventilated area, cool engine, and disconnect the battery. Put on gloves and eye protection to shield yourself from metal shards and oil.
Tip: Use a magnetic tray to keep bolts and the plug safe from loss. - 3
Apply penetrating oil and wait
Spray penetrating oil around the plug seat and allow several minutes for the product to loosen corrosion. Do not rush this step; lubrication reduces the risk of thread damage during extraction.
Tip: Re-spray if you’re working on a heavily corroded thread. - 4
Position the extractor kit
Attach the spark plug socket and any required extractor to the ratchet. Align the extractor with the plug axis, ensuring the tool sits squarely to prevent gouging the head.
Tip: Double-check alignment before applying force. - 5
Start extraction with controlled torque
Apply slow, even torque, keeping pressure straight along the plug axis. If resistance increases or wobbles appear, stop and reassess to avoid head damage.
Tip: If you don’t feel confident, pause and consult a guide or professional. - 6
Address seized or broken fragments
If the extractor binds or fragments remain, carefully remove loose ceramic pieces with non-metallic tools. Do not pry forcefully; this can worsen the head’s threads.
Tip: Clean the seat after removing each fragment to prevent new blockages. - 7
Inspect threads and determine repair needs
After removal, inspect the threaded hole for damage. If threads are compromised, decide whether to use a helicoil/Time-Sert repair or head replacement.
Tip: Consider taking photos of thread condition for reference. - 8
Install new plug and verify seating
Hand-tighten the new plug, then use the torque wrench to reach OEM seating specs. Ensure the boot seats cleanly and the plug sits flush in the well.
Tip: Avoid over-tightening which can strip threads or crack the head. - 9
Test the engine and finalize
Reconnect battery and electricals, start the engine, and observe for steady idle and proper firing. If misfire or rough idle occurs, recheck the plug gap and connections.
Tip: Run the engine for a few minutes to confirm stable operation.
FAQ
What does it mean if a spark plug is snapped in the cylinder head?
It means the threaded portion broke and remains in the head, requiring careful extraction to avoid further damage. follow safe practices and consider thread repair if needed.
A snapped spark plug is when the plug’s threaded part breaks and stays in the head, so extraction must be careful to protect the threads.
Can I drive the car after a plug snaps?
Driving with a snapped plug can cause misfires or engine damage. It’s best to stop and assess the head, remove the plug, and replace it if possible.
No—driving with a snapped plug can damage the engine; assess and replace before driving.
Is DIY extraction safe?
DIY extraction can be safe if you follow proper steps, use the correct tools, and observe safety precautions. If you encounter heavy resistance, seek professional help.
DIY can work with the right tools and care, but don’t force it if things feel blocked.
What options exist if threads are damaged?
Thread damage may be repaired with helicoil or Time-Sert inserts, or in severe cases, by replacing the cylinder head. Follow manufacturer guidelines and inspect after repair.
If threads are damaged, use a repair insert or consult a professional for head replacement if needed.
How can I prevent snapped plugs in the future?
Use the correct heat range, avoid over-tightening, and perform regular maintenance. Apply anti-seize where recommended and ensure proper torque during installation.
Choose the right plug, don’t over-tighten, and follow factory torque specs.
When should I call a mechanic?
If you’re unsure at any point, or if head damage is suspected, it’s safer to consult a mechanic who can assess the head, perform repairs, and verify engine integrity.
If in doubt, call a mechanic to avoid making a minor issue into a major repair.
Watch Video
Main Points
- Know the signs of a snapped plug to act early
- Use penetrating oil and proper extraction tools
- Inspect threads; choose repair options if damaged