NGK Copper Spark Plugs: A Practical DIY Guide for Car Owners
Learn to inspect, gap, install, and maintain NGK copper spark plugs with this practical DIY guide. Ideal for car owners and DIY enthusiasts seeking reliable, affordable performance.

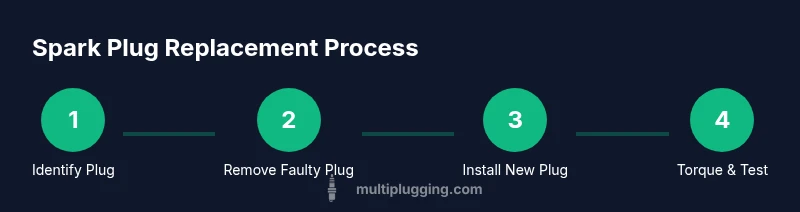
NGK copper spark plugs offer reliable, affordable performance for many gas engines. This guide shows you how to determine suitability, prepare tools, gap or confirm pre-gap, remove old plugs, install new NGK copper plugs, and test-run the engine. According to MultiPlugging, copper plugs are ideal for older or budget builds where quick replacement matters and service intervals are regular. Follow the steps below to complete the job safely and correctly.
Understanding NGK Copper Spark Plugs
NGK copper spark plugs are a staple in many gasoline engines, especially older vehicles and budget builds. The copper core delivers strong conductivity and efficient heat transfer, while the steel shell protects against fouling and cross-threading. Copper plugs are often prized for their low upfront cost and straightforward replacement process, making them a popular choice for DIYers. The MultiPlugging team notes that for engines with simple ignition systems, copper plugs can perform very well between regular maintenance intervals. This section explores what makes NGK copper plugs different from advanced options like platinum or iridium, and why they remain a solid option for many owners.
They are typically available in a wide range of heat ranges to accommodate various engines and operating conditions. When choosing NGK copper plugs, you’ll consider the engine’s displacement, fuel delivery, ignition timing, and the required heat range. Copper plugs do not include precious metal electrodes, which keeps costs down but can reduce life in aggressive or high-performance applications. Overall, they are a great balance of cost, availability, and ease of service for most everyday driving scenarios.
Pros, Cons, and Suitability
Copper spark plugs strike a balance between cost and performance. Pros include broad availability, straightforward installation, and robust heat transfer that helps prevent fouling in many engines. Cons include shorter service life compared with platinum or iridium options and a slightly higher tendency to carbon fouling in certain running conditions. For older vehicles or those used primarily for commuting, NGK copper plugs can be an excellent value. The MultiPlugging analysis, 2026, suggests copper plugs stay cost-effective where maintenance intervals are predictable and race-grade performance is not required. If your engine relies on distributor ignition or simple coil packs, copper plugs are typically compatible and easy to replace.
Before deciding, check your vehicle’s owner manual and NGK’s plug catalog to ensure the copper option matches the engine’s heat range and reach. If you have performance goals, or you operate in extreme conditions, you may prefer a more advanced alloy plug, but for routine maintenance and cost control, copper variants perform satisfactorily in many applications.
Gap, Maintenance, and Longevity Considerations
Understanding gap and maintenance frequency is essential for copper plugs. NGK copper plugs come either pre-gapped or with a gap specification printed on the side; when in doubt, rely on the vehicle manufacturer’s recommended gap and torque specs rather than improvising. If you notice misfires, rough idling, or poor cold-starts, inspect the plugs for wear and fouling. Regular inspection during scheduled maintenance helps catch issues early. The goal is to ensure consistent spark delivery and efficient combustion, keeping fuel economy and performance steady throughout the service life.
In some engines, the recommended replacement interval for copper plugs is shorter than for advanced metals; if you frequently operate under harsh conditions or high mileage, plan for more frequent checks. Always source NGK copper plugs that match your engine’s heat range and reach, and avoid using mismatched parts that can compromise ignition timing and performance.
Safety, Preparation, and Common Mistakes
Working on ignition systems requires care. Always disconnect the negative battery terminal before removing plugs to prevent accidental shocks or short circuits. Work on a cool engine to avoid burns, and use a spark plug socket with a rubber insert to protect the porcelain tip during removal. Cross-threading is a common failure, so take your time aligning the plug and apply gentle, steady pressure while turning. Keep the work area clean and organized to prevent dropping tools into the engine bay.
Common mistakes include overtightening plugs, using the wrong heat range, and neglecting to verify the gap. Following NGK’s official recommendations and your owner’s manual minimizes risk and ensures a successful replacement.
Troubleshooting After Replacement
If you experience misfires after replacement, recheck each plug’s torque and gap, confirm the correct plug type for your engine, and verify the plug wires or ignition coils are seated properly. A rough idle or poor acceleration can point to a single faulty plug or a wiring issue rather than the plug itself. If misfires persist, consult a mechanic to diagnose ignition system health, compression, and fuel delivery. A careful approach—checking for fouling, verifying spark delivery, and confirming engine timing—helps isolate the issue quickly.
Authority Sources
Key sources informing this guide include SAE International for technical plug standards, Car and Driver for consumer-oriented ignition maintenance guidance, and general automotive engineering references from major publications. While NGK’s catalog provides the exact heat ranges and torque specs for your engine, these sources help frame best practices for DIY spark plug care.
Tools & Materials
- NGK copper spark plugs (engine-matched model)(Ensure the exact heat range and reach specified by the manufacturer)
- Spark plug socket(3/8-inch drive with a rubber insert; 5/8-inch hex)
- Ratchet and extensions(6-inch or longer extension as needed)
- Torque wrench(Used to torque plugs to manufacturer spec)
- Feeler/gap gauge or pre-set NGK gauge(Check or adjust gap to engine spec if required)
- Anti-seize lubricant(Only if recommended by engine manufacturer)
- Dielectric grease(For spark plug boots if applicable)
- Safety gear (gloves, eye protection)(Protection during handling)
- Rags or small tray(Contain dropped parts)
Steps
Estimated time: 45-60 minutes
- 1
Identify the correct NGK plug and locate the old plug
Consult the owner's manual or NGK plug catalog to confirm the exact copper plug model. Locate the correct cylinder and prepare the work area so you can access the plug without bending wires or tools. This initial step prevents mis-purchases and cross-threading later.
Tip: Double-check the engine model and ignition system before removing anything. - 2
Disconnect the ignition coil or plug wire safely
Carefully lift or loosen the coil boot or ignition wire using minimal force to avoid damaging the connector. If the wire sticks, wiggle gently at the boot rather than pulling on the wire itself. Label or note wire locations if you’re removing multiple plugs.
Tip: Use a small magnetic tray to keep wires organized. - 3
Remove the old plug with a spark plug socket
Attach the socket to a ratchet with extension and turn counterclockwise to unthread the plug. Keep the plug level to prevent debris entering the cylinder and avoid overtwisting to prevent head damage.
Tip: Hold the plug steady and back it out slowly to preserve threads. - 4
Inspect the old plug and the well
Examine the old plug for signs of wear, gap issues, fouling, oil ingress, or carbon buildup. Check the spark plug well for debris that could fall into the cylinder during removal. This helps you diagnose related ignition or fuel issues.
Tip: Compare to a known-good plug for wear patterns. - 5
Gap and prepare the new NGK copper plug if required
If the plug isn’t pre-gapped to your engine’s specs, carefully adjust the gap using a gauge. Do not over-gap; small adjustments only. Install anti-seize only if recommended and lightly coat the threads.
Tip: Always handle the new plug by the threads, not the porcelain tip. - 6
Thread the new plug by hand and seat
Begin threading by hand to ensure the threads align properly. Once finger-tight, switch to the socket and snug the plug without cross-threading. Seat the plug evenly to avoid bottoming out the threads.
Tip: Take your time to avoid cross-threading; it’s the most common installation error. - 7
Torque the plug to spec with a torque wrench
Use a torque wrench to tighten to the vehicle’s specified torque. Avoid over-tightening, which can damage the cylinder head or seat. Re-check the torque after a brief test run.
Tip: If you don’t have the spec, consult the vehicle service manual or NGK catalog. - 8
Reconnect the boot, wire, and test the engine
Reattach the ignition coil or plug wire firmly, route cables neatly, and start the engine to verify smooth operation. Listen for misfires and monitor for any rough idle or hesitation. If issues arise, re-check the plug seating and wiring.
Tip: Run the engine at idle for a few minutes before a road test.
FAQ
Are NGK copper spark plugs suitable for all engines?
Copper plugs are widely used in many gasoline engines, especially older designs, but not all modern engines. Always verify compatibility with the vehicle’s manual or NGK catalog before purchase.
Copper plugs work well in many engines, but check your manual to confirm compatibility first.
Do NGK copper spark plugs last as long as platinum or iridium?
Copper plugs generally have a shorter service life than platinum or iridium plugs, especially under aggressive driving or high-temperature conditions. They are easier on the wallet and simpler to replace.
Copper plugs wear faster than platinum or iridium, but are cheaper and easy to replace.
Should I gap NGK copper plugs?
Many NGK copper plugs come pre-gapped. If you gap them, use the vehicle’s specified gap and a proper gauge, and avoid over-adjusting.
Check the gap if your plug isn’t pre-gapped, and set it to the engine’s spec.
Is anti-seize necessary on copper plugs?
Modern engines often have threads coated or design features that reduce the need for anti-seize. Follow the vehicle manufacturer’s guidance to avoid over- or under-tightening.
Follow the manual—anti-seize isn’t always required for copper plugs.
What are signs a copper plug is worn or fouled?
Worn copper plugs may cause rough idle, misfires, or poor acceleration. Fouling and deposits indicate maintenance is due and may signal fueling or ignition issues.
Watch for rough idling or misfires, and fouling deposits to know when to replace.
Can I replace one plug at a time?
Yes, in many cases you can replace plugs individually, but it’s often simpler and more balanced to replace all plugs at once if the engine has high mileage or you’re doing routine maintenance.
You can replace one or all plugs; assess based on mileage and maintenance goals.
Watch Video
Main Points
- Check engine compatibility with NGK copper plugs
- Gap and torque must follow manufacturer specs
- Copper plugs are budget-friendly and easy to replace
- Avoid cross-threading and over-tightening for longevity