How to Make MSD Spark Plug Wires: A DIY Guide
Learn to craft MSD-style spark plug wires with proper core, insulation, and boots. A step-by-step DIY guide for hobbyists focused on safety, materials, and reliable performance.

You’ll learn to fabricate MSD-style spark plug wires that withstand high-heat ignition conditions, including selecting a suitable core, insulation, and boots. This guide covers essential safety, required tools, and a clear step-by-step process to assemble custom-length, reliable wires for performance applications.
Understanding MSD-style ignition wires
MSD-style ignition wires are engineered to deliver high-voltage pulses with minimal energy loss and reduced electromagnetic interference (EMI). They use low-resistance, high-temperature cores wrapped in durable silicone insulation and surrounded by robust boots. The goal is to maintain impedance within a safe range while preventing moisture ingress and heat degradation. According to MultiPlugging, the key to reliability is matching resistance and shielding to the ignition module and system RPM range. This means selecting a conductor and insulation combo that stays stable under engine bay temperatures and the voltage spikes typical of performance setups. You’ll notice differences in core materials, insulation thickness, boot design, and overall flexibility. Understanding these distinctions helps you decide whether to buy purpose-built MSD wires or construct a custom set that suits your specific engine, clearance, and routing needs.
Electrical theory and why it matters
The ignition event involves a brief, high-current surge traveling through the plug wire. A well-designed MSD-style wire minimizes resistance and minimizes impedance irregularities that can distort the spark. Key concepts include impedance, shielding, and heat resistance. Impedance helps prevent radio frequency interference with other vehicle electronics and ensures a stable spark at high RPM. Shielding protects the conductor from EMI and reduces noise in the ignition signal. Heat resistance prevents breakdown of the insulation, which would lead to shorts or misfires. While you can buy off-the-shelf replacements, a custom wire build lets you tailor length, routing, and boot fit to your setup, which often yields a more reliable, consistent spark.
Differences between MSD and stock wires
MSD wires typically prioritize higher-grade insulation, longer boot life, and tighter tolerances for resistance and capacitance. Stock wires are designed for broad compatibility and lower cost, often sacrificing heat resistance and EMI suppression. With MSD systems, the mismatch can show up as hesitation, misfires, or inconsistent sparks at high RPM. A DIY approach lets you select materials that meet the demands of high-performance ignition, such as heat-rated silicone jackets, ceramic or glass-core conductors, and boots with solid, weatherproof seals. The trade-offs include cost, time, and the need for careful termination to avoid moisture or air gaps that degrade performance.
Tools and materials you’ll need
Before you start, assemble a clean, well-lit workspace and gather the essential items. At minimum you’ll need heat-resistant, high-temperature core material, silicone-insulated conductor, appropriate boots or connectors, heat shrink tubing, a precision cutting tool, a crimping tool or soldering iron for secure terminations, and a multimeter for continuity checks. Optional items include a silicone adhesive sealant, labeling tags, and a small heat gun for precise shrinkage. Having a steady work surface and a hand lamp helps you see small details during routing and boot fitting. Always work with the power disconnected and wear eye protection when dealing with cuts and terminals.
Wire construction fundamentals: core, insulation, and boots
The conductor is the heart of a spark plug wire. A robust core minimizes resistance and maintains signal integrity under high voltage. Surrounding the core is a silicone insulation jacket that resists heat and moisture while preserving flexibility. The outer boots must seal well against the spark plug terminal and the distributor or coil boot. When building MSD-style wires, ensure the core is compatible with the system’s impedance requirements and that the insulation thickness provides sufficient clearance to prevent arcing or heat buildup. A clean, uniform cut and secure terminations help prevent moisture ingress and arcing at the boot.
Handling and length considerations: measuring and routing
Accurate length measurement is critical for rhythmically timed ignition and peak performance. Measure from the ignition coil to each spark plug, allowing extra slack for routing around engine components without creating sharp bends. Use a flexible measuring tape and mark each cut clearly. When routing, avoid loose loops near belts or moving parts and keep wires away from hot exhaust components. Excessive length increases inductive losses, while too-short wires can pull components or cause boot stress. Label each wire to prevent cross-connection and confusion during installation.
Routing is also a reliability factor. Maintain smooth curves with gradual bends; sharp corners increase impedance and can cause micro-arcing at the boot. Route wires along existing harness channels whenever possible and secure with zip ties away from moving parts and heat sources. A well-planned route reduces wear, makes future maintenance easier, and helps the system perform consistently at high RPMs.
Common pitfalls and how to avoid them
Rushing the process leads to poor terminations, moisture ingress, or misrouting. Common mistakes include selecting a core that’s too stiff for tight engine bays, using boots that don’t seal properly, and failing to seal the ends against moisture. Another pitfall is neglecting to test resistance and continuity after assembly; ongoing resistance drift can signal degraded connections. To avoid these issues, double-check your measurements, choose boots with snug fits, use heat shrink with proper adhesive lining, and perform a full resistance check across each wire with a multimeter before installation. Labeling and keeping a tidy workbench reduce the chance of cross-connection.
Safety, testing, and tuning tips
Safety first: disconnect the battery and ensure the ignition system is fully powered down before touching wires or terminals. After assembly, test each wire for continuity and correct resistance using a multimeter. Inspect boots for cracks or gaps and verify a tight, moisture-proof seal at both ends. When testing in the vehicle, perform a cautious, engine-off check first, then a short engine run to observe idle behavior before logging any performance metrics. If you notice misfires or erratic RPM behavior, reassess routing and terminations. Finally, maintain the wires by inspecting boots and insulation at regular service intervals and replace any damaged parts promptly.
Safety, maintenance, and final considerations
Custom MSD-style wires require meticulous attention to mechanical safety and electrical integrity. Always wear eye protection when cutting or crimping, work in a dry environment, and keep flammable materials away from the work area. After installation, schedule periodic inspections of the boots and insulation and test resistance and continuity. As you gain experience, you’ll learn to pace your builds and adapt to different engine layouts. The payoff is a cleaner spark signal, more consistent ignition, and improved overall performance.
Tools & Materials
- Heat-resistant core material(High-temp rated and compatible with your MSD system's impedance)
- Silicone-insulated conductor(Flexible, weather-resistant jacket and precise diameter)
- Boots/connectors(Sealed, heat-tolerant boots for coil/distributor ends)
- Heat shrink tubing with adhesive(For moisture sealing and strain relief)
- Crimping tool or soldering iron(Secure terminations; ensure good electrical contact)
- Wire cutters/strippers(Sharp blades for clean cuts without fraying)
- Multimeter(Continuity and resistance checks for each wire)
- Labeling tags(Optional but helpful for wire routing)
- Safety gear(Safety glasses and gloves for protection)
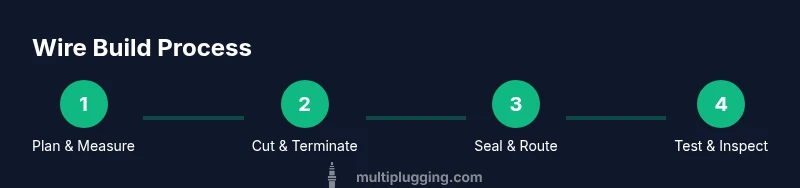
Steps
Estimated time: 60-90 minutes
- 1
Plan and measure
Decide which wire length you need for each cylinder and plan routing. Use a flexible ruler to mark each cut line with a distinct, legible marker. This ensures even, predictable performance and reduces the chance of bulky routing.
Tip: Double-check length against clearance; add a small margin for bends. - 2
Cut conductor and insulation
Carefully cut the core and insulation to the marked lengths. Keep cuts clean to avoid frays and ensure a snug fit into boots. Remove any burrs using light sandpaper if necessary.
Tip: Make straight, clean cuts; jagged ends cause poor termination. - 3
Attach boots or connectors
Slip boots onto each end of the conductor before termination. Position them for a tight seal around the spark plug and coil/distributor boot.
Tip: Test fit before securing; a loose boot increases moisture risk. - 4
Terminate with crimp or solder
Secure the connection with a proper crimp or solder joint. Ensure there is good contact and no exposed conductor beyond the boot.
Tip: Use heat shrink over the joint for moisture protection. - 5
Seal and insulate ends
Slide heat shrink over the termination and apply heat to seal. The adhesive layer should create a moisture-resistant barrier.
Tip: Keep heat to a minimum to avoid melting insulation; apply evenly. - 6
Route wires cleanly
Secure wires along engine bays using clamps or ties. Avoid sharp bends and hot surfaces; provide gentle curves that preserve impedance.
Tip: Label each wire for easy future maintenance. - 7
Test for continuity
With the battery disconnected, use a multimeter to check continuity and confirm resistance is within acceptable range for each wire.
Tip: If a wire shows open circuit, re-check terminations and re-seat the boot. - 8
Final inspection
Inspect all boots for secure sealing and verify routing clearance. Reconnect power and perform a cautious engine start to verify stability.
Tip: Listen for misfires or hesitation and stop to reassess if detected.
FAQ
Can I use off-the-shelf ignition wires for MSD systems?
MSD systems require wires with specific impedance, shielding, and boot design. Off-the-shelf stock wires may not meet these requirements and can lead to misfires or instability at high RPM. For best results, use wires designed for high-performance ignition systems or construct wires to match your MSD setup.
MSD systems often need wires built for performance; off-the-shelf options may not meet impedance and shielding needs.
Is it safe to DIY wire construction near the battery or distributor?
Yes, with proper precautions. Always disconnect the battery, work in a dry area, and wear eye protection. Avoid static and moisture during the build, and keep tools away from live terminals. Follow manufacturer suggestions for battery isolation during testing.
Always disconnect power and wear safety gear when working on ignition wires.
What length tolerance should I aim for when cutting wires?
Aim for lengths that match the planned routing with a small margin for curves. Avoid overly long runs that add inductive losses, and prevent tension at the boot by including gentle routing angles.
Keep wire lengths close to planned routing with a small margin for bends.
How can I test the wires after assembly?
Use a multimeter to check continuity for each wire and verify resistance is within the expected range for high-performance setups. Inspect boot seals and ensure there are no exposed conductors before installation.
Check continuity and resistance for each wire and inspect seals before installation.
Do I need to tune timing after installing custom wires?
In most cases, you won’t adjust timing solely because of wire length, but improper routing can affect signal quality. After installation, perform a cautious test run and verify that firing is smooth across RPM ranges before final tuning.
Wiring changes rarely require timing adjustments, but verify by testing at different RPMs.
What maintenance is recommended for MSD wires?
Regularly inspect boots, insulation, and routing for wear. Replace damaged sections promptly and recheck connections if you notice misfires or rough idling. Keeping a tidy engine bay helps prevent future issues.
Inspect and replace worn sections; keep routing tidy.
Watch Video
Main Points
- Choose a heat-resistant core with proper shielding.
- Measure lengths accurately to maintain impedance.
- Route wires with smooth bends and secure them.
- Test continuity and resistance before firing the engine.
- Follow safety protocols and disconnect power during work.