DIY Spark Plug Wires: Step-by-Step Guide
Master diy spark plug wires with this comprehensive, safety-first guide. Inspect wear, choose compatible wires, and perform a secure replacement for reliable ignition.

With this guide you will safely replace or upgrade your ignition wiring by installing a new set of spark plug wires and ensuring proper routing. Gather the right wires for your engine, a boot puller, pliers, dielectric grease, and a basic wrench set. Then follow the step-by-step section to complete a secure installation.
What DIY spark plug wires do for your engine
When you talk about the health of your ignition system, the spark plug wires play a pivotal role. The term diy spark plug wires has become common among car owners who want to understand how their engines ignite the air-fuel mixture. Properly rated, routed, and sealed wires deliver a strong, reliable spark to each cylinder, reduce misfires, and improve throttle response. According to MultiPlugging, investing in the right wire set can reduce symptoms of aging ignition components and help your engine start more crisply in cold weather or after long periods of sitting. In this article we’ll cover how to assess wear, choose compatible wires, and install them safely in a way that keeps heat, oil, and vibration from compromising your performance. You’ll learn simple checks you can perform at home, plus tips for prolonging wire life through better routing and routine maintenance.
Safety first: hazards and precautions
Working around the ignition system can expose you to electrical shock, burns from hot engine parts, and fuel-system hazards. Before you begin, disconnect the negative battery cable to prevent shocks and accidental cranking. Wear eye protection and gloves, and work in a well-ventilated area away from open flames or sparks. Do not work on a lit engine; allow it to cool for at least 30 minutes if it’s recently run. If you smell fuel or see fuel leakage, stop and address fuel system safety before continuing. Keep a clean workspace and lay out all parts in the order you’ll encounter them during installation.
Wire types and compatibility
There are several wire designs and constructions on the market, from OEM-style wires to universal sets. Copper-core wires often offer minimal resistance and fast response, while carbon- or carbon-impregnated cores can add EMI suppression in modern ignition systems. The right wire set depends on your engine type, the firing order, boot style, and the boot length. When selecting, verify that the connectors will fit your coil pack or distributor, and check the resistance rating printed on the wire jacket. Compatibility isn’t just about length—it’s also about boot diameter, spark- plug boot angle, and the resistance per foot that your ignition system expects. MultiPlugging analysis shows that wear is influenced by heat, oil exposure, and driving conditions, so choose a set that can tolerate your typical environment. The goal is a precise match that avoids excessive boot flex and arcing under heavy load.
Planning your kit and wiring strategy
Before buying parts, map the engine layout and cylinder order. Take photos of your current wiring to reproduce the routing pattern on the new set, which helps prevent misrouting. Create a simple checklist: wire length for each cylinder, boot orientation, and the correct firing order. If you have a V6 or V8 engine, lay out the wires on a flat surface in the same sequence as the cylinders to minimize tangling. This careful planning reduces installation time and makes the diy spark plug wires replacement smoother. The aim is a clean, organized harness that avoids rubbing against belts, pulleys, or hot exhaust components.
Tools and workspace setup
A safe, organized workspace speeds up the job and reduces mistakes. Gather a wire set, dielectric grease, boot puller, a set of wrenches and sockets, screwdrivers, pliers, a rag, and optional electrical tape for extra routing security. Ensure you have good lighting and a dry, non-slip surface. Protect nearby plastic and painted surfaces with a cloth to avoid scrapes. If you don’t have a boot puller, you can improvise with a small insulated handle tool, but be gentle to avoid damaging the boots. Planning the workspace in advance minimizes frantic moving parts and lets you focus on precise, careful work.
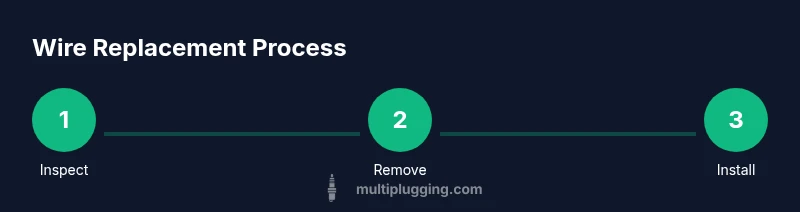
Step 1: Inspect the existing wires for wear
Begin with a visual examination of all spark plug wires. Look for cracks in the insulation, melted spots, hardening, or scorching near the boots. Wires that feel stiff or have noticeable resistance when flexed should be replaced. If you’re seeing glazing or oil saturation (which some engines exhibit), it’s a sign the wire jacket is compromised by heat and oil. Use a multimeter to check insulation resistance if you have one. Replacing worn wires early prevents misfires and improves starting reliability. In many engines a small fault in one wire can cascade into rough idle and poor fuel economy.
Step 2: Safety steps and battery disconnection
Power down the vehicle and remove the key, then disconnect the negative terminal of the battery. This step eliminates shock risk and prevents accidental engine cranking. If you’re working near the fuel system, consider disconnecting the fuel pump fuse as an extra precaution. Allow the starter circuit to discharge, and after 30 seconds, gently test that no voltage remains on the system. This is a best practice for safe handling of ignition components and aligns with standard automotive maintenance procedures.
Step 3: Remove the old wires in firing order
Identify the correct firing order for your engine and remove each wire one at a time, starting with the cylinder that corresponds to the topmost position on the engine. Label each wire or lay it next to a numbered diagram so you can reproduce the path on the new set. Wiggle the boot only by the base, never yank the wire from the boot. If a boot resists, use a boot puller or a gentle twist to release it. The goal is to minimize stress on the connectors and avoid cracking the boots during removal.
Step 4: Compare new wires and lay out the sequence
Unpack the new wire set and compare each length against the old wires. Lay them out in cylinder order on a clean surface to verify you have the correct lengths, ensuring that the boot orientations match the originals. Align the longest wires with the furthest cylinders and the shortest with the closest. This pre-arrangement prevents crossovers, reduces routing complexity, and keeps engine heat from softening the insulation. Verify that boot ends align with the same intake or coil locations as the originals.
Step 5: Install new wires one cylinder at a time
Begin with the cylinder that was the reference point in your firing order. Attach the boot to the coil/distributor first, then connect the other end to the corresponding spark plug. Apply a small amount of dielectric grease inside each boot to improve sealing and ease future removal. Seat each boot firmly, listening for a click or until you feel it seat evenly. Working one cylinder at a time helps avoid cross-wiring and preserves the correct order.
Step 6: Route wires away from heat and moving parts
Route the wires away from hot exhaust manifolds, belts, and moving parts. Use available loom clips or zip ties to keep wires secure without pinching. Avoid sharp bends and keep wires off sharp edges that could abrade the insulation over time. Recheck clearances around moving components and ensure the wires don’t contact the throttle cable or air intake; misrouting can cause eratic idling or misfires under load. A neat harness promotes reliability and easier future maintenance.
Step 7: Reconnect battery, test, and diagnose
Reconnect the battery and start the engine. Listen for any misfires, tapping, or rough running. If you notice hesitation or rough idle, recheck the boot seating and wiring order. Use a scan tool or a simple spark tester if available to verify each cylinder is firing correctly. Finally, wipe down the area and check for any signs of arcing or disturbed routing after a short drive. Regular checks after replacement help confirm long-term success.
Step 8: Maintenance and long-term care
Keep your ignition system in top shape with periodic inspections every 12–24 months or during seasonal maintenance. Look for cracking, oil saturation, heat damage, and boot wear. Replace a full set when a single wire shows signs of aging, as mismatched wear can compromise performance system-wide. Using dielectric grease on boot ends, avoiding aggressive bending, and tidying the harness all contribute to longevity. The MultiPlugging team recommends documenting your replacement date so you can track wear patterns and schedule future service proactively.
Tools & Materials
- New spark plug wire set(Ensure it matches engine year/model and boot style)
- Dielectric grease(Silicone-based recommended)
- Boot puller(Helpful for stubborn boots)
- Ratchet and socket set(Typically 3/8 inch drive)
- Screwdrivers (flathead & Phillips)(For freeing components)
- Gloves(Protection and grip)
- Shop rags(Clean spills and wipe surfaces)
Steps
Estimated time: 60-90 minutes
- 1
Identify wires and parts
Determine the correct wire lengths and boot styles for your engine. Confirm firing order using your vehicle’s manual or a reputable reference. Label or map old wiring to preserve order as you begin the replacement.
Tip: Double-check your engine code and cross-check with the wire set manufacturer. - 2
Prepare workspace and safety
Clear a clean workspace, gather tools, and ensure the engine is cool. Disconnect the negative battery terminal and set the vehicle in park with the parking brake engaged. Wear gloves and eye protection throughout the process.
Tip: Have a helper hold tools and parts at hand to avoid dropped components. - 3
Disconnect battery & set safety nets
Power down completely and disconnect the battery; optionally remove the fuel pump fuse for added safety. This minimizes the risk of arcing during disconnects. Wait a moment for stored energy to dissipate before touching any components.
Tip: Always disconnect the battery first before touching ignition components. - 4
Remove old wires (one-by-one)
Starting with the reference cylinder, remove each old wire by gently pulling from the boot, not the wire. Use a boot puller if needed. Label the wires as you go to preserve the firing order for the new set.
Tip: Do not twist or yank; damage to boots is common when forcing removal. - 5
Layout new wires and verify lengths
Unpack the new wires and lay them out in cylinder order. Check that each length matches the corresponding cylinder. Keep boot orientations consistent with the originals to avoid misalignment.
Tip: Lay them out on a clean mat so you can still see the order clearly. - 6
Install new wires (start at reference)
Attach the boot to the coil/distributor first, then connect the spark plug end. Apply a small dab of dielectric grease for a good seal and easier future removal. Seat each boot with a firm push until it clicks or seats evenly.
Tip: Work from the center outward to minimize wire crossing. - 7
Route and secure wires
Route the wires away from hot surfaces and moving parts. Use clips or ties to keep them secure and away from belts, fans, and pulleys. Avoid sharp bends that can crack insulation over time.
Tip: Leave a little slack near the bends to prevent hard kinking. - 8
Reconnect battery and test
Reconnect the negative battery terminal and start the engine. Listen for smooth idle and watch for misfires or warning lights. If issues persist, recheck wiring order and boot seating.
Tip: Take a short test drive to verify under load.
FAQ
Do I need to replace all wires at once?
If one wire shows wear, replacing the whole set is typically recommended to maintain even wear and performance. Mismatched wear can cause misfires and reduced fuel efficiency. Always verify the condition of each wire before deciding on partial replacement.
If one wire is worn, replace the whole set to maintain even wear and performance.
Can I reuse old wires?
Reusing old wires is generally not advised. Worn insulation can fail under heat and vibration, leading to misfires. Replacing with a new high-quality set provides better reliability and engine performance.
Generally not advised to reuse old wires; replace with a new set.
How do I know the right wire length?
Compare each old wire length to the new set before installation. Use a layout plan to match cylinder positions and avoid crossovers or excessive slack that can snag belts or fans.
Measure each wire and match it to the corresponding cylinder position.
What safety steps are essential?
Always disconnect the battery, work on a cool engine, and wear eye protection and gloves. Keep a fire extinguisher accessible in case of fuel exposure and avoid working around open flames.
Disconnect the battery and wear protection; work on a cool engine.
What if the engine still misfires after replacement?
Recheck firing order and boot seating. Inspect coil packs or distributor connections if misfires persist, and consider using a spark tester to identify the faulty cylinder.
Recheck wiring order and boots; inspect ignition components.
Are universal wire sets reliable?
Universal sets can work, but ensure exact boot sizes, lengths, and resistance specs for your engine. OEM-recommended wires typically yield the best compatibility and performance.
Universal sets can work if they fit your engine specs; otherwise, follow OEM guidance.
Watch Video
Main Points
- Prepare and plan before buying wires
- Follow firing order and proper routing
- Secure wires away from heat and moving parts
- Consult the manual and use dielectric grease for sealing