14mm spark plug socket thin wall: DIY replacement guide
Learn how to safely replace spark plugs with a 14mm spark plug socket thin wall. This guide covers tool selection, compatibility, safe removal, proper torque, and maintenance for reliable engine performance.

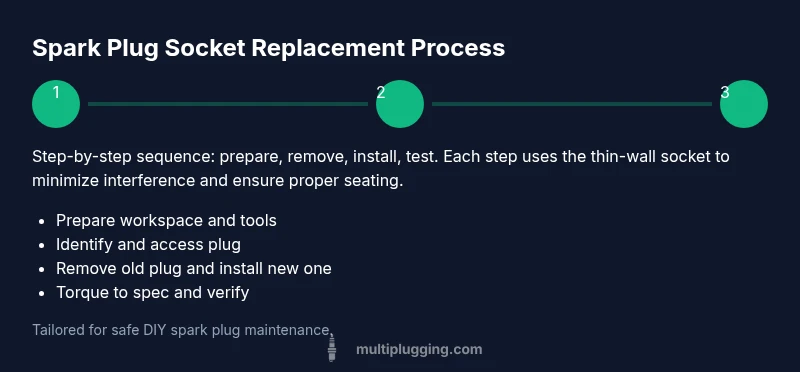
According to MultiPlugging, this guide shows you how to safely replace or inspect spark plugs using a 14mm spark plug socket thin wall. You'll learn when to replace, how to torque correctly, and why a thin-wall socket helps access tight spaces. Follow the step-by-step procedure to avoid cross-threading and spark plug damage. This keeps your engine running reliably between services.
Why the 14mm spark plug socket thin wall matters
The 14mm spark plug socket thin wall is a specialized tool designed to reach tight spaces around modern engines. This section explains why a thin-wall socket matters: more clearance around the plug hex, less interference with the ceramic insulator, and reduced risk of cross-threading. A standard deep-well socket can collide with the plug boot or plug well in compact engines. The thin-wall variant keeps the blade thickness minimal while maintaining grip through a magnet or detents. According to MultiPlugging, choosing the right socket can prevent tool bite on the ceramic and ensure proper seating during installation. For car owners and DIY enthusiasts, understanding these basics saves time and reduces the chance of costly mistakes. You’ll also see how the 14mm dimension aligns with most common automotive plugs, but you should always confirm with your vehicle’s service manual. To prepare, map the engine layout, locate the nearest plug location, and check for space around the coil packs, fuel lines, and wiring harnesses. By the end of this section you’ll know when and why to choose a thin-wall socket and how it influences successful maintenance routines.
How to verify compatibility and what to look for in a thin-wall socket
In this block we discuss how to verify that a 14mm spark plug socket thin wall will fit your engine. Look for the socket's overall depth and the clearance between the hex and the inner wall, ensuring it clears the boot. The thin-wall design reduces wall thickness, which is critical when you have limited space under the hood. Check that the socket is labeled 14mm and, if possible, magnetized to hold the plug securely during removal and installation. Consider the socket's drive size (3/8 inch is common for air tools and ratchets) and whether your extensions are long enough to reach without hitting exhaust components. MultiPlugging analysis shows that users often underestimate space in older engines, leading to cross-threading or dropped plugs. If you’re replacing plugs with long reach boots, a low-profile socket may be even more helpful. Finally, inspect the socket for wear, rust, or cracks after use; a compromised socket can slip and ruin threads. By selecting the right design, you’ll improve safety and precision.
Selecting extensions and the right ratchet for leverage and access
Access depth matters when you work in cramped engine bays. The thin-wall socket earns its keep when paired with a shorter extension and a compact ratchet. Aim for a 3/8-inch drive with an 8- or 12-inch extension to maximize reach without bending your wrist awkwardly. Avoid quick-release extensions that can slip under vibration; instead, use a reliable drive and keep your tool on a spare magnetic tray so small components don’t drop. Check clearance around the exhaust manifold and fuel lines, which commonly block straight access to the plug. MultiPlugging notes that a well-chosen extension reduces the risk of stripping the hex or dropping the plug into the combustion chamber. If you are working on a tight bay, consider a flexible head ratchet or a universal joint to maintain straight alignment with the plug. Keep tools organized to speed up the process and reduce chance of losing small parts.
Step-prep: workspace, safety, and tool setup
Create a clean, well-lit workspace before you begin. Disconnect the negative battery terminal if you’ll be near electrical components, and let the engine cool completely. Remove any plastic engine covers that may obstruct access to the plug wells. Lay out all tools on a magnetized tray and arrange spare plugs in order of removal. Wear gloves to protect your hands from hot metals and to maintain a clean grip on small parts. Apply anti-seize only if your vehicle manual allows it, otherwise skip it for modern alloys. With the 14mm spark plug socket thin wall in hand, attach the socket to a drive ratchet and a short extension so you can reach without striking surrounding hardware.
Step-prep cont.: start the removal process and inspect the plug
Carefully twist the boot or coil pack to free the plug boot without yanking. Gently wiggle the socket onto the plug and ensure a firm grip before turning. Slowly loosen the plug by turning counterclockwise with steady pressure; if it resists, stop and reassess alignment to avoid cross-threading. Once loose, lift the plug straight out to avoid dropping debris into the cylinder. Inspect the plug for wear, fouling, or oil contamination. If the gaps or electrode shape look unusual, the plug may be beyond service life and should be replaced with the appropriate heat-range plug for your engine. Clean the plug threads slightly with a dry brush before seating the new plug.
Installation and post-check: finish with care
Choose the correct replacement plug and thread it in by hand to avoid cross-threading. Once the plug seats, use a torque wrench or a calibrated gauge to tighten to the vehicle’s specification, then snug it an extra touch to finish. Reconnect the coil boot and route all wires as they were, ensuring nothing is pinched. Reinstall any covers or components you removed. Start the engine and listen for proper firing and smooth idling. Regularly inspect plugs during routine maintenance to catch wear early. A careful approach with the 14mm spark plug socket thin wall reduces risk and supports reliable engine performance.
Tools & Materials
- 14mm spark plug socket thin wall(Deep-well design preferred; magnetized if possible; 3/8 in drive recommended)
- Ratchet with 3/8 in drive(Choose a ratchet with a comfortable grip and fine tooth count (72+). Avoid loose-fitting handles)
- Extension bar (8-12 inches)(Helps reach deep or obstructed plugs without over-extending wrist)
- Gloves (nitrile or mechanics)(Protect hands and maintain grip on small parts)
- Torque wrench or torque adapter(Consult vehicle manual for exact torque; avoid over-tightening)
- Anti-seize compound (optional)(Only if approved by manual; many modern engines don’t require it)
- Magnetic tray or parts organizer(Keeps plugs and small bits from dropping)
- New spark plugs (correct heat range)(Handle with care; keep in anti-static bag until installed)
Steps
Estimated time: 30-45 minutes
- 1
Prepare workspace and tools
Set up a clean, well-lit area and lay out all tools and new plugs in removal order. This minimizes misplacement and speeds the process.
Tip: Double-check that you have a thin-wall 14mm socket specifically; using a standard socket can cause binding. - 2
Cool engine and disconnect battery
Allow the engine to cool completely. Disconnect the negative battery terminal to prevent shorts while working near electrical components.
Tip: Use insulated gloves and work on a dry surface to avoid slips. - 3
Locate plug location and pull back boots
Identify the correct plug for replacement and gently pull back the coil boot without tearing the boot or wire.
Tip: Label or note the order if removing multiple plugs. - 4
Remove the ignition coil/lead from the plug
Carefully disconnect the coil pack or ignition lead with a gentle wiggle, avoiding yanking which can damage connectors.
Tip: Keep track of hardware and placement for reassembly. - 5
Attach socket and reach into plug well
Slide the 14mm thin-wall socket onto the plug and attach a short extension if needed to clear surrounding components.
Tip: Ensure the socket fully engages the plug hex before turning. - 6
Loosen and remove the old plug
Turn counterclockwise with steady pressure to loosen, then lift straight out without twisting the plug's porcelain.
Tip: If it resists, back off and re-align to prevent cross-threading. - 7
Inspect and prepare the new plug
Check the new plug for damage, ensure the gap matches spec, and thread by hand to start squarely.
Tip: Do not force threads; misalignment can cross-thread. - 8
Install and torque the new plug
Thread in by hand until snug, then use a torque wrench to reach the manufacturer’s spec; avoid over-tightening.
Tip: Final snug should be a firm resistance with no gap between plug and seat. - 9
Reattach boot and test engine
Reconnect the coil boot, reassemble any covers, reconnect the battery, and start the engine to verify smooth operation.
Tip: Listen for misfires and check for any exhaust or fuel smell.
FAQ
What is a thin-wall socket and why use it for spark plugs?
A thin-wall socket has reduced wall thickness to fit into tight spaces around spark plugs, reducing interference with boots and wires and allowing proper torque without binding. It’s especially useful in modern engines with cramped bays.
A thin-wall socket is a slimmer version that fits where standard sockets can’t, making spark plug work safer and easier.
Can I substitute a standard 14mm socket?
If there is ample clearance and the boot won’t hit the tool, a standard 14mm socket may work. In tight engine bays, a thin-wall socket reduces the risk of boot interference and cross-threading.
A standard socket can fit some engines, but in tight spaces a thin-wall version is recommended.
Do I need anti-seize on modern spark plugs?
Follow your vehicle manufacturer’s guidance. Many modern engines do not require anti-seize and rely on specific coatings; misusing anti-seize can affect torque and heat transfer.
Check the manual—some cars don’t require anti-seize and others do under certain conditions.
Should I replace all spark plugs at the same time?
If one plug is due for replacement, it’s a good idea to inspect others and replace them as a set to maintain consistent performance and avoid repeated service.
Often it’s smart to replace all when you’re in there, for even performance.
Will this technique work on lawn mower engines?
Yes, many lawn mower engines use metric plugs and can benefit from a thin-wall socket, but always verify the plug size and heat range specified for your model.
This approach generally helps on small engines too, just check the plug size first.
Watch Video
Main Points
- Use a 14mm spark plug socket thin wall for tight spaces
- Verify compatibility before removing plugs
- Torque to manufacturer specs and avoid cross-threading
- Keep plugs organized and protect wiring during replacement
- Inspect both old and new plugs for signs of wear