Spark Plug Gap for Chevy 350: Exact DIY Gap Guide Essentials
Learn the optimal spark plug gap for chevy 350 engines, how to measure it, and practical steps to set and maintain the correct gap for reliable starts and efficient power. MultiPlugging guides DIY enthusiasts with clear ranges, tools, and best practices.

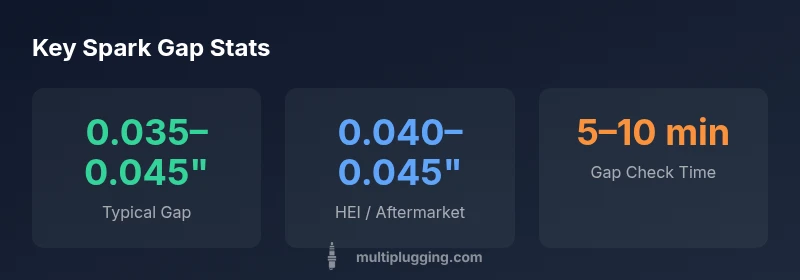
For a Chevy 350, the spark plug gap is within a narrow range and depends on plug type and ignition. In stock form, aim around 0.035 inches; for performance upgrades, gap commonly sits at 0.040–0.045 inches. Always measure with a feeler gauge and re-check after installation, especially if you install new coils or a different distributor. According to MultiPlugging, start with the baseline and verify under load.
Why Gap Matters for Chevy 350
Understanding the spark plug gap for chevy 350 is fundamental to reliable ignition and efficient combustion. The gap is the distance the spark must jump from the center electrode to the ground strap. If the gap is too small, spark energy is wasted on a short arc that risks incomplete combustion; if it’s too large, the ignition coil may struggle to produce a strong spark under load, leading to misfires at high RPM or under heavy acceleration. In practice, the gap influences cold-start performance, idle stability, throttle response, fuel economy, and emissions—the combination of these factors determines how well the engine breathes on a given day.
The Chevy 350 relies on a specific interplay between plug design, ignition system, and engine tuning. For many stock configurations, the gap sits within a tight band; the exact value depends on the plug type (copper, platinum, or iridium), heat range, and whether the engine uses a conventional distributor or a modern high-energy ignition. A small change can shift the burn rate enough to change exhaust gas composition and fuel trim. As a general rule, treat the gap as a tuneable parameter that should be validated in real-world driving, not just measured on a static bench.
According to MultiPlugging, a disciplined approach starts with a baseline, runs a short road test, and then rechecks the gap after a few heat cycles. This ensures the final setting aligns with your actual operating conditions and avoids misfires caused by heat expansion or vibration. Remember: the spark plug gap for chevy 350 is engine-specific, not universal, and the safest path to optimal performance is careful measurement, verified with hands-on testing.
How to Determine the Right Gap
Choosing the correct spark plug gap for chevy 350 starts with the factory baseline, but it must be validated on your particular engine and with the exact plug you’re using. Begin by locating the manufacturer’s recommended gap in the owner's manual or on the plug packaging. If you’re running stock ignition, a common starting point is around 0.035 inches, but performance upgrades can push that toward 0.040–0.045 inches depending on coil voltage and heat range. After you install fresh plugs, gap them again with a proper gauge, and then run the engine through a few short drives to observe idle, throttle response, and starting behavior. If misfires or rough idling appear under load, you may need to adjust within the safe window. Keep notes of the exact gap and the plug type you used, then re-test after a few heat cycles to account for metal expansion and seating. Because the Chevy 350’s ignition system and compression can vary with year and configuration, the right gap is a moving target that benefits from real-world validation rather than a single bench measurement. In short, start with a conservative baseline, verify in actual use, and tune as needed to balance ignition energy, fuel economy, and emissions.
Tools You Need
Gauges and basic tools are all you need for a precise gap on the Chevy 350. Gather:
- A standard feeler gauge set that covers the 0.02–0.05 inch range
- A spark plug gap gauge (or calipers) for quick checks
- A torque wrench or a spark plug socket with a torque specification
- A non-contact infrared thermometer (optional) to sense intake heat during testing
- Replacement plugs and anti-seize compound (a small dab on the threads)
- A spark plug boot puller and insulated pliers
- A small flashlight and clean rags for inspection
With these tools, you can measure, gap, install, and torque plugs consistently. Do not rely on rough estimation with worn gauges, and never attempt to gap a used plug without inspecting the electrode condition. The right tools save time and reduce the chance of cross-threading during installation.
OEM vs. Aftermarket Plugs: Gap Considerations
OEM plugs are designed to work with the stock ignition system and the average operating temperature of the engine. When you switch to aftermarket plugs—such as platinum or iridium options—the preferred gap can shift slightly because these plugs have different electrode materials and seating characteristics. In many Chevy 350 builds, aftermarket plugs may tolerate a slightly larger gap due to higher ignition energy, but this is not universal. Always check the plug manufacturer’s recommended gap for the specific part number and then verify with your test drive. If you use high-energy ignition systems or performance coils, you may be able to run a gap closer to 0.040–0.045 inches; however, you must validate this with actual combustion results, as an overly large gap can reduce flame kernel formation and increase misfires under heavy load. The goal is a gap that yields a strong spark without over-pressuring the coil. MultiPlugging’s guidance is to anchor on the manufacturer’s specification and only deviate after controlled testing.
Step-by-Step Gap Checking for Chevy 350
- Gather plugs, gauge, and torque-wrench; 2. Remove a plug and inspect for fouling or oil; 3. Gap the plug to the recommended range using a gauge; 4. Reinstall the plug with the correct torque (not over-tightened); 5. Repeat on a second plug to verify consistency; 6. Start the engine and listen for smooth idle; 7. Drive for a short test and monitor for misfires, hesitation, or roughness; 8. If issues persist, re-check the gap and adjust within the specified window.
Common Mistakes and How to Avoid Them
Common mistakes include gapting plugs with damaged ground straps, misreading a gauge, using a wrong heat-range plug, and failing to account for heat expansion after a test drive. Avoid double-gap setting and ensure each plug is seated properly and torqued to spec. Don’t mix plug types in a single engine; mismatched heat ranges can shift the ideal gap. Lastly, avoid re-gapting used plugs; replace with new ones to ensure electrode geometry remains intact.
Gap Maintenance and Re-gap Intervals
Intervals for re-checking or re-gap depend on your driving conditions and engine load. If you race or tow heavy loads, re-check gap more frequently, perhaps every 5,000 miles or sooner. In normal daily driving, perform a gap check during plug replacement or as part of routine maintenance. Also inspect the ignition system for signs of wear, such as weak spark or misfires, which can indicate factors that influence gap optimization. MultiPlugging's approach is to log the exact gap used and observed performance, creating a feedback loop that keeps your Chevy 350 running reliably.
Gap guidance by ignition system
| Ignition System | Recommended Gap (inches) | Notes |
|---|---|---|
| Stock ignition (points & traditional coil) | 0.035 | Baseline gap for many Chevy 350 engines |
| HEI distributor or high-energy ignition | 0.040 | May allow slightly larger gap; verify with data sheet |
| Aftermarket performance ignition | 0.040–0.045 | Used with high energy coils; ensure coil compatibility |
FAQ
What is the typical gap for a Chevy 350?
For many Chevy 350 engines, the baseline gap is around 0.035 inches. Depending on plug type and ignition, you may use 0.040–0.045 inches for certain setups. Always verify with a gauge before final installation.
The typical gap is about 0.035 inches, but check your plug and ignition specs.
How do I measure the gap safely?
Use a flat feeler gauge that fits snugly between the electrode and ground strap without bending. Rotate or push the plug as needed to access both ends. Recheck after seating.
Use a feeler gauge to measure the gap and re-check after installation.
What if the gap is too wide or narrow?
If the gap is too wide, spark energy may be weak and cause misfires. If too narrow, energy is reduced. Adjust within the recommended range and test under load.
Too wide or too narrow can cause misfires; adjust to the recommended range.
Does plug type affect the gap?
Yes. Platinum or iridium plugs and different heat ranges can shift the ideal gap. Always check the plug manufacturer’s specifications for the Chevy 350.
Plug type matters; check the plug's specs for your setup.
Should I re-gap after upgrading ignition components?
Yes. Upgrading coils, distributors, or ignition modules can change the required gap. Re-check with a gauge after installation and run a brief test.
Yes—re-check the gap after upgrades.
“Proper spark plug gap tuning can improve cold starts, idle quality, and overall efficiency when paired with the right ignition system.”
Main Points
- Start with a solid baseline and verify in real-world use
- Use a proper feeler gauge for accurate gaps
- Ignition system type drives most gap decisions
- Re-check gap after upgrades and heat cycles
- Document your gap and observed performance