Remove Spark Plug Tool: A Practical DIY Guide
Learn to remove spark plug tool safely with a clear, step-by-step approach. This MultiPlugging guide covers essential tools, safety checks, torque specs, and aftercare to keep your ignition system in top shape.

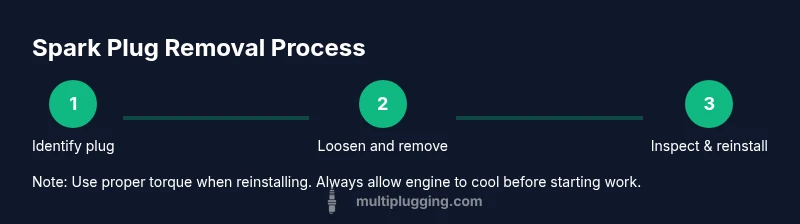
With the right approach, removing a spark plug tool becomes a safe, straightforward job. This guide shows you how to identify the correct tool, prep the engine, and apply proper torque to avoid thread damage. By following these steps, you can successfully remove a spark plug with minimal effort and avoid common mistakes.
What is the remove spark plug tool and why it matters
A spark plug removal tool is a specialized socket designed to grip the hex on your spark plug without damaging the ceramic insulator. Using the right tool helps prevent thread damage and cross-threading, especially in tight engine bays. In this guide, we focus on safe handling and proper technique so you can remove the plug confidently and prepare for replacement. According to MultiPlugging, choosing the correct socket size and a rubber insert reduces the risk of dropping or cross-threading the plug.
Safety first: PPE and engine prep
Before touching the engine, ensure the vehicle is cool and the battery is disconnected if recommended by the manufacturer. Wear hearing protection if you work around the compressor or tools, and use gloves to protect your hands from sharp edges and hot metals. Keep a clean workspace and avoid wearing loose clothing that can snag on moving parts. Also, set the parking brake and secure the vehicle on a level surface. This reduces the chance of accidental starts while you're working. According to MultiPlugging, a calm, well-lit workspace dramatically reduces mistakes when performing spark plug maintenance.
Tools and materials you’ll rely on
The core tool is a spark plug socket with a rubber insert to grip the plug without damaging the ceramic. Pair it with a ratchet and, for every engine, a torque wrench to bring the plug to the manufacturer’s spec. Keep an extension bar handy for deep wells and a clean, labeled workspace. Also gather a gap gauge to verify the plug gap if you reuse or test later, and safety gear like gloves and eye protection. Optional items include thread lubricant and a can of compressed air to clear debris before removal.
Preparedness: engine layout, plug location, and labeling
Take a moment to review your engine’s layout in the service manual or a reputable guide. Identify the correct spark plug lead or coil pack, and label or photograph its position to avoid mix-ups during reassembly. Ensure the engine is cool, the area around the plug is free of debris, and hoses or wires are moved gently aside. If you need to remove a coil pack, do so with the right disconnect technique to avoid damaging the electrical connector.
Common mistakes and how to avoid them
Common errors include using the wrong size socket, cross-threading the plug, or forcing a stuck plug. Never yank on a stuck plug; use penetrating oil and a gentle rocking motion with the socket. Avoid using a power impact tool on a spark plug due to the risk of overtightening or breaking the porcelain. Keep debris out of the well and inspect the plug for wear or oil fouling after removal.
Maintenance after removal
If you replace the plug, check the gap and seating; install by hand to avoid cross-threading, then torque to spec. Recheck the adjacent plugs for tightness after a run-in period. If you reuse a plug, verify the gap with a gauge and note any signs of wear. Clean and inspect the boot and wires; a damaged boot can cause misfires after replacement. Store tools clean and ready for the next service.
Different engines, different quirks
Some engines use a long reach well, others have fragile ceramic insulators close to tubes or water jackets. Always consult the vehicle’s manual for exact torque specs and plug type; what works on one engine may damage another. For diesel or high-performance engines, follow manufacturer recommendations and consider professional service if you encounter stubborn plugs.
Tools & Materials
- Spark plug socket with rubber insert(Size matches plug hex (commonly 5/8" or 13/16").)
- Ratchet wrench(Use a comfortable handle length for leverage.)
- Torque wrench(Set to manufacturer’s spark plug torque spec.)
- Extension bar(Optional for deep wells.)
- Gloves and safety glasses(Protect hands and eyes from debris and hot surfaces.)
- Compressed air or blower(Useful to clear dirt before removing the plug.)
- Spark plug gap gauge(Verify gap if you plan to reuse the plug or test new ones.)
- Anti-seize compound(Follow manufacturer guidance; many modern plugs don’t require it.)
- Replacement spark plug(Choose the correct heat range and reach for your engine.)
Steps
Estimated time: 15-25 minutes
- 1
Identify the correct spark plug and prep the engine
Locate the plug to remove by confirming the cylinder and plug size. Ensure the engine is cool and, if required by your manual, disconnect the battery. This step protects you from burns and prevents accidental electrical contact during removal.
Tip: Double-check the plug size before selecting a socket to avoid damaging the plug or cylinder head. - 2
Select the removal tool
Choose the correct spark plug socket with a rubber insert that matches the plug hex (common sizes are 5/8" and 13/16"). Attach a ratchet and extension if needed to reach the plug.
Tip: Ensure the insert is clean and free of grit that could drop into the plug well. - 3
Clear the area and secure the workspace
Wipe away loose dirt around the plug boot and surrounding components. If needed, lightly blow away debris with compressed air to prevent contamination as you work.
Tip: Label wires or take a photo of the layout before disconnecting anything sensitive. - 4
Loosen the plug with steady pressure
Place the socket on the plug hex and turn counterclockwise with a calm, steady motion. Do not use brute force; if it resists, pause and re-evaluate to avoid thread damage.
Tip: Keep the plug aligned to avoid cross-threading during removal. - 5
Remove and inspect the plug
Lift the plug straight out and inspect for wear, fouling, or oil contamination. Compare with the replacement plug’s condition and note any gaps or damage observed.
Tip: Take a quick photo for reference when shopping for a replacement. - 6
Prepare for replacement or reinstallation
If replacing, gap the new plug to spec and coat the threads with a light lubricant if required by the manufacturer. Hand-tighten first, then torque to spec to finish.
Tip: Avoid over-lubricating threads if your engine manufacturer advises against it.
FAQ
What tools do I need to remove a spark plug?
The core tools are a spark plug socket with a rubber insert, a ratchet, an extension, and a torque wrench. You may also need a gap gauge and anti-seize depending on your vehicle. Always verify fit before starting.
You’ll need a spark plug socket, ratchet, extension, and a torque wrench. A gap gauge is handy if you’re checking the plug gap.
How do I know it’s safe to remove the plug?
Make sure the engine is completely cool before touching any components. Disconnect the battery if your manual requests it, and wear gloves and eye protection to reduce injury risk.
Let the engine cool completely, disconnect the battery if advised, and wear PPE.
What if the plug is stuck?
Apply penetrating oil and wait a few minutes. Use a proper socket and a steady rocking motion. Do not force with excessive torque.
Don’t force it. Apply penetrating oil and gently rock the plug free.
Should I reuse a spark plug after removal?
Check the plug for wear, fuel/oil fouling, and the correct gap. If in doubt, replace with a new plug to maintain performance.
Usually replace worn plugs; check the gap if you’re reusing.
Is anti-seize necessary on spark plugs?
Most modern engines do not require anti-seize. Follow the vehicle manufacturer’s guidance for compatibility with corrosion protection.
Check your manual; many engines don’t need anti-seize.
Watch Video
Main Points
- Identify the correct tool before starting
- Work with a cool, clean engine environment
- Torque the plug to the manufacturer’s spec
- Inspect plug and boot for wear after removal
- Document observations for future maintenance