NGK Iridium IX Spark Plug Guide: DIY Diagnostics, Replacement & Maintenance
Learn to diagnose, replace, and optimize ngk iridium ix spark plugs with practical steps, safety tips, and maintenance guidance from MultiPlugging.

You will learn how to inspect, remove, and replace ngk iridium ix spark plugs, verify proper gap, and optimize ignition performance. The guide covers common wear symptoms, how to tighten plugs without overtorquing, which tools to use, and safety steps to avoid shocks or cross-threading. By following these steps, a DIYer can complete the process with confidence.
What ngk iridium ix Means for Your Engine
The ngk iridium ix is a premium spark plug designed to deliver durable performance and reliable ignition for a wide range of gasoline engines. The iridium alloy tip provides long life and high resistance to wear, which can translate to smoother idle, quicker starts, and improved fuel efficiency in some applications. When you hear about ngk iridium ix, you’re hearing about a plug built for consistent, durable performance under demanding conditions. For car owners and DIY enthusiasts, understanding what makes this plug different helps you decide if it’s the right choice for your vehicle. The term ngk iridium ix appears frequently in service manuals and repair guides because it represents a well-regarded design option in the spark plug ecosystem. As you work with this plug, always refer to your engine manufacturer’s recommendations and the NGK catalog to confirm the exact part number for your model. For many common engines, ngk iridium ix plugs can provide a balance of longevity and performance that many drivers appreciate, especially under steady highway cruising and urban stop-and-go scenarios. In the broader spark plug landscape, ngk iridium ix sits among the high-performance categories that emphasize durability and responsiveness without requiring specialty fuel or unusual maintenance routines. This article from MultiPlugging explores how to service ngk iridium ix plugs with practical, hands-on steps tailored for car owners and DIY enthusiasts.
In short, ngk iridium ix is a durable, premium plug option that can improve ignition reliability when installed correctly. The key is to match the plug to the engine’s gap, seating, and heat range requirements, then perform the replacement with careful torque and cleanliness. The definition of success here is a smooth start, steady idle, and consistent power delivery across typical driving cycles.
NGK Iridium IX: Benefits, Limitations, and Fitment
NGK’s Iridium IX line uses a fine-wire iridium alloy center electrode and a platinum ground electrode to extend life and resist fouling. Compared with copper-core plugs, iridium alloys can maintain a sharper, more consistent spark over a longer period. For many engines, ngk iridium ix offers better cold weather performance, stable idle, and improved overall combustion efficiency.
However, no spark plug is a universal solution. Some engines are optimized for different heat ranges or electrode designs. It’s essential to verify the recommended heat range and seating style for your specific vehicle. The ngk iridium ix is commonly chosen for modern engines that benefit from resilient ignition in variable conditions, but you should consult the owner’s manual or a trusted parts catalog to confirm compatibility. For DIYers, this means asking, “Is ngk iridium ix the right match for my rotor, coil pack, and cylinder head design?” The answer often depends on engine architecture, firing order, and performance goals. This is where practical diagnosis and careful replacement steps pay off.
From a maintenance perspective, ngk iridium ix can be more forgiving of minor neglect because of its longer lifespan. Yet even premium plugs require clean installation, proper torque, and correct gap (if applicable) to achieve the intended performance gains. The MultiPlugging team emphasizes that the best results come from following the exact parts spec and performing routine inspection at regular service intervals. The goal is reliability and consistent ignition, not just a quick upgrade in perceived power.
Preparing Your Workspace: Tools, Safety, and Plan
Before you touch a plug, prepare a clean, well-lit workspace and confirm you have the correct ngk iridium ix part for your engine. Gather essential tools like a spark plug socket, a ratchet, a torque wrench, and dielectric grease for ignition boot protection. A magnetic pickup tool can be handy to retrieve dropped components in tight spaces. Place a blue shop rag or a small container under the area you’ll work in to catch any dropped parts. Safety is paramount: disconnect the negative battery cable to minimize the risk of shock, avoid touching hot surfaces, and work in a ventilated area. If your engine uses coil-on-plug ignition, you’ll need to locate the coil packs and the spark plug wells; in engines with traditional distributor systems, you’ll follow the distributor route. Planning the replacement around a cool engine is essential to prevent burns. Finally, verify you have a clean torque spec from the manufacturer and a way to verify the plug seating depth so you don’t over-tighten after installation. The right tools, a clear plan, and safety awareness are the foundation of a successful ngk iridium ix installation.
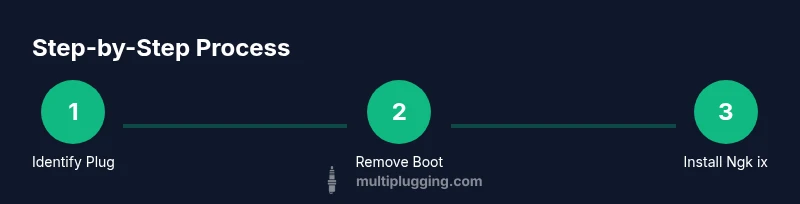
Step-by-Step Replacement Process (Overview)
The replacement process for ngk iridium ix follows a logical sequence: identify the correct plug, prepare the workspace, remove the old plug, inspect the threads and seating surface, check or adjust the gap if required, install the new plug with proper torque, reattach the ignition coil or boot, and perform a test run. This overview is designed to complement the detailed steps below, providing a conceptual roadmap so you know what to expect at each stage without getting lost in the details. Remember that precise torque and gap values should come from the engine manual or NGK’s official specifications for ngk iridium ix, as mismatches can affect heat transfer, spark reliability, and long-term durability. While you may encounter different layouts across vehicles, the core approach remains consistent: protect the threads, avoid cross-threading, and ensure a snug but not over-tightened fit. With the right tools and careful technique, ngk iridium ix replacement becomes a manageable DIY task that yields reliable ignition performance.
Gap, Torque, and Seating: What to Check
A key part of working with ngk iridium ix is ensuring correct seating depth and a proper gap (if your model uses a gap specification). The gap determines the arc distance the spark must jump, influencing ignition reliability under varying engine loads. In many ngk iridium ix installations, the plug features a pre-set gap, but some engines require a final check. Tools like a feeler gauge or a calibrated gap tool can help confirm the target distance. For best results, you should follow the engine manufacturer’s recommended torque settings to prevent thread damage and to avoid loosening under vibration. Always hand-tighten first, then use a torque wrench to reach the specified value. If you’re uncertain about the torque spec for ngk iridium ix, consult the vehicle service manual or the NGK compatibility guide for your exact engine code. A careful seating approach reduces compression leaks and misfire risk. The goal is a secure, clean seal with optimal heat transfer and spark delivery for consistent combustion. The MultiPlugging approach emphasizes patience, verification, and tidy routing of ignition wires to prevent arcing or interference with moving parts.
Maintenance, Cleaning, and Longevity Tips
Even premium ngk iridium ix plugs benefit from clean service conditions. When removing plugs, wipe the plug wells and surrounding areas to prevent debris from entering the cylinder. If you notice heavy fouling, perform a light cleaning of the threads and the seating surface before installing the new plug. After installation, re-connect boots or coil packs and ensure proper routing away from hot surfaces or sharp edges that could cause wear. Dielectric grease on the inside of the boot can improve sealing and facilitate future removal. Regularly inspecting plug wires for cracks or wear also helps maintain reliable ignition. While ngk iridium ix is designed for longer life, routine maintenance and early symptom detection are essential to maximize performance and avoid unexpected failures in the middle of a drive. MultiPlugging’s experience shows that proactive checks often prevent costly repairs later on.
Troubleshooting Common Issues with ngk iridium ix
If you notice a misfire, rough idle, or reduced fuel efficiency after installing ngk iridium ix, re-check the installation steps. Ensure the plug is seated correctly and that the boot is fully seated on the hex and electrode. Inspect coil packs and wire harness connections for corrosion or loose fittings. In some cases, a simple reinstallation or boot reseating resolves minor ignition issues. If the problem persists, confirm that the plug size and heat range match your engine’s design and return to the service manual for diagnostic tests. For vehicles with an advanced engine control system, a misfire may trigger a diagnostic trouble code (DTC). In such cases, scan data and verify the fuel system, ignition coils, and wiring before replacing components beyond the ngk iridium ix themselves. The goal is to isolate the issue to a plug-related cause or rule it out quickly to avoid unnecessary replacements.
Verifying Performance After Replacement and Final Thoughts
After completing ngk iridium ix installation, start the engine and listen for a smooth idle. A quick test drive can help confirm that acceleration is stable and that there’s no hesitation or stalling during load changes. If everything runs cleanly, you’ve likely achieved the intended improvement in ignition reliability and engine responsiveness. If you still notice symptoms, revisit torque, seating, or gap measurements and verify part compatibility with your engine’s heat range and firing characteristics. The overall aim is reliable starts, steady idle, and consistent power output. Throughout this process, the MultiPlugging team encourages you to rely on official specifications and match your approach to your specific vehicle’s requirements.
Tools & Materials
- spark plug socket(likely 5/8 in or 13/16 in depending on plug size)
- ratchet or breaker bar(short-handled preferred for access)
- torque wrench(to verify recommended torque)
- gap tool or feeler gauge(only if your ngk iridium ix requires gap adjustment)
- dielectric grease(protects boot contact and makes future removal easier)
- anti-seize compound(apply sparingly to threads if recommended by manual)
- magnetic pickup tool(helps retrieve dropped parts)
- shop rag(keep the area clean and catch debris)
Steps
Estimated time: 45-60 minutes
- 1
Power down and locate plugs
Turn off the engine, remove keys, and disconnect the negative battery to minimize shock risk. Locate the spark plugs and identify the ngk iridium ix units based on your engine code. This initial scan ensures you’re working on the correct cylinders and model.
Tip: Double-check your vehicle’s service manual for the exact plug location. - 2
Prepare workspace and safety checks
Set up a clean workspace, drain any residual fuel fumes if necessary, and gather all tools. Ensure the engine is cool before touching spark plugs to avoid burns.
Tip: Keep a spare container handy in case you drop a plug into the bay. - 3
Remove ignition boot and access plug
Carefully loosen and remove the ignition coil boot or ignition wire boot from the ngk iridium ix. Gently twist to break the seal and lift away without pulling on the wire itself.
Tip: Tip: use a small amount of dielectric grease on the contact point when reinstalling to seal against moisture. - 4
Inspect the old plug and threads
Check for oil fouling, heavy carbon buildup, or worn threads. If threads look damaged, stop and consult a professional rather than forcing a replacement.
Tip: If you see cross-threading marks, do not force the plug in—back out and start again. - 5
Gap check on the new ngk iridium ix
If your engine requires an explicit gap, measure the new ngk iridium ix with a gap tool and adjust carefully. Many ngk iridium ix plugs come pre-gapped, but verify against the service manual and the NGK catalog.
Tip: Use a steady hand; avoid bending the tip while checking the gap. - 6
Install the new plug by hand
Thread the plug by hand to prevent cross-threading, then snug with the ratchet before applying final torque with a torque wrench to the manufacturer spec.
Tip: Always start by hand to feel resistance and ensure proper alignment. - 7
Reattach boot and wires
Reconnect the ignition boot or wire, ensuring it seats fully and clicks into place. Route wires to avoid contact with hot surfaces and moving parts.
Tip: Check that each boot is fully seated and not loosely connected. - 8
Restart and test drive
Start the engine and listen for a smooth idle. Take a short test drive to confirm power delivery is consistent and that there’s no misfire or rough behavior.
Tip: If you notice hesitation, re-check seating, gap, and torque before continuing.
FAQ
What exactly makes ngk iridium ix different from standard plugs?
The ngk iridium ix uses an iridium center electrode for longer life and better wear resistance, providing more consistent ignition under many operating conditions. It often delivers improved cold-start behavior and smoother idle compared with traditional copper plugs, depending on engine design.
Ngk iridium ix plugs use iridium for longer life and cleaner ignition, which can improve cold starts and idle—though results depend on your engine.
Are ngk iridium ix worth the extra cost?
For many modern engines, ngk iridium ix plugs offer durability and reliability that can justify the cost over several maintenance cycles. Always compare with your vehicle’s requirements and maintenance schedule to decide.
It depends on your engine and maintenance plan, but many drivers find ngk iridium ix worth the longer life and dependable ignition.
How long do ngk iridium ix plugs last?
Durability varies by engine and driving conditions, but iridium-plated plugs are designed for longer service life than copper cores. Check your owner’s manual for expected intervals and inspect during routine maintenance.
Iridium plugs typically last longer than copper ones, but consult your manual for exact intervals and inspect if you drive aggressively or in harsh conditions.
Can I reuse old ngk iridium ix boots after replacement?
Boots can often be reused if they are in good condition and properly seated. If you notice any cracking, stiffness, or poor sealing, replace the boot to prevent misfires.
Reusing boots is okay if they’re flexible and seal well; replace them if they show wear or damage.
What should I do if I still have a misfire after installing ngk iridium ix?
Re-check the plug seating, gap, and torque first. If misfire persists, diagnose ignition coils, wires, and related sensors, and consider a professional inspection if needed.
If misfire persists, verify seating and gap, then check coils and wires; seek professional help if needed.
Watch Video
Main Points
- Always verify plug compatibility before install
- Use the correct torque to avoid thread damage
- Inspect and clean wells to prevent fouling
- Test drive to confirm performance improvements
- Follow official NGK and engine-manufacturer specs