Iridium Spark Plug NGK: Installation and Maintenance Guide
A comprehensive DIY guide to selecting and installing NGK iridium spark plugs for optimal ignition, efficiency, and longevity. Learn compatibility, gap handling, torque specs, and maintenance with practical steps.

This how-to guide helps you select and install iridium spark plugs NGK for improved ignition and longevity. You’ll learn what makes iridium plugs different, how to verify compatibility for your engine, and a clear install procedure with gap checks and torque specs. Follow these steps to optimize performance and avoid common installation mistakes.
Why brand reliability matters for spark plug choices
Choosing the right spark plug matters more than you might think. When you see the label iridium spark plug ngk, you’re looking at a design that emphasizes durability and efficient ignition. According to MultiPlugging, sticking with a trusted brand reduces misfires and simplifies maintenance across a wide range of engines and climates. NGK iridium plugs use a fine-wire center electrode and a small center-ground electrode, which allows for a thinner center gap and longer life. This combination helps engines start reliably, deliver smooth idle, and maintain fuel efficiency over time. For DIY enthusiasts, selecting a reputable brand also means you’ll have easier access to replacement parts and consistent torque values, reducing the risk of cross-threading or seat damage during installation. In short, brand reliability translates to fewer surprises during service windows and a more predictable performance profile.
Iridium spark plugs: NGK vs alternatives
Iridium plugs, platinum, and copper designs each have their own strengths. NGK iridium plugs stand out for their durability and resistance to electrode wear, making them a common upgrade for vehicles experiencing misfires, hard starting, or reduced efficiency. In contrast, copper plugs typically offer lower cost and a wider heat range but wear out faster under high-demand conditions. Platinum is a middle ground, featuring improved longevity over copper but generally not matching iridium in endurance. When you choose iridium spark plugs NGK, you’re prioritizing long life and steadier ignition under varying temperatures and loads. The MultiPlugging analysis shows that drivers who switch to iridium from copper often report smoother acceleration and fewer fouling issues in modern engines with coil-on-plug ignition systems.
NGK part numbers and compatibility: selecting the right iridium NGK
Selecting the proper NGK iridium plug starts with matching it to your engine’s spec sheet and NGK’s catalog guidance. The exact part number is determined by heat range, thread size, and reaching the correct reach for your cylinder head. While I won’t list specific SKUs here, the process is straightforward: check your vehicle’s owner manual, consult NGK’s official catalog, and verify the plug’s reach and thread type. If you have an older engine, confirm that improvements in ignition are compatible with your ignition coils. For most modern engines, NGK iridium plugs deliver reliable performance with a flush seating and a precision-finished electrode, but compatibility checks remain essential to avoid fouling or improper seating. Based on MultiPlugging research, using the correct NGK iridium plug is a top factor in achieving consistent combustion across a broad range of operating conditions.
Compatibility and engine-specific notes
Engines differ in their spark plug footprint, ignition coil configuration, and recommended heat ranges. Before buying, confirm that the iridium plug NGK you intend to install is listed as compatible with your make, model, and engine code. Some engines require specific heat ranges or electrode configurations to avoid pre-ignition or misfires. Always reference the factory service information or NGK’s compatibility guides for your vehicle. If your vehicle has a long-life spark plug warranty or a modernized ignition system, NGK iridium plugs typically align with those specifications, but always verify with your specific model year and market variant. This extra verification step saves time and avoids an unnecessary replacement cycle.
Iridium spark plug characteristics: gap, heat range, longevity
Iridium plugs feature a fine-wire center electrode that enables a durable center-ground electrode and a stable arc. The reduced wear means the gap remains stable over a longer period, which supports smoother idle and efficient combustion. The heat range describes how quickly the plug can transfer heat away from the combustion chamber; picking the right range helps prevent fouling at cold starts or pre-ignition at high loads. Longevity is a key advantage of iridium plugs, often resulting in longer service intervals than copper or platinum designs. When you install NGK iridium plugs, consult the packaging or vehicle manual for the exact gap and heat range recommended by NGK for your engine, and never guess. Proper gap and seating are essential for optimum performance and avoiding misfires.
Tools and safety considerations
DIY spark plug work should be done with a clean, organized workspace and proper safety gear. Gather a spark plug socket with rubber insert, a torque wrench, a gap tools, a light set, and eye protection. Before starting, disconnect the negative battery terminal to prevent any electrical shorts while handling ignition components. Keep the work area free of debris, and place used parts in a designated container to avoid losing small components in the engine bay. Hydration of the boot surfaces and boot ends helps ensure a good seal, so consider applying a small amount of dielectric grease to the inside of the boot if recommended by the vehicle manufacturer. This reduces the likelihood of moisture intrusion and eases future disassembly.
The install plan: overview and preparation
Plan the work to minimize heat soak and keep the engine bay clear. Start by identifying all spark plugs that require replacement, then map out the sequence to reduce confusion and misplacement of wires. Prepare the tools and replacement plugs in a labeled tray. If your engine uses coil-on-plug ignition, plan to remove one coil pack at a time and reseat it correctly to avoid misalignment. Finally, verify you have the correct torque specs and seating depth before tightening. This approach minimizes mistakes and improves reliability on the first start.
Step-by-step installation: overview to prepare
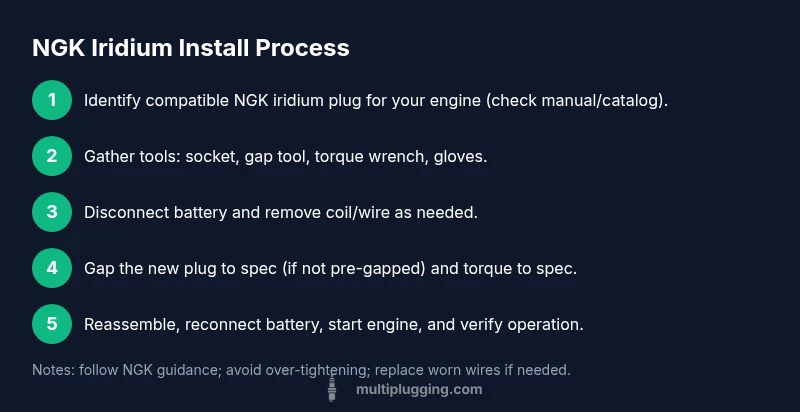
This section provides a concise roadmap for the installation steps, which are detailed in the dedicated STEP-BY-STEP block. You’ll locate the spark plugs, remove old plugs without cross-threading, gap the new NGK iridium plugs to the manufacturer’s spec, and torque them to the recommended value. Reinstall the coils or leads, reconnect the battery, and run the engine to verify that everything is functioning correctly. Following these steps in order helps you avoid common pitfalls and ensures a secure, long-lasting seal.
Step-by-step installation overview (part 2)
The actual actions are broken down in the STEP-BY-STEP block, but here is a quick preview: identify the correct plug, remove the old plug carefully, inspect the plug well, gap the new plug if required, thread it by hand, then torque to spec and reattach the coil. Finally, reconnect the battery and perform a test start and short drive to confirm normal operation. Always work one cylinder at a time to prevent misrouting of any wires or boots.
Common pitfalls and maintenance tips
A few recurring mistakes can jeopardize the benefits of NGK iridium plugs. Avoid forcing a plug into a tight seat, which can damage threads or seating surfaces. Never apply excessive torque, and always use the torque wrench to reach the manufacturer’s recommended value. If you notice misfires or rough idle after installation, re-check the spark plug gap, verify the wiring/seal after reassembly, and inspect the ignition coils for wear. Keep a maintenance log with replacement dates to track service intervals and ensure consistent engine performance.
Troubleshooting misfires and symptoms after install
If you experience misfires after replacing NGK iridium plugs, first check the plug seating depth and gap against the engine’s spec. Inspect the ignition wires and boots for cracks or moisture, and test the coil packs to ensure they are delivering adequate spark. Use an OBD-II scanner to identify misfire codes and confirm whether a cylinder is consistently failing. If misfires persist, consider checking the fuel system and air intake as root causes, and consult the NGK catalog for any model-specific caveats.
Maximizing durability and post-install care
To maximize longevity, keep your engine running at efficient operating temperatures and avoid aggressive long-duration high-RPM driving immediately after a plug change. Record the replacement date and part number as part of routine maintenance. If you drive in harsh conditions or frequent stop-and-go traffic, you may benefit from more frequent checks. Regularly inspect ignition components and replace damaged wires or coils to maintain performance and prevent misfires.
Tools & Materials
- Spark plug socket with rubber insert(Choose the size that fits NGK plug hex (commonly 5/8)
- Torque wrench(Use to achieve manufacturer-recommended torque)
- Spark plug gap tool(Use to verify or set the gap to engine spec)
- Dielectric grease(Optional; helps seal boots and reduce moisture ingress)
- Safety gloves and eye protection(Protect hands and eyes from debris and chemicals)
- Owner’s manual or NGK compatibility guide(Verify heat range, reach, and thread size for your engine)
- Replacement ignition wires or coils (if needed)(Only replace worn components to prevent misfires)
Steps
Estimated time: 60-90 minutes
- 1
Identify the correct NGK iridium plug
Consult the owner’s manual or NGK catalog to confirm the exact iridium NGK plug family and compatibility for your engine. Record the part number you’ll purchase to avoid mismatches. This step ensures you choose the right heat range, thread size, and reach before you begin.
Tip: double-check cross-reference charts and note any engine revisions that may affect compatibility - 2
Prepare workspace and gather tools
Set up a clean workstation with good lighting. Lay out the spark plug socket, gap tool, torque wrench, and replacement plugs in order. Wearing gloves reduces skin contact with solvents and oils and keeps your hands clean during the process.
Tip: keep a spare plug and a small container for screws or lost parts - 3
Disconnect the battery and access ignition components
Disconnect the negative terminal of the battery to prevent accidental shorting while removing the ignition wires. If your engine uses coil packs, identify the correct coil for the first cylinder and gently disconnect its connector without pulling on the wires.
Tip: label wires or take a photo before removal to ensure proper reassembly - 4
Remove the old spark plug
Using the spark plug socket, detach the old plug by turning counterclockwise until it comes free. Avoid using excessive force; if the plug resists, re-check the boot and ensure you are turning the plug, not the boot.
Tip: work one cylinder at a time to prevent misrouting or misplacing connectors - 5
Inspect the plug well and boot
Look for oil leaks, carbon buildup, or other contamination around the plug well. Clean any debris with a non-conductive brush or clean rag. Confirm the boot seating surface is intact and free of cracks before installing the new plug.
Tip: a clean well reduces the risk of debris entering the combustion chamber during installation - 6
Gap the new NGK iridium plug (if required)
If the NGK iridium plug you bought isn’t pre-gapped to your engine’s specification, use a gap tool to adjust it to the exact value recommended by the manufacturer. Do not force or over-gap, as that can damage the insulator or electrode.
Tip: always verify the gap against the vehicle’s spec before seating - 7
Thread and seat the new plug by hand
Carefully thread the new plug into the opening by hand to avoid cross-threading. Once it threads smoothly, you can proceed to the final tightening with a torque wrench. Hand-threading helps locate the threads without damaging the seat.
Tip: keep the plug straight to prevent cross-threading - 8
Torque the plug to spec and reassemble
Use the torque wrench to tighten the plug to the recommended specification for your engine. Reconnect the ignition coil or wire and ensure the boot is fully seated. Repeat for any remaining cylinders.
Tip: do not exceed torque spec; overtightening can damage threads - 9
Reconnect battery and test start
Reconnect the negative battery terminal. Start the engine and listen for smooth operation. If the engine misfires or runs rough, re-check the plugs and wiring, and consider a short test drive to verify stability.
Tip: monitor for any check-engine light or misfire codes after initial start - 10
Final checks and documentation
Inspect all tool marks, tighten any loose connections, and document the replacement date and plug type for future maintenance. Keep the old plugs as a reference for wear patterns if needed.
Tip: maintaining a simple maintenance log helps plan future service intervals
FAQ
What makes NGK iridium spark plugs different from copper plugs?
NGK iridium plugs use a fine-wire electrode and a durable center-ground design, delivering longer life and stable ignition. Copper plugs typically cost less but wear faster and can foul under demanding driving. Iridium offers a good balance of longevity and performance for modern engines.
NGK iridium plugs use a durable design that lasts longer and fires reliably, especially in modern engines. Copper plugs are cheaper but wear out faster.
Can I use anti-seize on NGK iridium plugs?
NGK generally recommends against using anti-seize compounds on iridium plugs, as it can alter the effective torque and seating. Follow the manufacturer’s instructions and use the torque spec for proper installation.
Usually you shouldn’t use anti-seize on iridium plugs; use the proper torque instead.
Do NGK iridium plugs require a different torque spec?
Torque specs vary by engine and plug size. Always refer to the vehicle’s service manual or NGK’s catalog for the exact torque value, and tighten accordingly with a torque wrench to avoid under- or over-tightening.
The torque depends on your engine; use the exact value from the manual or NGK catalog.
Are NGK iridium plugs compatible with all engines?
Most modern engines can run NGK iridium plugs, but some high-performance or specialty engines require specific heat ranges. Always verify compatibility in the official NGK catalog or your owner's manual.
Check the exact compatibility for your engine in the NGK catalog or manual.
Should I gap iridium plugs or are they pre-gapped?
Many NGK iridium plugs come pre-gapped, but always confirm the gap against your engine’s specification before installation. If adjustment is needed, use a proper gap tool and avoid bending the electrode.
Usually they’re pre-gapped, but always verify with your manual.
Watch Video
Main Points
- Verify NGK iridium plug compatibility with your engine.
- Torque each plug to the manufacturer spec; avoid guesswork.
- Inspect and replace worn wires or coils if needed.
- Record part numbers and service dates for future maintenance.
- The MultiPlugging team recommends NGK iridium plugs for most engines.