Faulty Spark Plug Troubleshooting: A DIY Guide
Learn how to diagnose and fix a faulty spark plug with practical, DIY-friendly steps. From symptoms to replacement, this guide helps car owners restore smooth running and prevent misfires safely.

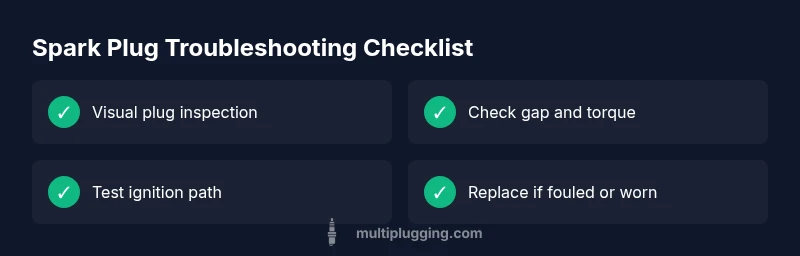
Most problems from a misfire or rough engine trace back to a faulty spark plug. Start by pulling the plug boot, inspecting the ceramic and metal corrosion, and checking the gap. If the plug is fouled, carboned, oil-soaked, or has a damaged electrode, replace it with a new plug of the correct heat range and torque.
What is a faulty spark plug?
A faulty spark plug is a worn or damaged component in the ignition system that prevents a consistent spark from igniting the air-fuel mixture in a cylinder. When a plug fouls, carbon deposits, oil seepage, or electrode erosion occur, combustion becomes uneven or fails entirely. This disruption can cause rough idle, misfires, reduced power, and decreased fuel economy. According to MultiPlugging, a faulty spark plug is a common trigger for performance issues in everyday vehicles. The MultiPlugging team found that simple visual checks and proper gap adjustments can diagnose many problems early and prevent costly repairs. Understanding what makes a plug fail helps you decide between cleaning and replacement, and guides you toward choosing the right heat range and torque for your engine.
In many engines, plugs are a relatively quick maintenance item, but neglect or using an improper plug can accelerate wear. Always verify that the plug type matches your vehicle’s specification and that you’re using the correct torque when reinstalling. The right plug supports efficient combustion, helps your engine run smoothly, and minimizes emissions. As you work through diagnosis, keep in mind that ignition issues can masquerade as fuel system problems, so a methodical approach is essential.
Symptoms you might notice with a faulty spark plug
- Rough idle, engine misfires, or hesitation during acceleration.
- Difficulty starting, especially in cold weather or after short trips.
- Poor fuel economy and reduced engine performance.
- Visible signs of wear: worn electrodes, oil fouling, or heavy carbon buildup on the ceramic.
- The check engine light may illuminate if misfires affect the catalytic converter.
These symptoms warrant a closer look at the spark plug condition, especially if other ignition components (wires, coils) appear in good shape. If you’ve recently serviced the plug area or suspect fouling, inspect each plug individually and compare to manufacturer specs. Quick visual checks can prevent unnecessary part replacements and keep your engine running reliably.
Common causes of spark plug failure and how they present
Spark plugs fail for several reasons, and understanding the root cause helps you pick the right fix. Worn electrodes reduce spark energy, leading to misfires and rough running. Fouling from carbon buildup can insulate the electrode and weaken the spark, especially under high-load conditions. Oil fouling, often due to worn piston rings or valve guides, creates a heavy glaze that plugs cannot burn off. Incorrect heat range or improper gap can cause pre-ignition, fouling, or accelerated wear. Lastly, damaged wires or coils can mimic plug trouble, so testing the entire ignition path is important when symptoms persist after replacement.
If you notice frequent misfires on one cylinder, start by inspecting that cylinder’s plug first, then move to others. A systematic approach reduces guesswork and saves parts costs. MultiPlugging recommends documenting observed symptoms and visual signs to track improvement after a fix.
How to diagnose a faulty spark plug at home (step-by-step flow)
Begin with a quick, non-destructive check:
- Remove the spark plug boot and inspect the plug for fouling, oil, or physical damage.
- Verify the electrode gap against the manufacturer’s spec using a feeler gauge.
- Compare the plug color: light tan is typical; dark or oily plugs suggest oil or fuel issues.
Next, perform a functional test:
- Ground the gap briefly to confirm a strong spark. If the plug shows no spark or a weak spark, inspect the ignition coil and wires in parallel.
- Swap a known-good plug into the suspect cylinder to see if misfire follows the plug or stays with the cylinder.
If misfires persist after plug replacement, broaden your check to the ignition system and fuel delivery. Document what you test and the results to identify the next step. When in doubt, seek professional help to avoid misdiagnosis and potential engine damage.
Cleaning vs replacing: when to clean and when to replace
Cleaning a plug can remove surface deposits, but it rarely restores full performance for worn or oil-fouled plugs. If deposits are light and the electrode isn’t eroded, a careful cleaning followed by re-gap and re-testing might buy time. In most cases, replacement is the safer, more reliable option, especially for vehicles with hard-to-find or high-cost plugs, or when replacement timing aligns with maintenance schedules. Spark plugs are a wear item; neglect accelerates the need for premature replacement and can mask deeper issues in the ignition or fuel systems. Always use new plugs that match your engine’s heat range and torque requirements, and recheck gaps after installation.
Step-by-step: replacing a spark plug (most common approach)
- Gather tools and replacement plugs: you’ll need a spark plug socket, a ratchet, extension, and the correct heat-range plug for your engine. Have anti-seize compound (optional but helpful for avoiding thread corrosion) and a torque wrench if your engine requires precise torque.
- Locate and access the plugs: remove any engine covers or components that block access. Make sure the engine is cool before touching plugs.
- Remove the ignition coil or wire boot: gently twist and pull to avoid wire damage. Label wires if you’re working on multiple cylinders to ensure correct reassembly.
- Remove the old plug: use a steady motion to break loose the plug, avoiding sudden twists that could strip threads.
- Inspect the plug: look for fouling, oil, or heavy wear. Compare with new plugs to confirm replacement is necessary.
- Gap and prepare the new plug: ensure the electrode gap matches spec and lightly coat the threads with anti-seize if you choose to use it.
- Install the new plug: thread by hand first to avoid cross-threading, then tighten to the manufacturer’s torque. Reconnect the ignition coil/wire boot.
- Reassemble and test: replace any covers, start the engine, and listen for smooth operation. If misfires persist, re-check the ignition system or schedule a diagnostic with a professional.
Maintenance and prevention tips
- Perform regular visual inspections of plugs during routine maintenance.
- Use quality plugs and the correct heat range for your engine.
- Maintain crisp ignition wires and coils; replace damaged or aging components.
- Avoid over-tightening plugs; torque to spec to prevent thread damage.
- Keep a clean intake and fuel system to reduce unseen fouling.
Start with safety and safety steps
- Disconnect the battery when removing components near electrical connections to avoid shocks or shorts.
- Allow the engine to cool before working on ignition parts to prevent burns.
- Work in a well-ventilated area and keep flammable liquids away from moving parts.
Steps
Estimated time: 45-60 minutes
- 1
Gather tools and parts
Collect a spark plug socket, ratchet, extension, torque wrench (if required), and the correct heat-range plugs for your engine. Prepare a clean workspace and wear safety gloves. Pro tip: Have a magnetized socket to retrieve dropped parts quickly.
Tip: Keep spare plugs and a spark plug gap tool handy. - 2
Access and label
Remove any engine covers or obstructions. If replacing multiple plugs, label each ignition wire or coil so you reinstall them to the same cylinder. Ensure the engine is cool before touching the plugs. Pro tip: Take a quick photo to reference during reassembly.
Tip: Work on one cylinder at a time to reduce confusion. - 3
Remove the old plug
Loosen and remove the old plug with a proper socket. Use a steady, straight motion to avoid damaging threads. If the plug is stubborn, apply a small amount of penetrating oil and wait a few minutes. Pro tip: Do not force the plug out; back it off a bit and then remove.
Tip: Be gentle to protect cylinder head threads. - 4
Inspect and decide
Examine the plug’s electrode wear, gaps, and deposits. If there are oil deposits, heavy carbon buildup, or a damaged electrode, replacement is usually the best option. Pro tip: Compare the old plug to a new one to judge wear visually.
Tip: Oil-fouled plugs often mean another issue (oil control) is present. - 5
Prepare the new plug
Check the gap on the new plug and adjust to spec if needed. Lightly coat the threads with anti-seize compound or a small amount of dielectric grease as recommended by the manufacturer (optional). Pro tip: Gap the plug only after threading to avoid mismeasurement.
Tip: Use the correct torque; over-tightening can strip threads. - 6
Install the new plug
Thread the plug by hand to avoid cross-threading, then tighten to the specified torque using a torque wrench. Reconnect the ignition coil or plug boot securely. Pro tip: Use a torque wrench for consistent results.
Tip: Recheck all wires/coils before starting the engine. - 7
Reassemble and test
Replace any covers, reconnect the battery, and start the engine. Listen for a smooth idle and note any lingering misfires. If symptoms persist, proceed to a broader ignition or fuel system check. Pro tip: Run the engine for a few minutes to ensure stable operation before closing up.
Tip: Keep a record of maintenance for future reference.
Diagnosis: Engine misfire, rough idle, hard starting, or reduced power
Possible Causes
- highWorn or fouled spark plug
- mediumIncorrect spark plug gap
- lowDamaged spark plug wire or ignition coil
Fixes
- easyInspect plug for fouling or wear and replace if necessary
- easyCheck and adjust plug gap to spec
- mediumTest ignition coil and wiring; replace faulty components as needed
FAQ
What are the most common signs of a faulty spark plug?
Rough idle, engine misfires, hard starting, and reduced power are typical indicators. Visual checks for fouling, oil deposits, or worn electrodes help confirm the issue.
Common signs include rough idle and misfires. A quick visual check can confirm if the plug is worn or fouled.
Can a faulty spark plug cause damage to the catalytic converter?
Yes, persistent misfires from a faulty plug can overheat and damage the catalytic converter over time. Addressing ignition problems promptly protects the exhaust system.
Yes. Misfires from a bad plug can harm the catalytic converter if left unfixed.
Should I clean a fouled spark plug or replace it?
Fouled plugs generally perform poorly even after cleaning. Replacement with a new plug is recommended for reliability, especially in modern engines.
Usually replace rather than clean when fouling is present.
How do I know the correct gap for my spark plug?
Check the owner’s manual or the spark plug specification for the exact gap. Use a feeler gauge and adjust carefully if needed.
Check the gap in the manual and adjust with a feeler gauge.
Is replacing spark plugs a difficult DIY job?
For many cars it’s doable with basic tools, but some engines have tight spaces. Follow safety steps and torque specs; stop if unsure.
It’s doable for many cars, but don’t hesitate to seek professional help if you’re unsure.
How often should spark plugs be replaced?
Intervals vary by vehicle and plug type. Refer to manufacturer specs and inspect plugs at regular service intervals.
Check your car’s manual for the recommended replacement interval.
Watch Video
Main Points
- Inspect plugs for fouling and wear.
- Replace faulty plugs with correct heat range.
- Check ignition components if misfires persist.
- Torque and gap specs matter for reliability.
- Regular checks prevent future faults.