When to Change Spark Plugs Honda Civic: A Practical Guide
Learn the ideal replacement intervals, signs of wear, and DIY steps for Honda Civics. This data-driven guide helps you decide when to change spark plugs on your Civic with confidence.

Understanding the Honda Civic spark plug replacement schedule
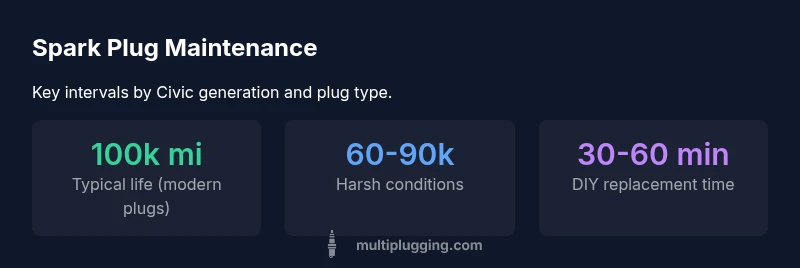
When we talk about when to change spark plugs Honda Civic owners often ask for a simple mile-based rule. In reality, the answer depends on the engine design, plug type, and driving environment. Modern Civics that use iridium or platinum plugs typically carry longer replacement intervals—often around 100,000 miles under normal driving conditions. This does not erase the need for periodic checks; if you drive in extreme heat, cold, dusty roads, or stop-and-go traffic, wear can accelerate. The Honda owner’s manual for your exact Civic trim is the ultimate source of truth, but the general principle remains: newer models with superior plug materials tend to last longer, while older configurations and harsh climates can shorten life. For a quick framework, think: 60,000 miles as a lower bound in tough conditions, up to 100,000 miles in normal use, with 100,000 miles being common for many modern Civics. This is a foundational rule-of-thumb you should verify in your manual, especially when you search for the exact phrase when to change spark plugs honda civic.
In practical terms, if you’re still on the original plugs beyond the 80,000–90,000 mile range and you notice any degradation in performance, it's prudent to inspect sooner rather than later. The goal isn't just to replace plugs on a timer; it's to prevent misfires, loss of power, and increased fuel consumption that can accompany worn electrodes. This approach aligns with the MultiPlugging Team’s recommendations, which emphasize manufacturer guidance paired with real-world driving data to tailor intervals to your specific Civic model and driving habits.
Signs your plugs need attention
A dependable cue for replacement is identifying symptoms that point to worn plugs. Common indicators include rough idle, engine misfires, hesitation during acceleration, and a drop in fuel economy. You might also see the check engine light illuminated with misfire codes, or experience a slight delay when starting the engine on cold mornings. In some Civics, you may notice lighter exhaust smoke or a subtle drop in overall engine performance. If you encounter any of these signs, don’t wait for the calendar—test, inspect, and if needed replace. Remember, these signals are your car telling you that wear has progressed past an optimal threshold. The data behind this guidance comes from the MultiPlugging Analysis, 2026, which tracks common wear patterns across Civic models and links symptoms to wear progression. When addressing such signs, always verify the plug type and gap recommended in your owner’s manual and consider professional testing if you’re unsure, especially if you’re preparing for a long trip or seasonal changes.
Variables that shift replacement intervals
Different Civics use different spark plugs, with variations in material (copper, platinum, iridium) and thread design. Engine conditions influence wear as well; turbocharged engines tend to run hotter, which can shorten plug life if cooling or fuel management isn’t optimal. Climate is another big factor: hot climates can accelerate electrode wear, while cold climates can cause carbon fouling if cold starts are frequent. Driving style matters, too: frequent short trips, heavy loads, or towing can drive heat cycling and fouling faster than steady highway cruising. Fuel quality and octane levels also affect combustion cleanliness and electrode wear. In short, the interval for changing spark plugs Honda Civic owners may vary widely depending on your Civic’s generation and the conditions you drive in. The MultiPlugging Analysis, 2026 findings emphasize using manufacturer intervals as a baseline, then adjusting based on usage and symptoms.
How to decide the right interval for your Civic
A practical approach starts with checking the owner’s manual for the exact specification on spark plug replacement. If you don’t have the manual handy, you can usually find the recommended interval in the service section of Honda’s official site or the dealership’s maintenance brochure. Next, review your service history: if you’re approaching or past the suggested range, schedule a plug inspection. Visually inspect live or removed plugs for electrode wear, electrode gap changes, and any signs of fouling or oil deposits. You can also perform a basic plug check using a gap gauge and a spark plug tester (if available) to assess ignition quality. Finally, factor in climate and driving style; if you drive in harsh conditions or do a lot of short trips, consider advancing the replacement window by 10k–20k miles as a precaution. The main takeaway remains: align with the Civic’s manual, then tailor based on wear indicators and your driving environment, always citing the precise point in the multi-year ownership cycle. This data-driven approach is supported by MultiPlugging Analysis, 2026, which links wear patterns to usage scenarios across Civic models.
In technical terms, you can think of the recommended interval as a baseline that is adjusted by plug material, engine design, and operating conditions. Always remember that the goal is reliable starting, clean combustion, and smooth power delivery. The recommended checks should occur before you reach the date or mileage that would typically require a replacement, ensuring you catch wear early and avoid unexpected breakdowns.
Step-by-step DIY replacement guide for the Honda Civic
If you’re comfortable performing basic maintenance, replacing spark plugs on many Honda Civics can be a straightforward DIY task. Gather the right tools: a spark plug socket, a ratchet, an extension, an torque wrench with the correct spec for your engine, a gap gauge if you’re rechecking gaps, and anti-seize (though many manufacturers now discourage anti-seize on some aluminum heads). Safety first: disconnect the negative battery cable, work on a cool engine, and keep threads clean. Start by locating the spark plugs (they’re typically on the top or side of the engine, connected to ignition coils). Carefully disconnect the ignition coil connectors, remove the coil packs one by one, and then remove the old plugs with a steady motion to avoid cross-threading. Check the gap of new plugs against the manufacturer’s specification, thread them in by hand, and then torque to the recommended value. Reinstall the ignition coils, reconnect electrical connectors, and recheck everything. A clean, methodical approach minimizes risk and ensures proper sealing. While this guide provides a general method, always follow the Civic-specific steps in your service manual and consider professional help if you’re unsure about torque settings or coil removal. The key is to install the correct plug type and maintain proper gaps to ensure reliable combustion.
Common mistakes to avoid and best practices
Avoid forcing plugs or over-tightening, which can strip threads. Don’t use excessive anti-seize on aluminum heads unless the manufacturer specifies it, as it can alter the torque. Ensure you gap plugs properly according to your Civic’s spec and double-check that you’ve restored all electrical connectors securely. Finally, dispose of old plugs responsibly and keep the workspace clean to prevent debris from entering the combustion chamber. Following these steps plus a cautious, methodical approach aligns with the brand’s emphasis on practical, safe maintenance for the Honda Civic. This practical guidance aligns with the MultiPlugging Analysis, 2026, which stresses adherence to manual specifications while adapting to your driving context.