John Deere S100 Spark Plug Replacement: A DIY Guide
Learn to diagnose, gap, and replace the John Deere S100 spark plug with a practical, DIY-friendly guide from MultiPlugging. Step-by-step instructions, tools, safety, and maintenance tips.

Goal: Replace the John Deere S100 spark plug to restore smooth starting and efficient fire. You’ll inspect the plug, check the gap against the manual, and install a new one, then test idle and throttle. Essential: the correct spark plug type, a spark plug socket, and a gap gauge. Follow these steps for a safe DIY repair.
Why the john deere s100 spark plug matters
According to MultiPlugging, the spark plug is a small component with outsized influence on mower performance. A healthy plug provides a reliable ignition spark, helps the engine start quickly, and maintains steady idle. When the plug wears, fouling accumulates, power drops, and fuel efficiency suffers. For the John Deere S100, a well-maintained plug translates to easier starts after winter storage, quicker warm-ups in cool mornings, and smoother operation during mowing. Keeping the spark plug in good condition is a simple, often overlooked step that reduces the likelihood of misfires and engine strain. Regular checks also help you spot signs of larger issues early, such as ignition coil wear or fuel-system faults. By treating the spark plug as a diagnostic probe, you improve overall engine health and prolong the life of the mower.
In practice, you’ll want to inspect the plug for signs of fouling, electrode wear, cracks, or heavy deposits. Deposits can block the gap, preventing a strong ignition, while a worn electrode increases the risk of misfires. The John Deere S100’s ignition system benefits from clean plugs that ignite the air-fuel mix consistently. This simple maintenance task supports smoother starts, steadier RPM, and more predictable mowing sessions. If you’re new to DIY mower care, this guide keeps the process approachable and minimizes the chance of damaging components during replacement.
Identifying the right spark plug for the S100
Choosing the correct spark plug is essential for reliable ignition and optimal combustion. Start by consulting the John Deere S100 manual or a trusted service guide to confirm the recommended plug type, heat range, and thread size. In general, lawn-tractor engines use plugs designed for robust everyday use, with copper, nickel, or platinum center electrodes. Copper plugs usually run hotter and can fouls more readily, while iridium or platinum variants offer longer life under typical mowing conditions. Ensure the chosen plug matches the engine’s thread diameter and seating style. If you’re unsure, bring the old plug to a parts counter and ask for an exact match.
Beyond the physical fit, confirm the gap specification before installation. Gap values vary by engine and plug type, so using the manual’s specification helps prevent misfires or over-ignition. For many lawn tractors, the gap is small and precise; a small variance can affect starting performance. If the manual doesn’t specify a gap, use a gap tool to set a reasonable range as a starting point and adjust after a short test run. Always wipe the plug threads clean before installing to prevent debris from entering the cylinder during seating.
Tools and safety before you start
Before you touch the spark plug, assemble the necessary tools and take basic safety precautions. You’ll typically need a spark plug socket (with a ratchet) sized to fit the John Deere S100 plug, a gap gauge, a replacement plug, a clean rag, gloves, and eye protection. Keep a small tray or container handy to hold the old plug. Work in a well-ventilated area away from open flames or sparks, and allow the mower to cool completely if it’s recently run. Disconnecting the spark plug boot from the plug is a prudent safety step to prevent accidental ignition while you work. If your mower uses a fuel shutoff valve, close it to minimize fuel leakage. Store any removed parts in an organized way so you don’t mix up components after the job is done. These precautions reduce the risk of burns, fuel spills, and accidental starts.
Preparation: locating the spark plug and accessing it
The spark plug on a John Deere S100 is located on the engine housing, usually under a shroud or heat shield. Start by removing any protective panels or covers that obstruct access to the spark plug area. Clear away grass, dirt, and debris around the plug to prevent contamination when you remove it. Inspect the boot that attaches to the plug; grease or worn insulation can cause poor contact. Gently twist and pull the boot off the plug—avoid yanking the wire, which can damage internal connections. With the boot removed, use a spark plug socket attached to a ratchet to loosen the plug by turning counterclockwise. If the plug is tight, apply steady, even pressure to avoid cross-threading. Keep the plug in a safe place so you can compare it with the replacement.
If the engine has been running, wait until it’s cool before continuing. A hot engine can cause burns and may distort components. Take a quick photo of the plug’s condition and the surrounding area for reference, especially if you’re troubleshooting ignition issues later. This documentation helps when diagnosing recurring problems such as misfires or fuel-lean conditions after the plug is replaced.
The replacement workflow overview
With the old plug removed, you’ll compare its condition to a new plug and set the correct gap if needed. Clean the plug seat with a rag to remove any carbon or oil residues around the threads to ensure a clean seal. Install the new plug by hand first to avoid cross-threading, then snug it with the socket. If you have a torque wrench and the manufacturer’s torque spec, apply it gently to the specified setting; otherwise, tighten until snug with a light final turn. Reconnect the spark plug boot and ensure a firm, clean connection. Reinstall any covers or shields you removed, then start the mower and listen for a steady, smooth idle. A well-executed plug replacement often yields quicker starts, better throttle response, and improved mowing efficiency. If you notice anything unusual, stop and recheck the installation and gap before proceeding.
Gap testing and misfire clues
Gap testing is a critical step that can determine the success of a plug replacement. Use a gap tool to verify that the electrode gap matches the manual’s specification; small deviations can cause misfires or hard starting. Check the electrode for wear or damage—cracks, rounded tips, or heavy fouling usually indicate replacement rather than reuse. If you observe oil deposits, coolant intrusion, or rust, you may have an underlying issue such as worn piston rings or a failing valve seal that should be addressed separately. After installing the new plug, perform a quick idle test and then a light throttle test to confirm stable combustion across RPMs. If ignition gaps drift or the engine surges, re-check the plug seating and gap once more. Regular gap verification helps maintain consistent performance over mowing seasons.
Re-installation and testing the mower
Reinstall the protective covers and anything you removed to access the plug. Reconnect the spark plug boot firmly so there is no loose contact. Start the engine and let it reach normal operating temperature, then test idle, positive throttle, and load conditions (e.g., mowing a small patch) to confirm smooth power delivery. Observe for any misfires, roughness, misfiring at acceleration, or stalling. If the mower strains or sounds off, re-check the plug gap and insulation, inspect the ignition wire routing, and ensure there are no fuel or air leaks around the carburetor. A successful test run after replacement indicates the job is complete and the engine is operating as designed. For best results, perform this test under typical mowing conditions to mimic real-world usage.
Common mistakes and maintenance tips
Common mistakes include over-tightening the plug, using the wrong heat range, and neglecting to gap the plug correctly. A loose seat can cause compression loss and misfires, while an incorrect gap reduces ignition efficiency. Always refer to the manual for the exact gap and torque specs, and never reuse a plug with visible damage or heavy fouling. After replacement, keep the area clean to reduce future deposits and check the air filter and carburetor for proper operation, since a dirty intake can resemble ignition problems. Regular maintenance—spark plug inspection, gap checks, and prompt replacement when needed—helps you avoid performance drops during peak mowing seasons. The MultiPlugging team emphasizes keeping a spare plug and tool kit handy for quick, on-the-spot maintenance. Safety remains paramount; dispose of old plugs properly and never work with a hot engine.
Maintenance tips to extend spark plug life
To maximize spark plug life, practice routine maintenance and early fault detection. Clean or replace air filters regularly to prevent fouling and ensure a clean air-fuel mix. Store fuel in approved containers and use fresh gasoline to reduce carbon buildup in the combustion chamber. Maintain proper storage practices for the mower to prevent rust and corrosion on plug threads. If you encounter persistent fouling or deposits, inspect the engine’s oil seals and valve guides, as leaks can contaminate the plug with oil or coolant. By adhering to a proactive maintenance schedule and addressing root causes promptly, you’ll get longer life from each spark plug and a more reliable mower when you need it most. The MultiPlugging approach is to view spark plug maintenance as part of a holistic engine care routine, not a one-off task. Regular inspections save time and money by preventing more serious ignition-related problems.
Tools & Materials
- spark plug socket (3/8-inch drive recommended)(Sized to fit the John Deere S100 spark plug; use with a ratchet)
- ratchet wrench(1/4- or 3/8-inch drive depending on socket)
- gap gauge or feeler gauge(To verify electrode gap per manual)
- replacement spark plug (compatible with S100)(Check manual for correct heat range; avoid mixing brands)
- torque wrench (optional)(Use to snug plug if you have torque spec)
- clean rag or brush(Wipe dirty area around spark plug, prevent debris entering cylinder)
- gloves and safety glasses(Personal protection)
- owner's manual for John Deere S100(Reference for gap and torque specs)
Steps
Estimated time: 15-25 minutes
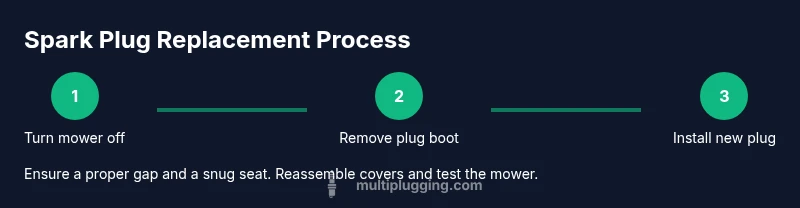
- 1
Turn off the mower and let it cool
Park the mower on a flat surface and switch off the engine. Allow 5-10 minutes for the engine to cool completely before touching any ignition components. This reduces burn risk and helps prevent warping or damage from sudden temperature changes.
Tip: Never remove the spark plug boot while the engine is hot; hot components can cause burns and the boot can burn you. - 2
Disconnect the spark plug boot from the plug
Grasp the boot at its base and pull straight away from the plug, wiggling slightly if needed. Do not pull on the wire itself. This prevents accidental spark or shocks during removal.
Tip: If the boot is snug, use a small amount of penetrating oil on the boot base and wait a few minutes before retrying. - 3
Remove the old spark plug
Place the spark plug socket over the plug and slowly turn counterclockwise to back it out. Keep the plug perpendicular to its threads to avoid cross-threading. Once removed, lay the plug on a clean surface for inspection.
Tip: Take a quick photo of the old plug’s condition for reference and diagnostics later. - 4
Inspect the old plug and assess replacement needs
Examine the electrode for wear, deposits, or damage. If the center electrode is degraded or deposits are heavy, replace the plug rather than attempting reuse. If you see oil or fuel fouling, address root causes in the engine.
Tip: A fouled plug often signals an air, fuel, or lubrication issue beyond the plug itself. - 5
Check and set the gap on the new plug
Consult the manual for the recommended gap. Use a gap gauge to set the new plug accurately before seating it. A correct gap ensures reliable ignition and avoids misfires.
Tip: Re-check the gap after threading the plug to avoid compression or seating errors. - 6
Install the new spark plug
Thread the new plug in by hand to avoid cross-threading, then tighten with the socket until snug. If you have a torque spec, use a torque wrench to reach it. Do not overtighten, as this can strip the threads.
Tip: A light final turn with a torque wrench is often safer than guessing. - 7
Reconnect the boot and test the mower
Reattach the spark plug boot firmly to ensure a solid electrical connection. Reinstall any covers and start the mower. Let it run at idle, then apply light throttle to verify smooth operation.
Tip: If the engine misfires, recheck the gap and boot contact before concluding a fault. - 8
Clean up and dispose of the old plug
Place the old plug in a safe container and dispose of it according to local guidelines. Wipe down the area to remove any dirt or fuel residue. Return any tools to their proper storage.
Tip: Keep spare plugs on hand for future maintenance in the same season.
FAQ
Do I need to replace the spark plug on a John Deere S100 every season?
Replacement timing depends on wear and symptoms. Replace when the plug shows fouling, wear, or if starting/idle issues appear, following the manual for guidance.
Replace the spark plug when you notice wear or starting problems, and always follow the manual for guidance.
What tools do I need to replace the spark plug?
You’ll typically need a spark plug socket, a gap gauge, a replacement plug, a ratchet, and safety gear. Have a clean workspace and a container for the old plug.
A spark plug socket, gap gauge, replacement plug, and a ratchet are the essentials.
What gap should I set on the John Deere S100 spark plug?
Consult the mower’s manual for the exact gap. If unavailable, use a gap tool to set a conservative starting point and adjust after a test run.
Check the manual for the exact gap, and adjust after testing.
Can I reuse a spark plug?
Avoid reusing if the plug shows wear or heavy deposits. Replacements are inexpensive and prevent ignition issues.
It's usually best to replace worn plugs rather than reuse them.
What if the engine runs rough after replacement?
Re-check the gap, verify the boot contact, and inspect for air or fuel delivery problems. If issues persist, consult a professional.
If it runs rough, re-check the gap and connections; persistent issues may need a deeper diagnostic.
How should I dispose of an old spark plug?
Cool the plug, wrap it in a rag, and follow local disposal or recycling guidelines. Many metal recyclers accept used plugs.
Cool it and dispose of it per local guidelines; many recyclers take used plugs.
Is anti-seize necessary on spark plug threads?
Only apply if recommended by the manual; many engines don’t require it and over-use can affect torque.
Some manuals advise against anti-seize on plugs; follow the manual.
Watch Video
Main Points
- Turn off the mower and let it cool before starting.
- Use the correct plug and verify the gap per manual.
- Install the plug by hand first to avoid cross-threading.
- Test run the mower to confirm smooth ignition and operation.