Toyota Tacoma Spark Plug Change: DIY Guide for 2026
Learn how to replace spark plugs on a Toyota Tacoma with our step-by-step DIY guide. Tools, safety tips, plug types, and maintenance notes to keep your engine running smoothly.

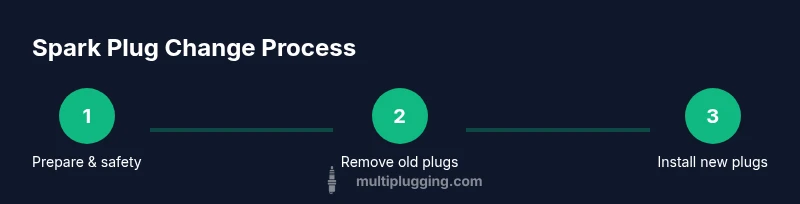
You can change Toyota Tacoma spark plugs yourself by gathering the right tools, preparing the engine, removing the old plugs, inspecting ignition wires and boots, installing new plugs with the correct gap, and rechecking everything. This quick process saves time and money when done carefully by following the step-by-step guide.
Why Toyota Tacoma spark plug change matters
Regular spark plug maintenance keeps your Tacoma running smoothly, preserves fuel economy, and helps meet emissions standards. Worn or fouled plugs can cause misfires, rough idle, hard starting, and reduced power—problems that worsen under load or in extreme weather. For DIY enthusiasts, changing plugs at the manufacturer-recommended interval can prevent these symptoms and extend engine life. Always consult the owner's manual for engine-specific intervals and plug types, as Toyota’s schedules differ by model year and engine option. The MultiPlugging analysis from 2026 emphasizes using the correct heat range, gap, and thread engagement to prevent cross-threading and misfires. This section explores signs of wear, how to verify condition, and how to choose the right replacement based on your driving style.
Tacoma-specific considerations and engine variants
Toyota Tacomas have several engine options across model years, which influences plug type, reach, and accessibility. Some engines place coil packs directly above the plugs, while others route boots to reach the plugs from a different side of the valve cover. Accessibility can vary with trim level, engine cover design, and whether shields or hoses must be moved. Always verify the exact plug type, gap specification, and service interval in your year- and engine-specific manual. The MultiPlugging Team notes that choosing the correct heat range and ensuring a clean installation are more important than chasing a single replacement method. If you tow regularly or drive in dusty, hot, or cold environments, plan for a longer replacement session and check boots for wear after reassembly.
Preparation and workspace setup
Set up a clean, well-lit work area on a level surface. Park with the parking brake engaged, and disconnect the negative battery terminal to prevent accidental short circuits while near electronic components. Gather the right tools, wear eye protection and gloves, and lay out a small parts tray to keep each plug and boot organized. Confirm you have the correct spark plugs for your Tacoma’s engine variant and review the service manual for any model-specific notes. A tidy workspace reduces the risk of dropping fasteners or misplacing components during reassembly.
Safety and engine access considerations
Safety comes first when working around hot engines or restricted spaces. If the engine has just run, allow it to cool for 15–30 minutes before starting. Use a non-slip mat and keep pets or children away from the work area. When removing hoses or shields to gain access, photograph the routing first and avoid bending or stretching wiring beyond its tolerance. Proper safety gear, such as gloves and eye protection, helps prevent minor injuries that can derail a DIY project.
Removing old plugs and inspecting ignition components
Begin by detaching the coil pack or boot from each plug carefully to avoid damaging the boot. Use the spark plug socket with an extension to loosen and remove the old plug straight out to prevent cross-threading. Inspect the plug for electrode wear, oil; fouling or coolant signs may indicate intake or gasket issues that should be addressed separately. Keep each plug in a labeled tray and compare wear across cylinders. Before installing new plugs, wipe the threads clean and ensure the plug wells are free of debris. This inspection step helps identify potential issues beyond plug wear.
Installing new plugs and finishing touches
Select the replacement plugs recommended for your Tacoma’s engine and verify the electrode gap with a gap tool before installation. Thread the plug in by hand to avoid cross-threading, then tighten per the vehicle manual guidance without over-tightening. Apply dielectric grease to the boot interiors if you use it, and coat the plug threads lightly if your manual recommends anti-seize. Reconnect the coil packs or boots, ensuring each connector seats fully, then reassemble any shields or covers you removed. Reconnect the battery and visually confirm there are no tools or parts left in the engine bay. A careful, deliberate approach reduces the chance of a cross-thread or misalignment.
Reconnect, test, and final checks
With everything back in place, start the engine and listen for a smooth idle and steady RPM. If you notice a rough idle, misfire, or a check-engine light, recheck the plug seating, boot connections, and coil integrity. During the first test drive, note any hesitation, surging, or unusual exhaust sound. If symptoms persist, re-scan for codes and inspect the affected cylinder’s components. Keep a simple log of changes, parts used, and observed behavior for future maintenance decisions.
Maintenance mindset: planning ahead
After a successful plug change, set reminders for future replacements based on your engine variant and driving conditions. Periodically inspect plug boots for cracks or moisture and verify boot seating during routine maintenance. Storing a small kit with spare plugs, dielectric grease, and a basic torque wrench can shorten future service times. By planning ahead, you minimize downtime and maximize engine reliability for daily drivers and weekend explorers alike.
Tools & Materials
- Spark plugs (correct type for your Tacoma engine)(Check gap and type per owner's manual; keep 1–2 spare plugs.)
- Spark plug socket with rubber insert(Typically 5/8" or 13/16"; confirm fit.)
- Ratchet with 3/8-inch drive(Main driver for removing plugs.)
- Ratchet extension (6-12 inches)(Helps reach difficult plugs.)
- Torque wrench(Use the manual's recommended torque; avoid over-tightening.)
- Gap gauge or feeler gauge(Verify correct electrode gap before installation.)
- Anti-seize compound (optional)(Some manuals discourage use; follow Toyota guidance.)
- Dielectric grease (optional)(Helps boots remove and reinstall easily.)
- Gloves and safety glasses(Personal protection.)
- Magnetic tray or container(Keeps small parts from getting lost.)
- Shop rag or microfiber cloth(Wipe spills and keep areas clean.)
Steps
Estimated time: 60-90 minutes
- 1
Prepare workspace and safety
Park on level ground, engage the parking brake, and disconnect the negative battery terminal. Put on safety glasses and gloves, remove jewelry, and clear the area. Gather all tools and spare plugs; verify engine is cool before starting.
Tip: Take clear photos of wiring and boot positions before disconnecting anything. - 2
Open engine cover and locate plugs
Remove any engine cover or shields needed to access the spark plug area. Identify coil packs or plug boots above each plug. Note the order and layout to avoid mix-ups during reassembly.
Tip: Consult the manual or a service diagram for your exact engine variant. - 3
Disconnect ignition coils or boots
Carefully detach each coil pack or boot from its plug without twisting or pulling hard. Keep track of which boot belongs to which cylinder to prevent confusion later.
Tip: Use a gentle rocking motion if a boot is snug; don’t yank. - 4
Loosen and remove old plugs
With a proper spark plug socket and extension, loosen each plug straight up to avoid cross-threading, then remove it. Inspect the threads for damage and keep plugs in a labeled tray for comparison.
Tip: If a plug is stuck, don’t force it; stop and recheck access. - 5
Check gaps and assess wear
Compare the old plugs to the new ones and verify electrode gap using a gap gauge. Clean the plug wells if any debris is present to prevent contamination of the new plugs.
Tip: Use the same gap on all plugs unless the manual specifies otherwise. - 6
Install new plugs
Thread the new plugs by hand to ensure proper engagement, then tighten following the manual’s guidance without over-tightening. Optionally apply a small amount of anti-seize if recommended by the manual.
Tip: Stop if you feel resistance; back out and realign. - 7
Reconnect coils/boots and reinstall components
Reconnect each coil pack or boot, ensuring full seating. Reinstall any engine covers or shields, then reconnect the battery.
Tip: Turn the key to the accessory position briefly to verify boot seating before full start. - 8
Test start and final checks
Start the engine and listen for a smooth idle. Look for any diagnostic codes; if present, recheck the affected cylinder wiring and plug seating.
Tip: Take a short test ride to confirm there are no hiccups or misfires.
FAQ
Do I need to replace ignition coils at the same time as spark plugs on a Toyota Tacoma?
Coils are inspected during the plug change; replace them if you notice cracks, arcing, or consistent misfires. In many cases, replacing worn boots or coils together with plugs reduces future misfire risk.
Inspect the ignition coils and boots for wear; replace them if you see cracks or arcing to prevent future misfires.
What tools are required for a Tacoma spark plug change?
You’ll generally need a spark plug socket, extension, ratchet, torque wrench, gap tool, and the correct plugs for your engine. A battery disconnect tool and safety gear are essential for safe work.
Typical tools include a spark plug socket, extensions, a torque wrench, and a gap gauge; always follow the manual.
How often should I replace spark plugs on a Tacoma?
Follow Toyota’s maintenance schedule in your owner's manual, which varies by engine and year. The interval is influenced by driving conditions and the type of plugs installed.
Check your manual for the recommended interval, as it depends on the engine and plug type.
Can I use aftermarket spark plugs in place of OEM for Tacoma?
Aftermarket plugs can be used if they meet the OEM specifications for heat range and reach. Avoid mismatched heat ranges that can cause misfires or poor performance.
Yes, but you must match the heat range and gap to the manufacturer’s specs.
What are common signs of bad spark plugs in a Tacoma?
Symptoms include rough idle, engine misfires, reduced power, hard starts, and lower fuel efficiency. If you notice these, inspect plugs and related ignition components.
Look for rough idle, misfires, or reduced power as indicators to check the plugs.
Is it safe for a DIYer to change spark plugs on a Tacoma?
Yes, with proper precautions: disconnect the battery, use the right tools, and follow the manual. Don’t rush, and stop if you encounter resistance or injury risk.
Yes, as long as you follow safety steps and use the right tools.
Watch Video
Main Points
- Verify plug type and gap before installation
- Use proper tools and organization to avoid cross-threading
- Inspect boots and coils for wear during replacement
- Test engine performance after replacement and note any changes