Toyota Camry Spark Plugs: Replacement and Maintenance Guide
Learn to diagnose, replace, and maintain spark plugs in the Toyota Camry with clear, step-by-step instructions. Tools, torque guidance, safety tips, and troubleshooting from the MultiPlugging team.

Replacing worn spark plugs on a Toyota Camry improves fuel efficiency, smoother acceleration, and reliable idle. This quick answer highlights the key requirements, signs of wear, and what to expect during a safe, step-by-step replacement. You’ll learn how to choose the right plugs, torque correctly, and avoid common missteps in your Camry.
Why Spark Plugs Matter for Toyota Camry
Spark plugs are the tiny yet critical components that ignite the air-fuel mixture in each cylinder. In a Toyota Camry, healthy plugs support clean combustion, steady idling, and smooth acceleration. Worn or fouled plugs can cause rough idle, hesitation on takeoff, reduced fuel economy, and misfires that trigger the check-engine light. The right spark plug type and heat range are essential to maintain efficient burning, especially as engines across model years evolve with tighter emissions controls. According to MultiPlugging, spark plug health is a high-impact, low-effort maintenance task that a confident DIYer can tackle with common tools. Regular inspection of electrode wear, gap, and deposits helps prevent more costly repairs later. For many Camry variants, a plug that maintains consistent gap and efficient combustion will deliver better throttle response and more stable idle across city and highway speeds. If you’re planning a DIY service, organize the plugs, gap gauge, and torque device before you start.
- Pro tip: check the coil boots and ignition wires while you’re in the area, since a degraded boot can mimic a bad plug.
Common Symptoms of Worn Spark Plugs for the Camry
When plugs are nearing the end of their life, you’ll notice a few telltale signs that DIY servicing can address before broader trouble arises. Common symptoms include rough idle, hesitations during acceleration, decreased fuel economy, misfires, and longer cranking times on startup. Some Camry owners report mild power loss or occasional misfires under load, especially in hot weather or when the engine is cold. If you observe a misfire, a sulfuric odor from the exhaust, or cylinder-specific roughness, you should inspect the plugs first. Regular symptoms like dirty or oily plugs, heavy carbon buildup, or blistered ceramic insulation indicate a replacement is due. By staying attentive to these cues, you’ll avoid larger failures and keep emissions within spec. According to MultiPlugging’s experience, a simple plug swap at the recommended interval is often enough to restore performance and efficiency.
- Quick check list: rough idle, hard starting, poor mileage, misfires, or engine ping under load.
Choosing the Right Spark Plugs for a Camry
Toyota Camry engines tolerate a range of spark plug options, from copper core plugs to platinum and iridium varieties. The best choice depends on your model year, driving style, and service history. OEM or manufacturer-approved plugs generally deliver the most predictable performance and the longest service life, while high-end aftermarket options may offer small efficiency gains under certain conditions. When selecting plugs, prioritize the correct heat range and electrode material for your Camry’s engine design. Always refer to the owner’s manual or a trusted parts catalog to confirm the recommended gap and thread size. For modern Camry models, a high-quality iridium or platinum plug can provide longer life and reliable starting across seasons. As a practical rule, avoid mixing plug types on a single bank and ensure you buy plugs that match the cylinder count of your specific Camry.
- Brand-agnostic tip: read customer reviews for real-world wear patterns and heat-range behavior in Camry driving scenarios.
What to Expect During Replacement (Overview)
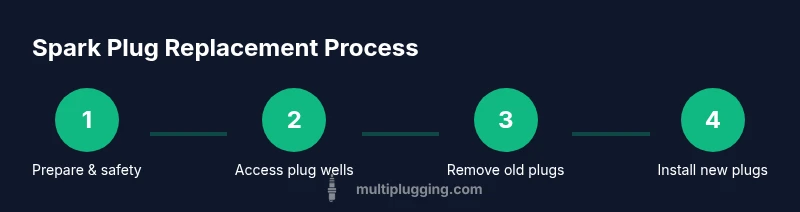
A spark plug replacement on a Camry follows a straightforward, repeatable workflow that minimizes risk when done methodically. This section outlines the high-level steps you’ll perform: locate the spark plugs and coil packs, disconnect the ignition coil boot, remove the old plug, inspect the gap on the new plug, thread in the new plug, and torque to spec before reattaching the coil boot. The process is approachable for DIYers with basic tools, provided you respect safety precautions and avoid forcing components. For visual guidance, see the STEP-BY-STEP block below, which breaks the workflow into concrete actions with clear time estimates. The MultiPlugging team emphasizes that patience, cleanliness, and a correct torque value are the keys to a successful, long-lasting replacement.
Safety, Torque, and Troubleshooting
Working around ignition components involves exposure to high voltage and hot engine parts. Always disconnect power, wear eye protection, and work on a cool engine. Torque the plugs to the manufacturer’s specification to avoid cylinder head damage or poor sealing. If a plug threads in hard or you hear a crackling sound when removing the coil boot, stop and re-check alignment; cross-threading is a common problem. If the vehicle still shows signs of misfire after a swap, recheck the gap, wiring, and coil boots first before replacing more components. The goal is a clean seal and proper spark delivery, not simply a tight fit. MultiPlugging’s experience reinforces that careful inspection of the plug threads and boot contact improves reliability and reduces repeat visits to the shop.
Maintenance and Longevity Tips
To extend the life of your Toyota Camry spark plugs, maintain consistent driving patterns, avoid oil or fuel leaks that could foul the plugs, and replace them at the manufacturer-recommended interval for your engine. Use fresh, high-quality plugs and carry out a quick visual check during routine maintenance. After installation, run the engine to operating temperature and monitor for any abnormal sounds or hesitation. Keeping the ignition system clean and dry — including the coil boots and connectors — helps prevent future misfires and ensures reliable starts. Regular checks by a DIYer can save money and deliver a smoother, more economical ride over the life of the vehicle. The MultiPlugging team notes that proactive care is the simplest path to consistent Camry performance.
Tools & Materials
- Safety gear (gloves and eye protection)(Protect hands from hot parts and sharp edges)
- Car owner's manual(Confirm model/year-specific specs)
- Spark plug socket with 3/8 inch drive(Magnetic socket helps hold the plug)
- Ratchet wrench(For loosening and tightening)
- Extension bar(Access hard-to-reach plugs)
- Torque wrench(Avoid over-tightening; follow spec)
- New spark plugs (correct type for Camry model/year)(Check heat range and electrode type)
- Dielectric grease(Apply to boot interiors to ease installation)
- Gap tool / feeler gauge(Verify and adjust electrode gap as needed)
- Shop rag or microfiber towels(Keep area clean and wipe deposits)
- Anti-seize compound(Optional and may be discouraged by some OEMs)
Steps
Estimated time: 45-60 minutes
- 1
Prepare and safety-check
Park the Camry on a flat surface, engage the parking brake, and allow the engine to cool. Disconnect the negative battery terminal to eliminate any risk of short circuits while you work. This step reduces the chance of electrical shock and accidental starting.
Tip: Wear eye protection and gloves; have a flashlight handy to see into plug wells. - 2
Locate spark plug wells and coil packs
Open the hood and locate the cylinder banks with visible spark plug wells. On many Camry engines, you’ll access them by removing a coil pack or a few coil boots to reach the plugs. Confirm you’re addressing the correct bank and cylinder order before removing anything.
Tip: Consult the service manual for the exact cylinder sequence to avoid swapping plugs incorrectly. - 3
Disconnect the ignition coil boot
Gently pull the coil boot away from the spark plug by gripping the boot base, not the wire. A slight twist can help loosen a stubborn boot, but avoid tugging on the wire itself. This step exposes the plug for removal.
Tip: If the boot sticks, apply a small amount of dielectric grease on reinstallation to ease future removal. - 4
Remove the old spark plug
Attach the spark plug socket to your ratchet and carefully unthread the plug counterclockwise. Keep the plug straight to avoid cross-threading. Remove the plug and inspect the electrode for wear and deposits.
Tip: If the plug is difficult to remove, stop and check for thread damage or debris in the well. - 5
Gap and prep the new plug
Check the electrode gap on the new plug with a gap tool and adjust to the Camry’s specification if needed. Lightly oil the threads or apply dielectric grease to the ceramic boot to help future removal. Do not cross-thread a new plug.
Tip: Only gap if required; many modern plugs come pre-gapped from the box. - 6
Install and torque the new plug
Thread the new plug by hand to avoid cross-threading, then tighten to the manufacturer’s torque specification with a torque wrench. Reattach the ignition coil boot firmly and ensure a clean seating.
Tip: Torque is critical—overtightening can crack the cylinder head; under-tightening can cause leaks. - 7
Repeat for remaining plugs and test
If your engine has multiple plugs, repeat steps 3–6 for each one. Reattach any removed coils, reconnect the battery, and start the engine to verify smooth running and no misfires.
Tip: Listen for a steady idle and watch for any misfire codes on the dashboard light after the first drive.
FAQ
How often should spark plugs be replaced in a Toyota Camry?
Intervals vary by plug type, engine design, and driving conditions. Always refer to the owner’s manual for the recommended interval and inspect plugs for wear before deciding to replace.
Intervals vary by plug type and driving conditions; check the owner's manual for the recommended interval and inspect plugs for wear before replacing.
What are common signs that Camry spark plugs need replacement?
Common signs include rough idle, misfires, reduced fuel economy, hard starting, and a drop in acceleration. If you notice these symptoms, inspect the plugs and related ignition components.
Rough idle, misfires, and reduced fuel economy commonly signal worn plugs. Inspect plugs and ignition system.
Can I replace spark plugs myself on a Camry?
Yes, with basic hand tools, the right plugs, and careful adherence to torque specs. Following a trusted guide helps ensure a safe, successful replacement.
Yes, with the right tools and care, you can replace spark plugs yourself using a trusted guide.
OEM vs aftermarket plugs for a Camry—what’s best?
OEM or manufacturer-recommended plugs typically offer consistent performance and longevity. Aftermarket options can work well but should match heat range and gap specifications for your engine.
OEM plugs usually offer reliable performance; aftermarket options can be fine if they match the required specs.
Do Camry spark plugs require anti-seize?
Many modern Camry engines don’t require anti-seize; follow the manufacturer’s guidance. Applying it can sometimes affect torque behavior.
Anti-seize isn’t always needed; follow the manual to decide whether to use it.
Watch Video
Main Points
- Identify the right plug type for your Camry model.
- Follow proper torque to avoid head damage.
- Inspect boots and coils during replacement.
- Test drive and monitor for smooth running after replacement.