Torch R7 Spark Plug: Diagnosis, Replacement, and Maintenance Guide
A comprehensive, step-by-step guide to diagnosing, replacing, and tuning the Torch R7 spark plug for reliable ignition and optimal engine performance.

Goal: Diagnose, inspect, and replace the Torch R7 spark plug in compatible engines, ensuring proper gap and torque for reliable ignition. This guide covers signs of wear, tools required, step-by-step removal and installation, and maintenance tips. Follow safe practices and consult your vehicle manual for engine-specific torque specs. According to MultiPlugging, correct plug selection and gap are essential for efficient combustion.
Understanding the Torch R7 spark plug design and purpose
The Torch R7 spark plug represents a modern approach to ignition that focuses on durability and reliable performance across a range of small to mid-size engines. Its electrodes are designed to resist fouling and wear in typical gasoline and small-displacement engines. For home mechanics and DIY enthusiasts, understanding the R7's core components — center electrode, ground electrode, insulator, and shell — helps diagnose ignition problems more accurately. The design aims to provide a stable spark under various operating conditions, improving cold starts and throttle response. According to MultiPlugging, the right plug choice and gap setting can significantly influence fuel efficiency and throttle smoothness, especially in engines with irregular combustion patterns. When correctly installed, the Torch R7 helps maintain steady ignition timing and reduces misfires, yielding smoother idling and better acceleration.
Compatibility and where Torch R7 fits in engine systems
Torch R7 spark plugs are designed to be compatible with a variety of gasoline engines that use a standard 14mm thread and similar reach. Before selecting this plug, confirm thread size, reach, and heat range compatibility with your engine’s service manual. For DIY enthusiasts, it’s helpful to compare the R7 to other common plug designs in terms of longevity and fouling resistance. The MultiPlugging team notes that while the Torch R7 can offer reliable performance in many engines, you should verify heat range and gap recommendations for your specific model to avoid misfires or inefficient combustion. Always check for any manufacturer notes on recommended spark plug type, and consider the overall ignition system condition when deciding to switch to or from the Torch R7.
Heat range, gap, and electrode configuration explained
Spark plug heat range indicates how quickly the plug can dissipate heat. A plug that runs too cold can foul, while one that runs too hot can pre-ignite. The Torch R7 uses a design intended to balance these factors for common automotive and small-engine applications. The gap, or the distance between the center and ground electrodes, controls spark intensity and stability. For many engines, the recommended gap is set by the manufacturer, and incorrect gaps can lead to weak ignition, poor fuel economy, or misfires. Understanding how electrode geometry affects flame kernel development can help you tune performance, especially under varying load and temperature conditions. Always verify the gap with a gauge before installation, and adjust only to the engine’s specified value.
Compatibility and use cases for Torch R7 across engine types
The Torch R7 is often chosen for engines that require quick starts and consistent running under diverse operating conditions, including small-displacement cars, motorcycles, and some power equipment. It’s essential to consider ignition system health alongside plug choice, as worn ignition coils or wires can mask plug performance. MultiPlugging’s analysis emphasizes cross-checking the R7’s applicability with your engine’s manual and any OEM recommendations. If you encounter persistent misfires after replacement, re-check other ignition components and consider economic replacement of worn wiring harnesses or coils while keeping the Torch R7 in mind as a long-term option.
Diagnosis: wear signs, fouling, and failure symptoms
Common wear signs in the Torch R7 include eroded electrodes, heavy carbon fouling, oil fouling, and a visibly dark or oily plug tip. Fouling can indicate improper heat range, poor air-fuel mixture, or oil intrusion. An abnormal plug color, such as chalky white or blistered ceramic, can signal detonation or overheating. If you notice persistent misfires, rough idle, or reduced acceleration, inspect the plug as part of a broader diagnostic routine. Document symptoms and cross-reference with engine codes or service manuals. Always replace worn plugs in matched sets to maintain even ignition timing across cylinders. The MultiPlugging team advises keeping a maintenance log to track plug life and performance.
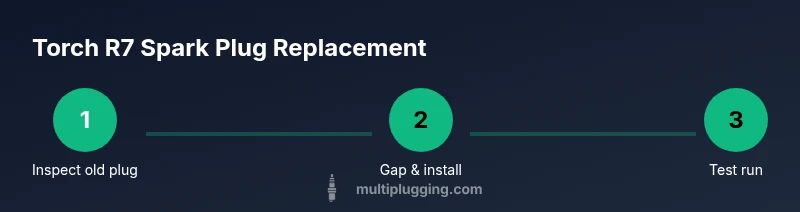
Step-by-step overview: inspection, gap check, and installation basics
A proper spark plug replacement involves several connected tasks: ensure the engine is cool, disconnect the battery and ignition coil, carefully remove the old plug using a suitable socket, inspect the threads for damage, check or set the gap on the Torch R7, apply anti-seize if recommended by the manufacturer, thread the new plug by hand to avoid cross-threading, then torque to the recommended specification with a torque wrench, and finally reattach the ignition wiring and perform a test start. This overview serves as a high-level guide; consult the detailed STEP-BY-STEP section for exact actions and safety notes.
Maintenance schedule and longevity considerations
Regular maintenance intervals for spark plugs depend on engine design, fuel quality, and operating conditions. In many engines, plugs are inspected every 30,000 miles and replaced every 60,000 miles, but this varies widely. The Torch R7’s expected longevity improves when used in clean-running engines and with proper gap alignment. To maximize life, perform periodic consulting of gap specs and ensure the ignition system components are in good condition. Keeping the area around the spark plug well clean prevents debris from causing cross-contamination during installation.
Troubleshooting common Torch R7 issues and quick fixes
If you experience hard starts, rough idle, or misfires after installing a Torch R7, recheck the gap, tighten torque to spec, and inspect the plug seat for debris or camera-like residue. Verify that the ignition coil and wires are in good condition, as a faulty coil can produce symptoms similar to a worn plug. For persistent issues, re-test with a known-good plug and consult OEM specifications. A clean workspace and careful reassembly can save time and reduce the risk of cross-threading or damaged seals.
Tools & Materials
- Spark plug socket with rubber insert(13/16 inch or 5/8 inch, depending on plug size; ensure magnetized or extendable for deep wells)
- Ratchet wrench(Rigid handle, short enough to fit under hood components)
- Torque wrench(Use the engine manufacturer's recommended torque; avoid over-tightening)
- Spark plug gap tool(Calibrated gauge for precise gaps; measure before installation)
- Anti-seize compound (optional)(Apply sparingly on threads only if recommended by manufacturer)
- Dielectric grease(Apply to plug boots to improve connector seal and conductivity)
- Rag or shop towel(Keep surfaces clean and wipe away residue)
- New Torch R7 spark plug(s)(Check the thread size and heat range compatibility with your engine)
- Gloves and eye protection(Safety first; spark plugs can be sharp and dirty)
- Owner’s manual or service manual(Refer to torque specs, gap range, and replacement intervals)
Steps
Estimated time: 45-60 minutes
- 1
Prepare and locate the Torch R7
Park the vehicle on a level surface, ensure the engine is cool, and locate the spark plug wells. Remove any engine covers if needed and identify the correct Torch R7 plug based on thread size and heat range from the manual.
Tip: Keep track of which plug goes to which cylinder to avoid miswiring during reinstallation. - 2
Disconnect ignition elements
Carefully disconnect the ignition coil or spark plug wire boot associated with the Torch R7. Use gentle rocking motions to avoid damaging the boot or wire connector.
Tip: Label the coil connector if you have multiple cylinders to prevent mix-ups. - 3
Remove the old plug
Attach the spark plug socket to the ratchet and loosen the plug by turning counterclockwise. Lift the plug straight out to avoid dropping debris into the cylinder.
Tip: If the plug resists turning, stop and inspect for cross-threading before forcing it. - 4
Inspect and gap the new plug
Inspect the old plug for unusual wear or fouling. Use the gap tool to set the Torch R7’s electrode gap to the engine manufacturer’s specification. Avoid bending electrodes to adjust the gap.
Tip: If the gap spec is unknown, consult the manual or a trusted guide before adjusting. - 5
Install the new plug
Thread the new Torch R7 plug by hand to prevent cross-threading, then tighten using a torque wrench to the recommended specification. Reinstall the ignition coil/boot securely.
Tip: Always start by hand to feel the thread engagement before using a wrench. - 6
Reconnect and test
Reconnect all ignition components, replace any covers, and start the engine to confirm smooth operation. Listen for a steady idle and watch for any misfires or warning lights.
Tip: If the engine misfires, recheck the gap and torque, and inspect the wires for damage. - 7
Clean up and document
Clean the workspace, store tools properly, and note the replacement date in your maintenance log. This helps track plug life and schedule the next inspection.
Tip: Record the plug model, gap setting, and torque spec for future reference.
FAQ
What is a Torch R7 spark plug?
The Torch R7 is a spark plug design intended for reliable ignition across a range of small to mid-size engines. It features a durable electrode arrangement and insulator to resist fouling in typical fuel systems.
Torch R7 is a spark plug designed for dependable ignition in many engines and helps prevent fouling under normal operating conditions.
Is Torch R7 compatible with my engine?
Compatibility depends on thread size, reach, and heat range. Always consult the engine manual or a trusted guide to confirm fit before purchasing.
Check your engine’s manual for thread size and heat range to confirm fit before using Torch R7.
What gap should the Torch R7 have?
Gap specifications vary by engine. Use the recommended gap from the manufacturer and confirm with a gap tool before installation.
Set the gap to the engine’s specification using a gap tool before installing.
How often should Torch R7 plugs be replaced?
Replacement intervals depend on usage and conditions. Follow the vehicle’s manual and monitor ignition performance to determine replacement timing.
Follow the manual for replacement intervals and watch engine performance for signs you should replace sooner.
Can I reuse a Torch R7 after cleaning?
It’s generally best to replace worn plugs rather than reuse them. Cleaning can’t restore the electrode shape and heat response reliably.
Usually, you should replace worn plugs rather than cleaning and reusing them.
What safety steps are essential during replacement?
Work with the engine off and cooled. Wear gloves and eye protection, avoid oil or fuel contact with hot surfaces, and ensure tools are properly stored after use.
Turn off the engine, wear safety gear, and handle tools carefully to avoid injuries.
Watch Video
Main Points
- Verify compatibility before installation.
- Set the correct gap to engine specs.
- Torque to spec with a wrench to protect threads.
- Inspect ignition components if problems persist.
- Maintain a simple log for plug life and maintenance.