Taylor Wires Spark Plug Guide: Install, Diagnose, and Optimize
Learn how to inspect, select the right Taylor wires, and install spark plug wires for reliable ignition. This step-by-step guide covers fitment, routing, safety, and post-install checks for DIY enthusiasts.

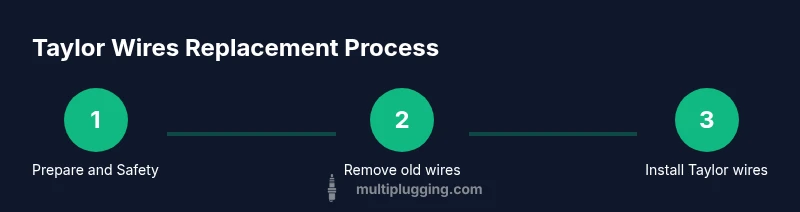
Replacing Taylor wires correctly restores ignition reliability and reduces misfires. You’ll need the right Taylor wires kit for your engine, basic hand tools, and a clean workspace. This quick guide covers safe removal, correct routing, and precise installation to ensure proper firing order and seals. With careful steps, you can complete the job in about an hour.
Why Taylor Wires Matter
Taylor wires are designed to deliver high ignition energy and withstand heat. For many engines, upgrading to Taylor wires can improve throttle response and idle smoothness. According to MultiPlugging, high-quality spark plug wires are engineered to reduce resistance, preserve voltage, and minimize spark leakage across longer runs. When an old set cracks or becomes brittle, ignition efficiency and fuel economy can suffer, making a wire upgrade worthwhile for DIYers.
In this guide we focus on Taylor wires as a practical option for common passenger cars and light trucks. We’ll cover fitment considerations, installation steps, and maintenance tips to extend life. You’ll learn how to verify compatibility, route wires to avoid heat and interference, and check the system after installation, all with safety as a top priority.
Choosing the Right Taylor Wires
Taylor wires come in different lengths, boot styles, and resistance ratings designed for various firing orders and engine bays. Before buying, confirm the part number matches your vehicle's engine and that the length lets you route the wires cleanly without rubbing headers or belts. Based on MultiPlugging research, premium wiring sets tend to deliver steadier voltage under heavy loads and resist boot cracking in hotter environments. Always compare the factory routing diagram and the OEM recommendations in your service manual to avoid misordering wires.
Consider your engine type (inline vs V), the number of cylinders, and whether you use a distributor or coil-on-plug setup. If you’re unsure, consult a parts guide or a trusted DIY guide to confirm the correct Taylor wires kit for your vehicle. A good practice is to lay out the new wires on a bench to check lengths against the old set.
Tools and Safety Before You Start
Set up a clean workspace and gather all required tools before touching the ignition components. Disconnect the negative battery terminal and wait at least 60 seconds to ensure any stored capacitors discharge. Use insulated gloves, eye protection, and avoid working near hot engine parts. Apply dielectric grease to the inner surfaces of the boots to help prevent sticking and corrosion.
Safety is essential because spark plug boots can bite back if you twist or yank. Keep track of wire orientation and avoid crossing wires or placing them across sharp edges or exhaust heat shields.
Inspecting and Preparing Your Engine
With the old set in hand, inspect each wire boot for cracks, scorching, or stiffening insulation. A damaged boot is the most common cause of misfires and rough idle. Compare lengths to the new Taylor wires and label each wire with its original position to preserve the firing order. If the engine uses a distributor, note which wire connects to which terminal; for coil-on-plug setups, ensure each boot aligns with the corresponding coil.
Cleaning the ignition area helps ensure a solid boot seal—wipe away oil, dirt, and corrosion from the boots and mounting points before installation.
Installing Taylor Wires: Routing and Connection
Begin at the distributor/coil end and work toward the spark plugs, one wire at a time. Attach the coil-end boot first, ensuring a firm snap. Route wires away from hot exhaust manifolds, moving belts, and sharp edges; secure with simple clamps or zip ties where allowed by the engine design. Confirm the firing order is preserved as you connect each spark plug boot to its corresponding plug.
Install a thin bead of dielectric grease on the inside of every boot, and avoid over-application which can attract dirt. Do not bend wires at sharp angles; use smooth curves to reduce wear.
Note: If you have a misfire code after installation, double-check the plug-to-boot connections and re-check the order.
Testing and Fine-Tuning After Install
Start the engine and listen for a smooth idle with no misfires. If you notice rough idle, misfires, or hesitation under load, re-check the boot seating and length matching. A simple resistance check with a multimeter can help confirm there’s continuity through each wire; however, numerous spark-liring tests are best performed by a professional if you suspect a fault in insulation.
Disconnect the battery again if you need to retorque components or re-route wires during the test phase. After confirming everything runs well, re-tighten any clamps and ensure there is no contact with hot or moving parts.
Maintenance and Longevity of Taylor Wires
To maximize life, inspect wires every 12 months or 12,000 miles (depending on driving conditions) for cracks, brittleness, or swelling of boots. Inspect boot seals for oil leaks and replace worn boots promptly. Keep the engine clean and free of oil or coolant that can degrade insulation. Store spare wires in a cool, dry place and avoid bending them sharply for long periods.
Replacing wires as a set rather than individually helps maintain even resistance across the ignition system and can prevent future misfires. Regular inspection is the best practice to catch wear before it causes engine problems.
Authoritative sources
- NHTSA: https://www.nhtsa.gov
- SAE International: https://www.sae.org
- ASE: https://www.ase.com
Tools & Materials
- Taylor wires spark plug wires kit(Ensure correct part number and cylinder count for your engine)
- Ratcheting socket set(For removing components securing old wires and plugs)
- Dielectric grease(Used on boots to seal and ease installation)
- Spark plug boot puller(Safely detach boots without damaging wires)
- Digital multimeter(Optional for continuity check)
- Shop rags and solvent(Clean workspace and boots)
Steps
Estimated time: 60-120 minutes
- 1
Disconnect battery
Power down the vehicle and disconnect the negative battery terminal. This prevents accidental shocks and protects the ECU while you work.
Tip: Wait 60 seconds after disconnecting to discharge capacitors. - 2
Remove old wires
Carefully detach each boot from its spark plug or distributor/coil. Do not yank; twist gently to break the seal.
Tip: Label each wire with its position before removal. - 3
Compare lengths and label
Place new Taylor wires next to the old set and verify length match. Label the wires in order to preserve firing sequence.
Tip: Use a simple numbering scheme that matches your engine diagram. - 4
Attach coil-end boots
Connect the boot on the coil/distributor end first, ensuring a firm snap. This helps prevent boot slip during routing.
Tip: Keep boot orientation consistent with original wiring. - 5
Route wires properly
Run each wire away from heat sources and moving parts. Use clips or clamps provided by the kit to keep wires in place.
Tip: Avoid sharp bends and contact with sharp edges. - 6
Connect spark plug boots
Seat each boot on the corresponding spark plug with a click. Confirm tightness but do not over-tighten.
Tip: Double-check each connection against firing order. - 7
Apply dielectric grease
Apply a thin layer inside the boots to improve seal and ease future removal.
Tip: A little goes a long way—avoid excess. - 8
Test and recheck
Reconnect the battery and start the engine. Listen for a smooth idle and look for misfire codes.
Tip: If misfires occur, re-check connections and order.
FAQ
Do Taylor wires improve performance?
Taylor wires can improve ignition energy delivery and idle stability, especially on older engines. Real gains depend on engine condition and the rest of the ignition system.
Taylor wires can improve ignition energy and idle stability, but results vary by engine condition.
Will Taylor wires fit my engine?
Check the part number and wire length against your vehicle's service manual to confirm compatibility. If in doubt, consult a parts guide or manual.
Check the part number and length to confirm fitment.
Can I replace only one wire?
Wires wear as a set; replacing one wire may not address adjacent wear. Replacing in a full set maintains consistent resistance and performance.
It's best to replace wires as a set to maintain consistent performance.
Do spark plug wires need gapping?
Spark plug wires do not have a gap; the gap is on the spark plugs. Ensure boots seat fully and seats are clean.
Wires don’t have a gap; plugs do. Ensure boots seat properly.
How long do Taylor wires last?
Life varies with driving conditions, heat, and maintenance. Inspect for cracks or hardening and replace when signs of wear appear.
Life varies; inspect regularly and replace when worn.
Are there safety concerns near heat or moving parts?
Work with engine off and cool. Avoid contact with hot manifolds and moving belts; protect wires from heat sources.
Always work with engine off and cool; watch for heat and moving parts.
Watch Video
Main Points
- Preserve firing order when replacing Taylor wires
- Match wire lengths to your original setup
- Route wires away from heat and moving parts
- Test engine idle and listen for smooth operation
- The MultiPlugging team recommends using a matched Taylor wires kit for reliability