Spark Plug with Coil Pack: A Complete DIY Guide
A thorough, step-by-step guide to diagnosing, replacing, and optimizing a spark plug paired with a coil pack. Learn safe handling, tools, troubleshooting, and best practices for reliable ignition performance in 2026.

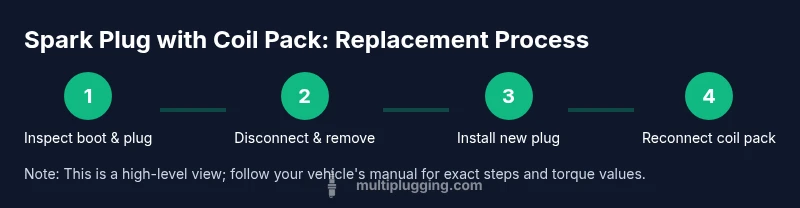
Goal: Diagnose, replace, and optimize a spark plug that shares a coil pack. This guide covers how to identify the right parts, safely disconnect the coil pack, and install a fresh plug with correct torque. Before you begin, confirm your vehicle’s exact plug type and coil-pack configuration, and reference the service manual for torque specs and any model-specific steps.
What is a spark plug with coil pack and how it functions
A spark plug with coil pack describes a modern ignition layout where the ignition coil or coil assembly sits adjacent to or directly on top of the spark plug. The coil sends a high-voltage surge to the plug, creating a spark that ignites the air-fuel mixture in the cylinder. In many modern engines, this configuration is called coil-on-plug (COP) or a coil pack with integrated spark plugs. The performance of the entire ignition system depends on both the coil’s ability to deliver voltage and the plug’s ability to withstand heat, wear, and combustion byproducts. When one part fails, it can affect combustion efficiency, fuel economy, and emissions. As you service a spark plug with coil pack, remember that different manufacturers use different boot styles, sealing methods, and torque specs. Always consult the vehicle’s service manual for model-specific guidance.
How coil packs affect ignition performance
Coil packs are designed to deliver a precise high-voltage pulse to the spark plug at exactly the right moment in the engine cycle. The coil’s energy, windings, and architecture influence spark duration and voltage. A healthy coil pack reduces misfires, ensures clean ignition, and supports smooth engine running. Over time, the coil boot can crack, moisture can enter, and corrosion can degrade contact quality, which diminishes spark energy and can lead to misfires. The plug itself must resist fouling, glazing, and heat soak. When a coil pack or a spark plug fails, symptoms often point to misfires, rough idle, or a check engine light, but a proper diagnosis requires careful testing of both components and the associated wiring.
Configurations and use cases
Engine designers choose coil pack configurations based on cost, space, and efficiency considerations. Coil-on-plug (COP) systems place a single coil directly over each plug, offering fast response and minimal wiring length. Some engines use a coil pack assembly that serves multiple cylinders, reducing wiring harness complexity but requiring careful diagnosis when a misfire occurs. In either case, a failed coil pack or worn plug can produce similar symptoms, so structured testing is essential. Understanding your engine layout helps you source the correct plug type, reach, and boot design—critical for proper seating and heat management.
Diagnosing issues: symptoms that point to a bad plug or coil pack
Common signs include intermittent rough running, misfires on one or more cylinders, or a drop in idle quality. The check engine light may illuminate with codes related to misfire (e.g., cylinder-specific P030x ranges) or circuit faults indicating an issue with the coil or plug wiring. Visual inspection is valuable: inspect the boot for cracks, oil contamination, or carbon tracking, and examine the spark plug for fouling, glazing, or worn electrodes. Electrical testing, such as resistance checks or coil-inventory tests, can help distinguish between a faulty plug and a failing coil pack. Always perform a thorough surface inspection of the coil boot contact and plug seating.
Safety considerations and common mistakes
Safety first: work only with the engine cool, disconnect the battery to avoid shorts, and wear eye protection. A common mistake is over-tightening spark plugs, which can ruin threads or damage the seat. Another risk is using anti-seize on aluminum threads when not recommended by the manufacturer, which can alter torque values. When in doubt, refer to the service manual for torque specs and plug type recommendations, and avoid forcing connectors or dropping parts into the engine bay.
Maintenance and best practices
Regular inspection of the coil boot, plug boot seal, and the immediate area around the spark plug is essential. Keep ignition components clean and dry, replace worn boots, and verify that the coil pack is seated firmly with all connectors secure. Use the correct plug type and gap settings specified for your engine, and replace the coil pack if it shows signs of internal damage or tracking. Periodic checks help prevent misfires and protect emissions controls, contributing to smoother operation and better fuel economy.
Practical tips for DIY replacement and troubleshooting
For DIY enthusiasts, plan the job with a clean workspace and a magnetic tray for fasteners. Label hoses or wires to prevent mix-ups when reassembling. When replacing, always gap the plug to the manufacturer’s specification and torque to the recommended value. If the engine still misfires after replacement, test the coil pack with a spare known-good plug to isolate the issue, and consider testing the wiring harness continuity and the PCM feedback signals. A methodical approach reduces guesswork and saves time.
Troubleshooting common mistakes and how to avoid them
Avoid cross-threading by starting threads by hand before tightening with a wrench. Do not overtighten or re-use damaged spark plugs—frayed electrode edges can cause poor performance. Always inspect the ignition coil boot for cracks and the plug seat for debris, and clean the seat area before seating a new plug. If you’re unsure, consult the vehicle service manual or a trained technician. Proper tool use and a calm, methodical approach will help prevent costly errors.
Tools & Materials
- Socket wrench set(Include 6-point sockets and a spark plug socket (often 5/8" or 16mm).)
- Torque wrench(Use the manufacturer’s torque specification; avoid guesswork.)
- Spark plugs compatible with coil pack(Check OEM or aftermarket parts for your vehicle; ensure proper reach and heat range.)
- Feeler gauge or gap tool(Verify plug gap to spec before installation.)
- Dielectric grease(Optional for boot contact to ease future removal.)
- Anti-seize compound (manufacturer's guidance)(Only if explicitly recommended for your engine; incorrect use can affect torque.)
- Safety gear(Gloves and eye protection; chemical-resistant if applying cleaners.)
- Magnetic pickup or tray(Keeps fasteners from getting lost in the engine bay.)
Steps
Estimated time: 60-90 minutes
- 1
Park and prepare
Park on a level surface, set the parking brake, and disconnect the negative battery terminal. Allow the engine to cool to avoid burns and thermal shock to parts. Gather your tools and work in a well-lit area.
Tip: Always start with a cool engine to prevent heat damage to boots and seals. - 2
Locate coil pack and spark plug
Open the hood and locate the coil pack assembly or COP per your engine design. Identify the specific spark plug to replace and confirm the boot orientation to ensure proper disassembly order.
Tip: Take a photo of the wiring arrangement before disconnecting so you can reassemble correctly. - 3
Disconnect wiring and boot
Carefully detach the electrical connector from the coil pack and gently pull off the boot from the spark plug. Do not twist or yank; use a wiggle-and-pull motion to avoid damaging the boot or contact.
Tip: If the boot resists, use a small amount of penetrating oil around the base and wait briefly. - 4
Remove the coil pack/boot assembly
Remove the coil pack mounting bolts if needed and lift the pack away, exposing the spark plug. Keep track of bolts and washers for reassembly.
Tip: Use a magnetic tray to avoid dropping small hardware into the engine bay. - 5
Remove the old spark plug
Use a spark plug socket to break loose the plug, then lift it out straight to avoid cross-threading. Inspect the plug and boot contact for wear or oil contamination.
Tip: If the plug is stubborn, apply light twisting while steady pressure to free it without damaging threads. - 6
Check gap and condition
Inspect the new plug’s gap with a feeler gauge and adjust to the specified interval if required. Compare the condition of the old plug to any signs of fuel richness, oil contamination, or electrode wear.
Tip: Do not over-gap; tiny changes can impact combustion efficiency. - 7
Install new plug and torque
Thread the new plug by hand to avoid cross-threading, then tighten to the manufacturer’s torque specification using a torque wrench. Re-gap only if necessary after seating.
Tip: Always torque in a crisscross pattern when multiple plugs are involved to ensure even seating. - 8
Reconnect coil pack and test
Reinstall the coil pack, reconnect the wiring, and snug the bolts. Reconnect the battery and start the engine; listen for a smooth idle and watch for any misfire codes or rough running. If issues persist, diagnose coil or wiring further.
Tip: Take a test drive to ensure consistent performance and no abnormal noises.
FAQ
Do I need to replace the coil pack when replacing a spark plug?
Not always. If the coil pack shows signs of wear, cracks, or tracking, or if misfires persist after plug replacement, consider replacing the coil pack. Always test both components when diagnosing ignition problems.
Usually you replace the coil pack only if there are signs of wear or continued misfire after replacing the plug.
What are common signs a coil pack is failing?
Frequent misfires, rough idle, loss of power, or an illuminated check engine light with corresponding cylinder misfire codes are typical indicators. Visual cracks or scorching on the boot also suggest replacement.
Common signs include misfires, rough idle, or a persistent check engine light with cylinder codes.
Can I reuse old spark plugs with a new coil pack?
It’s generally recommended to replace worn plugs with new ones when a coil pack is serviced, to ensure consistent ignition performance and reliable seating.
You should usually replace old plugs when changing a coil pack to keep performance consistent.
Should I use anti-seize lubricant on threaded plugs?
Follow the vehicle manufacturer’s guidance. Some engines require anti-seize on aluminum threads, while others advise against it because it can alter torque readings.
Only use anti-seize if the manual specifies it; otherwise, skip it to avoid torque issues.
Is it safe to diagnose and replace spark plugs with coil packs in a driveway?
Yes, many DIYers perform plug and coil pack work at home, provided you have a flat surface, basic tools, and safety equipment. If you’re unsure about the complexity, consult the manual or a professional.
Yes, you can DIY at home if you’re comfortable and have the right tools and a level surface.
What torque specification should I use for plugs with coil packs?
Torque specs vary by engine. Always refer to the vehicle’s service manual for the exact value and use a torque wrench to tighten accordingly.
Always check the manual for the exact torque value and use a torque wrench.
Watch Video
Main Points
- Identify the correct plug and coil-pack pairing before starting
- Follow torque specs to protect threads and ensure seal
- Inspect both plug and boot for wear or damage during replacement
- Test the engine to confirm successful ignition after replacement