Spark Plug Wire Kit: Install, Replace & Maintain Your Engine
Learn how to choose, install, and maintain a spark plug wire kit for reliable ignition. This educational, step-by-step guide covers compatibility, tools, installation nuances, safety, and long-term care to keep your engine running smoothly.

This guide helps you select the right spark plug wire kit for your engine, install it correctly, and verify solid connectivity for reliable ignition. You’ll learn how to check compatibility, avoid common mistakes, and perform a safe, straightforward replacement. Essential gear includes a compatible spark plug wire kit, basic hand tools, a torque wrench, and dielectric grease.
Choosing the Right Spark Plug Wire Kit for Your Engine
According to MultiPlugging, selecting the right spark plug wire kit is the first choice for dependable ignition. Engines vary in coil configurations, boot sizes, and cylinder counts, so a kit isn't one-size-fits-all. A quality spark plug wire kit should include matched conductors, boots, and a mounting method that fits your vehicle. When shopping, compare boot material (silicone vs. fluorosilicone), conductor core (copper or carbon-impregnated), and resistance per length, which can influence timing stability and EMI. If you drive a modern distributorless system, a traditional wire kit may not be enough, and you may need coil-specific leads or direct-fit options. Always verify kit length and boot angle to prevent interference with intake manifolds or headers. This section lays the groundwork by explaining universal versus vehicle-specific kits, how to measure fit, and how to align your choice with service life and maintenance goals.
In practical terms, you’re looking for a kit that matches your engine’s firing order, cylinder count, and boot geometry. Wires should be of adequate length to reach each cylinder without excessive slack that could snag on moving parts. Conductors with low resistance help maintain consistent spark timing, especially at higher RPMs. Boots must seal well against the spark plug wells and sit securely on the coil or distributor caps. A good kit should also include protective sleeves and heat-resistant boots to withstand manifold heat. Finally, prioritize reputable materials and verified compatibility, since poor fit or substandard insulation can create misfires, dry-rot, and EMI that disrupt ignition timing.
The takeaway: understand your engine’s needs, then choose a spark plug wire kit designed for that configuration. A proper fit reduces future maintenance and improves performance indicators such as throttle response and idle stability. A well-chosen kit also minimizes diagnostic headaches when a check-engine light or misfire occurs. The end result is a smoother-running engine and less downtime at the curbside or in the driveway.
Understanding Compatibility and Safety
Compatibility is the cornerstone of a successful spark plug wire kit installation. Start by confirming your engine’s cylinder count, ignition type (coil-on-plug, distributor, or wasted spark), and whether your vehicle uses a traditional wire-and-boot arrangement or a direct-fit lead. Some engines require specific boot sizes or boot angle bends that match the spark plug well geometry. If you’re unsure, consult the vehicle’s service manual, factory wiring diagrams, or trusted DIY guides. Safety comes first: disconnect the battery before any work near the ignition system, and keep metal jewelry and tools away from hot engine components to prevent shorts or shocks. When removing old wires, do so one cylinder at a time to preserve routing order; this approach helps you map the correct path for the new kit and reduces the risk of cross-wiring. Remember that physical fit matters as much as electrical compatibility. Wires that rub against exhaust manifolds, belts, or moving parts can overheat, crack, or fail prematurely. In short, verify cylinder-to-boot mapping, boot orientation, and routing clearance before you begin the replacement.
For safety and reliability, treat every step as a test and inspect stage: check each boot’s seal, confirm the protective sleeves are intact, and ensure the routing won’t channel heat toward plastic components or sensors. If your engine uses coil packs, verify that the kit’s boots align with each coil boot and that you’re not forcing a mismatch. When in doubt, seek a vehicle-specific kit that’s designed to snap into the original geometry without aftermarket adaptation. A careful compatibility check saves time and reduces the likelihood of misfires right after installation.
As you proceed, note how the new wires feel when you bend them near the boots. They should flex without cracking, and boot ends should seat snugly on the plugs. If you see any bubbling, cracking, or obvious wear on the old kit, plan to replace those parts in the same service window. The core idea is to replace like-for-like where possible and choose a kit that mirrors the original boot geometry, conductor type, and resistance profile. In this way, your spark plug wire kit installation will be smoother and safer, with improved ignition reliability and long-term performance.
Key Features to Look for in a Spark Plug Wire Kit
When shopping for a spark plug wire kit, focus on the features that affect durability, performance, and ease of installation. High-quality kits use robust conductors (often copper-core or carbon-impregnated materials) that deliver a crisp, consistent spark across all cylinders. Boots should be heat-resistant (silicone or fluorosilicone) and designed to seal properly around the spark plug and coil boot to prevent moisture ingress and arching. The internal resistance of the wires matters; some engines benefit from lower resistance for peak performance, while others tolerate mid-range resistance to reduce radio frequency interference. A dependable kit includes clearly labeled wires corresponding to each cylinder, with a path that minimizes cross-talk and EMI. Also consider boot shapes—curved boots can simplify routing in tight engine bays, while straight boots may offer more direct alignment for certain coil packs. Finally, verify that the kit includes protective sleeves and adequate connector fitment for your specific model. A quality spark plug wire kit should come with clear installation notes or a wiring map that helps you replicate the OEM routing and avoid common missteps.
In the broader context of maintenance, choosing a well-matched kit reduces fuel-table deviations and misfire risk, especially during cold starts and high-load conditions. The best kits balance rugged construction with cost-effectiveness, delivering consistent performance for many driving cycles. Keep an eye on boot corrosion resistance, insulation integrity, and the warranty offered by the manufacturer. A kit designed for your engine’s service life, driving conditions, and emissions requirements will save time and improve overall engine reliability over the long term.
Preparing Your Workspace and Tools
A clean, organized workspace makes spark plug wire kit installation safer and more efficient. Start by gathering your tools: a compatible spark plug wire kit, a spark plug socket, a ratchet, a torque wrench, dielectric grease, anti-seize compound, a small magnetic tray for fasteners, and clean rags. Clear the engine bay of loose tools and debris to prevent accidental contact with moving parts. Take photos before disassembly if you’re uncertain about routing, which will help you recreate the original wires’ path. Protect your hands with gloves and wear eye protection in case of unexpected sparks or foreign objects. Ensure the battery is disconnected and the ignition system is de-energized before you touch the wiring. If your engine has a restrictive intake or tight throttle body area, consider flexible-wired boots or a kit with angled boots to maintain safe routing. Finally, set a clear plan: identify each cylinder’s wire, label them if needed, and map their route from coil or distributor to the plug with a consistent order. A calm, organized approach cuts replacement time and reduces the chance of crossing wires or missing a cylinder.
Common Installation Scenarios and Considerations
Different engines present distinct installation challenges for spark plug wire kits. In coil-on-plug setups, you’ll replace individual coil-to-plug leads, often with shorter wires and specialized boots. In traditional coil-and- distributor configurations, you’ll route longer multi-cylinder cables that must avoid heat sources and sharp bends. Some engines require universal-length kits that you trim to fit, while others rely on pre-cut, cylinder-specific wire lengths. Always verify the kit’s boot geometry matches your spark plugs and coil boots. For turbocharged or high-performance engines, heat resistance and EMI suppression become critical; look for boots with enhanced heat protection and shields that keep long runs from heating up nearby sensitive electronics. If you have a modern engine with direct ignition, you may need a direct-fit kit or a set of coil-on-plug leads designed for tight tolerances. When possible, replace only what’s worn or damaged to minimize unnecessary labor and keep your ignition timing consistent. Document each step so you can repeat the process across service intervals without guesswork.
Basic Troubleshooting After Installation
After installing a spark plug wire kit, perform a careful inspection for obvious issues: ensure every boot seats fully on its plug, verify that each wire runs to its corresponding coil or distributor boot, and check for any signs of arcing or heat damage on the boots or insulation. If you notice intermittent misfires after replacement, re-check the connector and boot seating on the problem cylinder. Loose connections or deformed boots can cause erratic ignition behavior. A quick diagnostic check includes cranking the engine briefly and listening for consistent firing across all cylinders or using a basic scan tool to monitor misfire counters. If a misfire persists on a single cylinder, swap the wires with a known-good position to determine whether the issue is wire-related or engine-related. Finally, confirm that there is no contact between wires and hot exhaust components. A well-installed spark plug wire kit should provide stable idle and smooth acceleration with minimal coil loading under typical driving conditions.
Maintenance Tips to Extend Wire Kit Life
Long-term performance from a spark plug wire kit relies on proactive maintenance. Periodically inspect boots for cracks or heat damage, and look for signs of glazing or corrosion on the terminals. Keep the wires clean and free of oil or fuel contamination; wipe them with a clean rag during routine maintenance. Dielectric grease on boot tips helps seal against moisture and improves electrical contact, while anti-seize compounds on threaded portions of plugs may be appropriate in extreme heat or rugged environments. Replace worn wires in pairs or all at once to preserve even firing characteristics and avoid uneven resistance among cylinders. If you repeatedly see misfires that fix with grounding or cleaning, consider replacing the entire kit rather than patching individual wires. Finally, store spare parts in a cool, dry place and avoid bending wires at acute angles; gentle bending radii extend insulation life and prevent early failure.
Cost Considerations and Buying Guide
Investing in a spark plug wire kit balances upfront cost with long-term reliability. Kits range in price based on conductor material, boot design, and rating for heat and EMI resistance. Expect mid-range kits to offer solid performance and adequate durability for daily driving, while premium lines provide enhanced heat protection and longer service life under demanding conditions. If you drive a high-mileage vehicle, a robust kit may pay for itself through fewer misfires and better fuel efficiency over time. When budgeting, consider not only the kit price but also the cost of tools you may need (like a torque wrench if you don’t own one) and any additional items such as dielectric grease or anti-seize compounds. Finally, factor in labor time if you’re hiring a technician for the replacement. While prices can vary by brand, the goal is to select a kit that fits your engine’s geometry, firing order, and service expectations while staying within your budget and maintenance plan.
What to Do Next: Verification and Testing
With the spark plug wire kit installed, take a systematic approach to verification. Reconnect the battery and start the engine, observing for a smooth idle and steady RPM transitions. If you have access to a scan tool, check for misfire codes and confirm that cylinder timing is within expected ranges. If the engine runs rough or you hear arcing noises, shut down the engine and re-check each boot’s seating and wiring path. A quick highway or load test can reveal stability across RPM ranges and confirm that ignition timing remains consistent under load. Finally, document the service details, including kit brand, model, and installation date, so you can reference them during the next service. This disciplined approach ensures your spark plug wire kit replacement yields reliable ignition, better throttle response, and longer engine life.
Tools & Materials
- spark plug wire kit(Must match engine year, model, and ignition type; includes boots and conductors.)
- spark plug socket(8-12 point socket with ratchet.)
- ratchet(Standard 3/8 inch drive or larger.)
- torque wrench(To set correct boot-to-plug torque where specified.)
- dielectric grease(Apply to inner surfaces of boots for sealing.)
- anti-seize compound(Optional on plug threads in high-heat environments.)
- clean rags(Wipe surfaces and clean oil/grease.)
- silicone spray or lube(Optional for ease of sliding wires into boots.)
- gloves(Hand protection while working in a hot engine bay.)
- replacement plugs (optional)(If replacing worn plugs, have them ready.)
Steps
Estimated time: 60-90 minutes
- 1
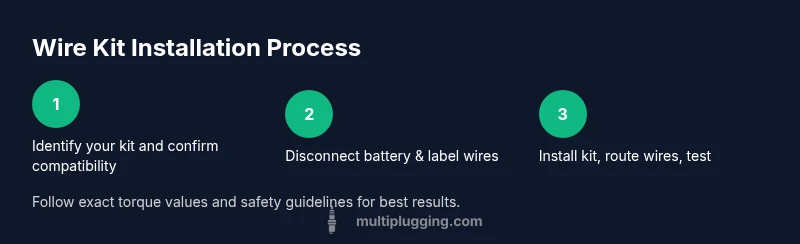
Identify and prep the kit
Confirm compatibility with your engine and lay out the wires in the order you will install them. Inspect boots for cracks and ensure the conductors are intact. This initial check prevents wasted effort during installation.
Tip: Always lay out wires in cylinder order to avoid confusing the replacement plan. - 2
Disconnect battery and label wires
disconnect the negative battery terminal to prevent accidental shocks. Label each old wire with its cylinder position to help map routing for the new kit.
Tip: A small notepad can serve as a quick wire map. - 3
Remove old wires one cylinder at a time
Starting at one end, gently twist and pull each wire from the boot; avoid yanking to prevent boot or plug damage. Sequence matters for clean routing.
Tip: Keep track of the order to mirror the OEM path. - 4
Inspect boots and plugs
Check boots for wear and plugs for insulation damage. Replace damaged plugs if you’re upgrading and are already in the service window.
Tip: Don’t reuse cracked boots; it can cause misfires. - 5
Install the new wires in order
Seat boots on plugs firmly and route wires along the original path, avoiding sharp bends. Use dielectric grease on boot tips for a proper seal.
Tip: Ensure no wire is forced into a tight bend or near hot exhaust components. - 6
Secure routing and spacing
Tuck wires away from moving belts, fans, and high-heat areas. Use zip ties if necessary to maintain clearance and prevent contact with hot surfaces.
Tip: Maintain a gentle bend radius for all wires. - 7
Torque and final checks
If your kit includes torque-relevant fasteners, apply the specified torque. Reconnect the battery, start the engine, and listen for smooth operation. Check for any idle or misfire anomalies.
Tip: A slow, methodical check catches issues early. - 8
Test readiness and clean up
Take a short test drive to verify performance across RPM ranges. Recheck boot seating and clean up any residual grease or debris from the service.
Tip: Document the service details for future maintenance.
FAQ
What is a spark plug wire kit and when should I replace it?
A spark plug wire kit provides the backbone wiring and boots that connect the ignition coil or distributor to the spark plugs. Replace it when you notice worn boots, cracking insulation, misfires, or degraded performance after many service cycles.
A spark plug wire kit connects the ignition system to the spark plugs and should be replaced if you see wear, misfires, or reduced performance.
Can I use a universal spark plug wire kit on any engine?
Universal kits can fit many engines but might require trimming or routing adjustments. Vehicle-specific kits tend to fit more cleanly and reduce installation time, especially on modern engines with tight spaces.
Universal kits may fit many engines, but vehicle-specific kits usually install faster and fit better.
Do I need special tools to install a spark plug wire kit?
Basic hand tools are typically sufficient, including a screwdriver, pliers, a ratchet, and a torque wrench if specified. Dielectric grease and anti-seize compounds are optional but helpful for a durable seal and easier installation.
Usually you need basic hand tools and a torque wrench if your kit calls for it.
Is it safe to replace spark plug wires myself?
Yes, with proper precautions: disconnect the battery, work on a cool engine, label wires, and follow the kit's routing map. If you’re unsure, consult a professional.
Yes, with care and following safety steps, you can replace wires yourself.
What signs indicate a failing spark plug wire kit?
Common signs include misfires, rough idle, poor acceleration, gasoline smell, and engine hesitation. Visual checks for cracked insulation or swollen boots are also useful.
Watch for misfires and rough idle, plus visible wear on boots and insulation.
Can I reuse old boots with a new kit?
Reusing old boots is not recommended if there is wear or damage. Always install new boots that come with the kit to ensure a proper seal and electrical contact.
It’s best to use new boots with the kit for reliable sealing and contact.
How often should spark plug wires be inspected?
Inspect during each major service or every 30,000 to 60,000 miles, depending on driving conditions. Look for cracks, brittle insulation, or signs of heat damage.
Check wires during major services or every couple of years, depending on driving conditions.
Watch Video
Main Points
- Choose a kit matched to your engine’s geometry.
- Route wires away from heat and moving parts.
- Label and map wires to preserve correct order.
- Use dielectric grease for a secure seal and longevity.
- Test after installation to confirm smooth ignition.