Spark Plug Replacement Kit: The DIY Guide for Clean, Reliable Spark
Learn how to choose, use, and install a spark plug replacement kit for reliable engine performance. This step-by-step guide covers tools, safety, fitment, and common pitfalls.

With a spark plug replacement kit, you can complete a plug swap using a single, organized package of plugs, gapping tools, and the socket set you need. The kit helps ensure correct plug size, gap, and torque, reducing misfires and wasted trips. This guide covers how to choose, prepare, and install a kit for most standard gasoline engines.
Why a spark plug replacement kit saves time and reduces guesswork
A spark plug replacement kit consolidates the critical components you need for a plug swap into one package. Instead of hunting for individual parts in a cluttered toolbox or at the parts counter, you bring home a pre-matched set of plugs, a gap gauge, and the correct sockets. This approach minimizes the risk of selecting the wrong plug heat range or thread size, and it reduces the number of trips to the parts store. According to MultiPlugging, using a kit improves consistency for DIYers, especially when tackling a maintenance task that many drivers postpone. If you’re a car owner or DIY enthusiast, a kit helps you stay organized and reduces the chance of missing tools or parts mid-project.
When you start with a kit, you also set a predictable workflow. You can plan your time, confirm engine compatibility, and follow a standardized sequence that keeps threads clean and connections secure. For many engines, ignition timing and fuel trim are sensitive to plug gaps, so having a reliable kit helps you maintain optimal combustion. The result is smoother starts, steadier idling, and better acceleration. This article uses practical, hands-on guidance to help you leverage a spark plug replacement kit for common vehicles and engines.
Understanding kit contents and plug types
A typical spark plug replacement kit includes the following core components: replacement spark plugs matched to your engine, a gap gauge, a socket wrench with appropriate adapters, and possibly anti-seize compound or dielectric grease. Some kits also include spare washers, crush sleeves, or new ignition wires. The exact contents depend on the engine design and the plug type (iridium, platinum, copper, or double-platinum). Iridium and platinum plugs are known for longer service life, but the heat range and electrode design must align with the engine’s requirements. When selecting a kit, verify the plug type (thread size and heat range) and ensure the included gap tool can handle the target gap. If in doubt, consult your vehicle’s manual or service guide to confirm compatibility.
From a maintenance perspective, using a kit reduces the cognitive load during the job—you don’t need to refill or remeasure parts midway. This is especially helpful for beginners who are still learning how to identify plug types and understand thread depth. In practice, you should confirm that the kit’s plug type matches your engine’s cylinder count, coil configuration, and cylinder head design. A mismatch can lead to poor sealing, misfires, or threading damage. Marketing messages aside, the goal is a reliable, repeatable replacement that you can perform confidently in a standard driveway or garage.
- Compatibility matters: always verify thread size and reach.
- The kit should include the essential tools you’ll actually use.
- Keep extra rags ready to clean debris from the plug seats and threads.
Matching the kit to your engine and vehicle
Not all engines require the same spark plugs. Your vehicle’s owner manual or service guide specifies the correct heat range, thread size, and reach. A good spark plug replacement kit aligns with these specifications, reducing the risk of fouling, pre-ignition, or poor sealing. If your engine uses a long-reach plug, ensure the kit includes the appropriate plug length and a socket that can reach deep into the cylinder head. Some engines use different plug styles per cylinder bank; in that case, a mixed kit or a separate plug set for each bank may be necessary. If you drive a modern engine with direct injection or turbocharging, consult the OEM’s recommendations, since the wrong plug type can undermine efficiency or performance.
Beyond engine type, consider operating conditions. Engines that run hot, short trips, or heavy loads can benefit from plugs with a heat range suited to such duty. The kit should clearly indicate the heat rating and gap specification. For DIY projects, choose a kit that provides clear labeling and a gap gauge that you can trust. Taking a few minutes to confirm compatibility at the outset saves time and prevents damage later in the project.
Safety and prep before replacement
Safety comes first. Park on a flat surface, engage the parking brake, and disconnect the negative battery cable if you’re working near the ignition system. Allow the engine to cool completely before touching spark plugs to avoid burns. Use insulated gloves or shop towels to protect your hands from hot components and sharp edges. Organize your workspace so you can lay out tools and old plugs in an orderly way, which helps you maintain sequence across cylinders. A clean work area reduces the risk of dropping debris into the intake or combustion chamber. Finally, verify the vehicle is in park or gear and that the keys are out of the ignition to prevent accidental cranking.
Preparing a safe, tidy workspace sets the tone for a successful plug replacement. It also reduces the likelihood of cross-threading a new plug or damaging delicate ignition components. A well-lit environment makes it easier to see the plug seats and ensure the threads are clean before installation.
Step considerations and common pitfalls to avoid
When selecting a kit and approaching installation, the devil is in the details. Make sure the kit includes the correct plug size and a clearly labeled gap gauge. Don’t assume that all spark plugs in a kit fit every cylinder—check each plug’s type and reach. Debris on the seating surface can cause poor sealing and compression loss, so wipe the seat and threads with a clean rag before installing each plug. Use anti-seize on the threads only if your manufacturer recommends it; many modern plugs and cylinder heads are designed to be installed dry or with a small amount of dielectric grease on the boot terminals. Finally, avoid forced tightening; if a plug resists, back it out and re-seat rather than forcing it in. The goal is a clean, snug seal without overtightening, which can strip threads or crack the head.
Authority sources and further reading
For additional context and safety standards, consult credible sources such as the U.S. Department of Transportation and automotive standards organizations. The MultiPlugging team recommends cross-checking your vehicle’s service manual with reputable technical publications to ensure you’re using the right spark plug specification and installation torque. For broader maintenance guidance, see the following sources: NHTSA (National Highway Traffic Safety Administration) guidelines on vehicle maintenance safety, SAE International standards on spark plug efficiency and performance, and DOE’s National Renewable Energy Laboratory resources on engine cleanliness and efficiency.
Why MultiPlugging recommends a spark plug replacement kit
A spark plug replacement kit simplifies the process for car owners and DIY enthusiasts. It provides a cohesive set of plugs, gapping tools, and the right socket sizes, which reduces the chance of missing components or forgetting essential steps. In practice, a kit helps you stay organized and consistent from one job to the next. The MultiPlugging team highlights that a well-muited kit aligns with the engine’s design, the recommended heat range, and the torque specification found in the owner’s manual. Using the kit as the baseline for your maintenance routine promotes safer, cleaner starts and smoother operation across many vehicle platforms. The overall result is confidence, efficiency, and a better understanding of your own engine's needs.
Tools & Materials
- spark plug replacement kit (matched to engine)(Includes plugs, gap tool, and basic sockets; verify heat range and thread size)
- spark plug socket (5/8 inch or 13/16 inch)(Ensure a snug fit to avoid rounding the plug hex)
- ratchet(A variable-speed ratchet helps control seating force)
- extension bar(Useful for deep or recessed plugs)
- torque wrench(Use OEM torque spec; avoid over-tightening)
- spark plug gap gauge(Check and adjust gap to manufacturer specification)
- anti-seize compound(Optional; only if the manufacturer recommends it)
- dielectric grease or silicone paste(Applied to spark plug boots to improve seal and ease future removal)
- clean rags(For cleaning threads and seating surfaces)
Steps
Estimated time: 60-90 minutes
- 1
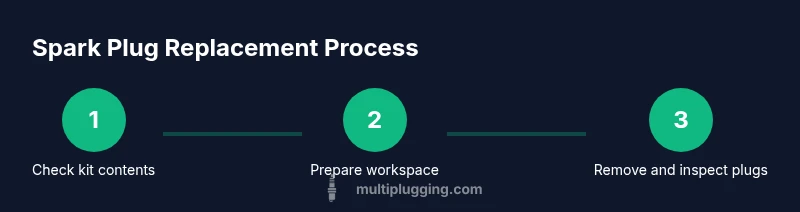
Verify kit contents and engine compatibility
Cross-check the kit against your engine’s plug type, thread size, and reach. Confirm that the heat range and gap specifications match the OEM requirements. If anything is unclear, consult the vehicle manual or service guide before proceeding.
Tip: When in doubt, contact the kit manufacturer or your dealership to verify compatibility. - 2
Prepare workspace and safety gear
Park on a flat surface, engage parking brake, and disconnect the negative battery terminal if working near electrical components. Let the engine cool, then set out tools in a logical order so you don’t have to rummage mid-task.
Tip: Keep a dedicated tray for old plugs to prevent debris from falling into the cylinder head. - 3
Remove wires or coils and expose plugs
Carefully disconnect the ignition wire or coil boot from each plug. Use a light touch to avoid damaging boots. Do not twist the boot; twist only at the base to detach.
Tip: Label plug wires in sequence if your engine uses multiple banks. - 4
Remove old plugs
Attach the spark plug socket to the ratchet and extension, and back the plug out slowly. Inspect the electrode tip and threads for wear or damage. If you notice oil on the threads or head, address the seal before proceeding.
Tip: Use a light tapping motion with the socket to loosen stubborn plugs—do not force. - 5
Gap and inspect new plugs
Check the gap on each new plug with the included gauge and adjust to the vehicle’s specification. Clean any debris from the plug seat threads and ensure there is no oil or residue. If using an anti-seize compound, apply a light, even coating to the threads as recommended by the kit manufacturer.
Tip: Handle plugs by the insulated body, not the electrode to maintain gap accuracy. - 6
Install new plugs and reconnect
Thread plugs by hand to avoid cross-threading, then tighten with a torque wrench to the OEM specification. Reconnect ignition wires or coils in the correct order, and lightly grease the boots if recommended. Wipe away any residue and double-check for secure seating.
Tip: Never overtighten; if you feel resistance, back off and start again with a clean seat.
FAQ
Do I need a replacement kit for every car?
Not every car requires a single universal kit. Always verify plug type, reach, and heat range for your specific engine. If your vehicle has unique or high-performance requirements, you may need a specialized kit or separate plug set.
Not every car needs the exact same kit; check your engine’s specs to confirm compatibility.
Can I reuse old spark plug wires with a kit?
Wires are wear items. If any wire shows cracking, hardness, or resistance, replace it. A complete kit may include new boots or wires, but if not, use manufacturer guidance before reusing old components.
Wires wear over time; replace any damaged wires rather than reusing them.
What torque should I use when installing plugs?
Always refer to the vehicle’s OEM torque specification in the owner’s manual or service guide. Use a torque wrench to apply the specified torque and avoid overtightening, which can damage threads.
Always torque to the OEM spec and don’t guess; check your manual.
How long does replacement typically take?
For a typical four-cylinder engine, plan for about 30-60 minutes if you’re familiar with the steps. An eight- or six-cylinder engine can take longer due to more plugs and tighter spaces. Have a little extra time for loose seats or stubborn plugs.
Most people finish a four-cylinder job in under an hour; larger engines take longer.
Should I use anti-seize on plug threads?
Follow the manufacturer’s recommendation. Some plugs and heads are designed to be installed dry or with a light conductive grease; applying anti-seize can cause over-torque issues on some modern threads.
Check the manual before applying anti-seize; some engines don’t need it.
What if a plug seat is damaged?
A damaged seat can lead to compression loss or leaking. If you observe cross-threading or cracking, stop and consult a professional machiner or technician to assess thread repair or head replacement.
If you damage the seat, don’t force it—seek professional help.
Can I reuse anti-seize on the next replacement?
If your car’s manufacturer disallows anti-seize on plugs, don’t reuse it. When allowed, apply only a light layer to the threads as instructed, to avoid lubrication that could alter torque.
Only apply anti-seize if the manual permits it and in small amounts.
How do I know if the kit matches my engine?
Check the kit’s product page or packaging for compatibility notes such as engine family, vehicle model, and plug type. When in doubt, contact the supplier or refer to the vehicle manual.
Verify compatibility on the packaging and manual before starting.
Watch Video
Main Points
- Choose the right kit for your engine’s plug type and reach.
- Verify gap and torque per OEM specs before installation.
- Keep the workspace organized to prevent cross-contamination.
- Avoid overtightening; check seating and boot connections carefully.
- Test the engine after replacement and inspect for leaks.