Spark ignition engine: Diagnosis, maintenance, and plug replacement
A comprehensive, step-by-step guide to diagnosing, replacing, and optimizing spark plugs in a spark-ignition engine. Learn common issues, tool lists, safety tips, and practical maintenance techniques for DIY enthusiasts.

According to MultiPlugging, mastering spark ignition engine maintenance starts with diagnosing spark plug wear, fuel mixture, and ignition timing. This quick guide shows you how to diagnose common symptoms and perform a safe, step-by-step plug replacement. Follow the steps to improve performance, fuel efficiency, and reliability in a DIY-friendly way.
Why Spark Ignition Engine Fundamentals Matter
A spark ignition engine relies on precise spark timing to ignite the air-fuel mixture at the correct moment. When a spark plug wears, the gap widens and the spark can weaken, leading to misfires, rough idling, and reduced power. This series of symptoms often shows up as hesitation during acceleration, higher fuel consumption, or the check-engine-light illuminating. Understanding the core principles—ignition timing, electrode wear, and the path of the electrical current—helps you diagnose issues early and avoid unnecessary repairs. In this article we’ll explore how a healthy spark-ignition path translates into smoother starts and more efficient combustion. MultiPlugging’s analysis emphasizes the practical, hands-on steps you can take to keep a spark ignition engine reliable and perform best in everyday driving.
Key Components of a Spark Ignition System
Today’s spark ignition systems vary from traditional distributor-based layouts to coil-on-plug designs. The essential idea is simple: a high-energy electric spark must jump the gap at the precise moment to ignite the air-fuel mixture. The main components include spark plugs, ignition coils or coils-on-plug, ignition control modules, and the wires or boots that connect coils to plugs. Spark plugs themselves have a central electrode and a ground electrode that wear over time, changing the gap and conductivity. If any part of the path is compromised—bad coil, cracked boot, or fouled plug—the engine loses efficiency and may misfire. A solid understanding of these parts helps you pinpoint where to focus when symptoms appear.
Diagnosing Common Spark Plug Problems in a Spark Ignition Engine
Common signs of worn or fouled spark plugs include rough idle, noticeable misfires under load, hesitation during acceleration, and decreased fuel economy. You may also observe difficulty starting in cold weather or after the engine reaches operating temperature. Tools like a spark plug tester, a gap gauge, and a clean workspace are invaluable for accurate diagnosis. MultiPlugging analysis shows that irregular firing is often linked to fouled deposits, worn electrode tips, or incorrect heat range for the engine. Systematic checks—visual inspection, used plug extraction, and resistance measurement—help separate plug issues from ignition coil faults or ignition timing problems.
Tools and Safety Before You Begin
Before any spark plug work, ensure the engine is cool and the battery disconnected to prevent shocks or short circuits. Use a proper spark plug socket with a rubber insert to protect ceramic insulators. Clean the area around the plug wells to avoid debris falling into the cylinder. Wear eye protection and gloves, and work in a well-lit, ventilated space. This stage sets the foundation for a safe, clean replacement process and minimizes the risk of cross-threading or damaging the threads in the cylinder head.
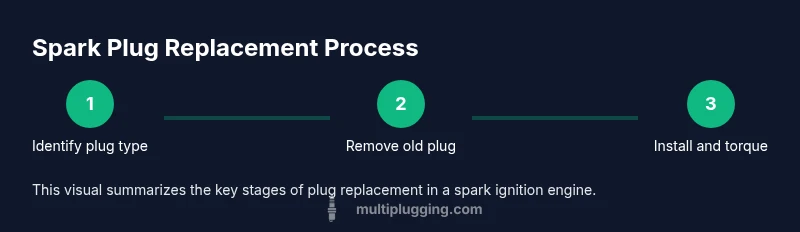
Step-by-Step: Replacing Spark Plugs in a Spark Ignition Engine
Step 1: Locate and identify the correct plugs for your engine using the service manual. Step 2: Remove ignition coils or wires one at a time to avoid cross-firing. Step 3: Carefully loosen and remove the old plugs with a spark plug socket. Step 4: Inspect plug threads and cylinder head for damage; clean the wells. Step 5: Check the electrode gap on the new plugs to ensure it matches the manufacturer’s specification. Step 6: Apply a small amount of anti-seize compound or lubricate the threads as appropriate for your engine type, then thread in by hand to avoid cross-threading. Step 7: Torque plugs to the manufacturer-recommended specification with a torque wrench. Step 8: Reconnect ignition coils or wires one by one and clear any debris. Step 9: Reconnect the battery and perform a careful test run to verify smooth operation. Each step has a precise purpose, from safeguarding the threads to ensuring proper heat dissipation.
Troubleshooting After Replacement
If the engine still runs roughly after replacement, recheck the gap on all plugs and verify the torque specification. Misfires could indicate an ignition coil problem, a loose wire, or a vacuum leak rather than the plugs themselves. Inspect plug wires for wear and cracks, and consider replacing worn boots for a more reliable connection. A test drive with data logging (if available) can help reveal lingering misfires or performance dips under load. If issues persist, consult a professional to diagnose ignition timing or fuel-system concerns.
Maintenance Tips for Longevity and Performance
Regularly inspecting spark plugs and related components is a cornerstone of preventive maintenance. Use the correct heat range and electrode type for your engine, and replace plugs at the recommended interval to avoid fouling. Keep the ignition system clean and dry, and protect threads from corrosion with appropriate lubricants. Adhering to these practices improves idle quality, accelerates response, and sustains fuel efficiency.
Common Mistakes to Avoid
Skipping torque checks on plugs can lead to loose threads and cylinder head damage. Over-torquing can strip threads or crack the ceramic insulator. Mixing different plug types across cylinders can cause uneven heating and misfires. Reusing old anti-seize compounds or applying too much lubrication can attract debris and create deposits. Relying on memory instead of the service manual for gap specs often leads to incorrect ignition timing and poor combustion outcomes.
How to Verify Correct Gap and Torque
Use a calibrated feeler gauge to measure the electrode gap and compare it to the vehicle’s specification. If you don’t have an exact match, select a plug with the recommended gap and adjust gently. After installation, use a torque wrench to tighten plugs to the specified torque. A correct gap and torque ensure reliable spark delivery, proper heat transfer, and long plug life.
Is a Spark Ignition Engine the Same as a Gasoline Engine?
In many contexts, ‘spark ignition engine’ is a broader term that includes gasoline-powered engines, where air and fuel are ignited by a spark. Some modern engines run on alternative fuels or use direct injection technologies, but the core principle—timed spark ignition—remains consistent. Understanding spark plugs, coils, and timing is relevant across these configurations.
Tools & Materials
- Spark plug socket with rubber insert(Fits the plug size in your engine; protects ceramic tip)
- Ratchet or socket wrench(For loosening and tightening plugs)
- Torque wrench(To spec; prevents over/under-tightening)
- Gap tool / feeler gauge(Check electrode gap to spec (inches/mm))
- New spark plugs (correct heat range)(Pre-gap if needed per manufacturer)
- Anti-seize compound or thread lubricant(Apply sparingly if recommended by engine maker)
- Dielectric grease(For spark plug boots to improve grounding)
- Protective gloves and eye protection(Safety first)
- Clean rag and all-purpose cleaner(Clean plug wells and threads)
- Owner’s manual or service manual(Torque specs and gap values)
Steps
Estimated time: 45-75 minutes
- 1
Prepare workspace and tools
Set up a clean, well-lit workspace. Disconnect the battery to prevent shocks. Gather all tools and replacement plugs so you can work efficiently.
Tip: Label each wire or boot as you remove it to avoid cross-connections. - 2
Identify correct plug type
Check the service manual for the correct heat range, thread size, and gap spec for your spark ignition engine.
Tip: If in doubt, remove one used plug to compare with the new ones. - 3
Remove the ignition coil/wire
One plug at a time, carefully disconnect the coil boot or ignition wire from the plug. Do not twist the wire excessively; grip the boot to detach.
Tip: Work one plug at a time to prevent miswiring. - 4
Remove old plug
Attach the spark plug socket, turn counterclockwise to loosen, and extract the plug. Inspect for deposits or damage.
Tip: If the plug is hard to remove, apply a small amount of penetrating oil and wait a few minutes. - 5
Check and prepare new plug
Check the gap of the new plug with a gauge and adjust to spec if required. Ensure the threads are clean and dry.
Tip: Do not crush the gasket or drag debris into the threads. - 6
Install new plug by hand
Thread the new plug by hand first to avoid cross-threading, then snug with the socket. Do not force beyond hand-tight contact.
Tip: Screw in smoothly; if resistance exists, stop and re-check alignment. - 7
Torque to specification
Use a torque wrench to tighten plugs to the manufacturer’s specification. Over-tightening can crack the ceramic; under-tightening causes leaks.
Tip: Double-check the torque setting in the manual. - 8
Reconnect coil/wire and test
Reattach the coil boot or ignition wire securely. Reconnect the battery and run the engine briefly to verify smooth operation.
Tip: Listen for a clean start and steady idle; watch for misfires.
FAQ
What causes spark plugs to foul, and how can I prevent it?
Fouling is often caused by excessive fuel, oil leaks, or improper heat range. Regular maintenance, using the correct plug type, and addressing engine oil or fuel system issues can prevent fouling.
Fouling happens when fuel over-rich conditions or oil leaks coat the plug. Regular maintenance helps prevent it.
Do I always need a torque wrench for spark plugs?
A torque wrench ensures plugs are tightened to the manufacturer’s specification, preventing damage from over-tightening or leaks from under-tightening. Some older engines may specify hand-tight torque in a range.
Torque tools help you tighten to spec and avoid damage.
Can I reuse old ignition wires or boots?
Worn wires or boots can crack and cause misfires; it's best to replace them if they show signs of wear or resistance, even if you replace the plugs.
If wires look cracked or stiff, replace them.
How do I know which gap to set on a new plug?
The correct gap is specified by the engine manufacturer. Use a gap tool to set it precisely before installation for optimal ignition.
Set the gap to the manufacturer’s spec with a gauge.
Is anti-seize always recommended when installing plugs?
Many modern engines do not require anti-seize and some specify not to use it. Always follow the manufacturer’s guidance to prevent thread issues or damage.
Follow the manual; some engines don’t need anti-seize.
What signs indicate ignition timing is off after replacement?
Persistent misfires, rough running, and poor acceleration after plug replacement can indicate timing issues, which may require professional diagnosis.
If misfires persist after replacement, check timing.
Watch Video
Main Points
- Inspect plugs for wear and deposits before replacement
- Use the correct gap and torque for reliable ignition
- Replace plugs one at a time to avoid miswiring
- Test run after replacement to confirm proper operation
- Follow safety procedures to prevent injury