Ignition Plug: Diagnose, Replace, and Optimize Your Spark System
Learn how to diagnose, replace, and optimize ignition plugs in gas engines. This step-by-step guide covers types, tools, timing, and maintenance tips for DIY enthusiasts.

Inspect, gap, and replace ignition plugs safely with the right tools, following engine manual specs. This concise guide covers removal, installation, and post-replacement testing to restore smooth performance.
What is an ignition plug and why it matters
The ignition plug, commonly called a spark plug, is a small device that creates a controlled spark inside the combustion chamber to ignite the air-fuel mixture. According to MultiPlugging, the plug is a wear item in most engines: its electrodes erode slowly with use, and improper gaps can reduce ignition efficiency. A healthy plug helps steady idle, smooth power delivery, and optimal fuel economy. When a plug wears, it can misfire, causing rough running and higher emissions. Understanding how the plug works helps you diagnose problems early and plan maintenance around your engine’s service intervals. This knowledge is especially useful for car owners and DIY enthusiasts who want to save time and keep engines running reliably.
Ignition plug types and their implications for performance
Spark plugs come in several common families, each with different durability and heat-management characteristics. Copper-core plugs heat up quickly and offer predictable performance at a lower price, but they wear faster. Platinum and iridium plugs last longer and resist fouling, but they cost more and may not be ideal for every engine. Many modern engines are designed around long-life, high-reliability plugs, with the heat range and electrode design tuned for efficiency and emissions. When choosing a replacement, balance cost, performance, and the engine’s intended use. Always refer to the vehicle’s service manual for the recommended type and heat range. This guidance helps you avoid misfires and rough idle that degrade fuel economy.
Symptoms of a worn ignition plug
Common indicators include rough idle, engine misfires, reduced acceleration, and a drop in fuel efficiency. You might also notice increased exhaust emissions, hesitation when pulling away, or the check engine light coming on. If you recently performed maintenance and symptoms persist, the culprit could be a fouled or damaged plug. Regular inspections can catch wear before it becomes a drivability issue. Remember, a single faulty plug can disrupt the entire ignition sequence and affect neighboring cylinders.
Safety first: before you touch the engine
Work in a well-ventilated, well-lit area with the engine cool. Disconnect the negative battery terminal to avoid accidental short circuits. Remove loose jewelry and wear safety glasses. Keep a clean workspace and organize removed components so you can reassemble accurately. By establishing a safe baseline, you reduce the risk of electric shock, burns, or dropped tools during the procedure.
Inspecting ignition plugs: visual and basic tests
Start with a visual inspection after removing the ignition lead or coil boot. Look for heavy carbon buildup, oil fouling, melted deposits, or a worn electrode tip. If the plug wires or boots show cracks or damage, replace them as needed to prevent cross-fire and misfires. A clean, lightly worn electrode is usually a sign the plug can be reused, but always compare against the manufacturer’s specifications for gap and replacement intervals. Document findings so you can reference them later.
How to remove an ignition plug safely
Loosen the boot to avoid tearing the boot seal, then use a proper spark plug socket with a rubber insert to grip the plug. Turn the plug counterclockwise to loosen, keeping steady pressure to avoid cross-threading. Once removed, inspect the threads for damage and clear any debris from the recessed hole. If you see cross-threading or stripped threads, do not force the plug; address the mounting area first to prevent further damage. A clean removal sets the stage for a correct replacement.
Checking gap and choosing the right replacement
Use a gap gauge to verify the electrode gap on your new plug matches the engine’s specification. If the manual requires, gently adjust the gap using the gauge tool. Install only plugs that meet the exact gap and heat range specified by the manufacturer. In engines designed for long-life plugs, you may notice less wear per mile, but failure can still occur if gaps drift or deposits form. This step is critical to ensure reliable ignition timing and combustion efficiency.
Tools and materials you’ll need (quick overview)
Gather a spark plug socket, ratchet, torque wrench, feeler gauge, dielectric grease, anti-seize compound (if recommended by the manual), and the correct replacement plugs. Have safety gear, rags, and a fire-safe workspace ready. These essentials minimize damage, prevent thread stripping, and help you complete the job cleanly on the first attempt.
How to install a new ignition plug: step-by-step
Begin by threading the new plug in by hand to avoid cross-threading, then snug it with a socket until resistance is felt, and finally torque to specification per your engine manual. Reconnect the coil boot or wire, ensuring a solid seal. Recheck all boots for tightness, then repeat for any remaining plugs. After installation, lightly lubricate the boot’s exterior with dielectric grease to facilitate future removal and protect the seal. Start the engine to check for a smooth idle and absence of misfire.
Testing after replacement: start engine and diagnose
With the engine at a normal idle, listen for any irregular rhythms or misfires. Use an OBD-II scanner if available to pull codes that may indicate misfiring in a particular cylinder. A successful replacement should yield steady idle, improved throttle response, and consistent fuel economy. If the engine still runs poorly, recheck the plug seating, gap, and boot connections before testing again. This post-install check confirms the repair’s effectiveness and helps you learn from the process.
Maintenance and long-term care for ignition plugs
In many engines, the service life of ignition plugs is tied to operating conditions, fuel quality, and maintenance practices. Regular inspection during routine service helps catch fouling, gap drift, or worn electrodes early. Use a diagnostic plan that includes periodic checks of plug gaps, carbon buildup, and wiring condition. By syncing plug maintenance with engine service, you can maintain clean combustion and predictable performance across seasons.
Troubleshooting common issues after replacement
If you notice continued rough running, check for vacuum leaks, injector issues, or coil pack problems that can masquerade as plug faults. Make sure the ignition system wiring is intact and that the boots seat properly on each plug. If the check engine light returns, retrieve codes and inspect the corresponding cylinder for misfire patterns. A systematic approach helps you isolate the root cause without unnecessary replacement parts.
Tools & Materials
- Spark plug socket (6-point) with rubber insert(Deep-well style preferred for reaching recessed plugs)
- Ratchet handle(For turning the socket with control)
- Torque wrench(Use per engine manual; prevents over-tightening)
- Feeler gauge or gap tool(For checking correct electrode gap)
- Dielectric grease(Apply to boot interiors to improve seal and ease future removal)
- Anti-seize compound(Only use if the manual recommends; some modern plugs don’t require it)
- New ignition plugs matching engine specs(Correct heat range and thread size; buy one or two spares)
- Gloves and safety glasses(Protection during handling and scraping debris)
- Rags and cleaners(Keep the area clean and wipe away oil or carbon buildup)
- Torque-ready ratchet extension(Helps reach tight spaces in some engines)
Steps
Estimated time: 45-75 minutes
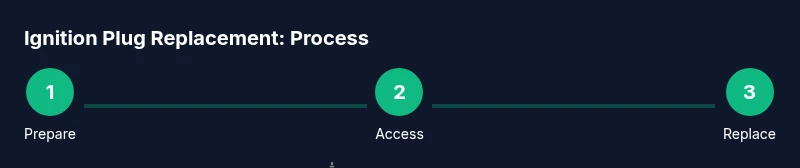
- 1
Prepare workspace and safety
Set up a clean, well-lit area. Disconnect the negative battery terminal to prevent shocks or shorts and gather all tools before starting.
Tip: Double-check battery polarity and ensure the engine is cool before touching components. - 2
Identify plugs and access
Locate the ignition plug(s) and remove any covers or obstacles that block access. Plan a clear path to the spark plug boots for removal.
Tip: Take a quick photo of wiring order if you’re unsure about boot placement. - 3
Loosen spark plug boot
Gently twist and pull the boot to free it from the plug without tearing the boot seal. Do not yank or pull the wire from the coil.
Tip: If stubborn, wiggle slightly while pulling to minimize boot damage. - 4
Remove the old plug
Attach the spark plug socket and carefully unscrew the plug counterclockwise. Lift the plug straight out to avoid thread damage.
Tip: Inspect the port threads for cross-threading or debris; clean if needed. - 5
Inspect and gap
Visualize the electrode and insulator. If replacing, check the new plug gap with a gauge and adjust if required per manual.
Tip: Never bend the electrode or force the plug into a tight seat. - 6
Prepare the new plug
Lightly thread the new plug by hand to avoid cross-threading, then tighten with the socket to snug contact before final torque.
Tip: If using anti-seize, apply a light coat only on the threads where recommended. - 7
Torque to spec
Torque the plug to the engine manual’s specification. Over-tightening risks thread damage; under-tightening can cause leak or misfire.
Tip: Use a torque wrench and test by a slight tug after reaching spec. - 8
Reconnect boot and wiring
Seal the boot back onto the plug firmly and ensure it sits squarely on the electrode. Check for cracks or wear in the boot.
Tip: Apply dielectric grease to ease future removal and maintain seal integrity. - 9
Repeat for additional plugs
If there are multiple plugs, repeat installation steps for each one in sequence to maintain engine balance.
Tip: Keep plugs in the same cylinder order as removed; misordering can complicate diagnostics. - 10
Reconnect battery and start
Reconnect the negative battery terminal and start the engine. Listen for smooth idle and confirm there are no obvious misfires.
Tip: If the engine runs rough, recheck boot seating and torque on recently replaced plugs. - 11
Initial test drive
Take a short test drive to observe throttle response and acceleration. Note any engine hesitation or surging.
Tip: If any codes appear, stop and diagnose using a scan tool. - 12
Document results
Record the replacement date, plug type, and observed performance. This helps plan future maintenance and informs future troubleshooting.
Tip: Keep receipts or notes for reference during next service interval.
FAQ
What is an ignition plug and what does it do?
An ignition plug, or spark plug, creates the spark that ignites the air-fuel mixture inside the engine cylinder. It plays a critical role in starting the engine and maintaining smooth operation.
An ignition plug creates the spark that starts the combustion process in each cylinder. It’s essential for reliable starts and smooth running.
How often should ignition plugs be replaced?
Replacement intervals depend on engine design, driving conditions, and plug type. Always follow the vehicle’s service manual for recommended replacement schedules.
Follow the manual for replacement intervals; it varies by engine and plug type.
Can I clean a fouled spark plug instead of replacing it?
Cleaning can work in some cases, but worn or fouled plugs often perform best when replaced. Cleaning doesn’t restore electrode shape or resonance that affects ignition.
Cleaning can help briefly, but replacement is usually the best long-term fix.
Do I need a torque wrench for plug installation?
Using a torque wrench ensures plugs are tightened to the manufacturer’s specification, reducing the risk of thread damage or poor seal.
Yes, a torque wrench helps you reach the right tightness safely.
What should I do if misfiring persists after replacement?
If misfiring continues, recheck plug seating, gap, and boot connections. If the issue persists, inspect other ignition components or fuel system faults.
If misfiring persists, double-check everything around the plug and consider broader ignition or fuel-system diagnostics.
How do heat ranges affect plug choice?
Heat range affects how quickly the plug heats to operating temperature. Refer to the manual to pick the correct range for your engine and operating conditions.
Choose the heat range per the engine manual to avoid running hot or cold conditions.
Watch Video
Main Points
- Identify ignition plug role and wear indicators
- Match plug type and gap to manufacturer specs
- Use proper tools and safe techniques
- Torque accurately to prevent damage
- Test and document results for future maintenance