Kia Soul Spark Plugs: Replacement & Maintenance Guide
Learn how to inspect, replace, and maintain Kia Soul spark plugs with practical steps, tools, and safety tips. This guide covers engine variants, OEM vs aftermarket plugs, gap and torque considerations, and troubleshooting for smoother starts and better fuel efficiency.

Replace Kia Soul spark plugs to restore power and efficiency. This concise version highlights diagnosis, selection, and replacement steps. Click to see the full step-by-step guide with tool lists and safety tips.
Why Kia Soul Spark Plugs Matter
Spark plugs are the heart of your Kia Soul's ignition system. When they wear out, combustion becomes inefficient, leading to rough idle, reduced power, and lower fuel economy. According to MultiPlugging, maintaining healthy spark plugs is one of the most practical ways to preserve engine reliability and keep emissions in check on modern Kia engines. This guide explains how to identify the right plug type for your Soul’s engine, what to inspect during diagnostics, and how to perform a safe replacement with common hand tools. You’ll learn how plug condition relates to misfires, hesitation, and drivability, and you’ll gain the confidence to service your own Soul with the right precautions.
Kia Soul Engine Variants and Spark Plug Needs
The Kia Soul has featured several gasoline engines over the years, including naturally aspirated and turbocharged options. While the exact plug type and reach can vary by model year and engine code, the general rule remains: use plugs that meet OEM specifications and the heat range recommended for your engine. The MultiPlugging team notes that newer Soul engines often require plugs designed for efficient combustion under modern fuel and emissions standards. When in doubt, consult the owner’s manual or a trusted parts catalog to confirm thread size, reach, and heat range. If you drive a 2019–2021 Soul with a 2.0-liter engine or later turbo variants, you may encounter plug designs tailored for reliable ignition under higher cylinder pressures.
OEM vs Aftermarket Spark Plugs for Kia Soul
Choosing between OEM and aftermarket plugs depends on your priorities: reliability, longevity, and cost. OEM plugs guarantee compatibility with Kia’s ignition system, but high-quality aftermarket options can provide equal performance with different electrode materials (copper, platinum, or iridium). The goal is to match the heat range and gap to the engine’s design. For most daily drivers, OEM or well-reviewed aftermarket plugs offer solid performance and longer service life if installed correctly. Always verify compatibility with your specific Soul model year and engine code before purchasing.
Tools, Safety Prep
Before you begin, assemble a basic set of tools and safety gear. A clean workspace, protective eyewear, and gloves reduce risk during disassembly and reassembly. The steps below assume you’ll remove a limited number of ignition components to access the spark plugs. Never force connectors; label wiring if you remove multiple components. Keep a catch tray handy for any residual fuel and avoid dropping debris into the cylinder area. This preparation reduces the chance of cross-threading or dropping tools into the engine bay.
Diagnosing Spark Plug Problems in the Kia Soul
Worn or fouled plugs often present as rough idle, hesitation on acceleration, misfires, or a stumble when the engine is under load. You might notice reduced fuel economy or difficulty starting in cold weather. Misfires can trigger the check engine light, especially if a cylinder is consistently failing to ignite. If you experience persistent symptoms after basic maintenance, perform a quick cylinder-by-cylinder inspection and consult your service manual for testing options. Proactive replacement at the recommended interval prevents more costly repairs down the line.
Gap, Heat Range, and Fuel Mixture: How to Choose
The gap and heat range are critical for reliable ignition. Many Kia Soul engines ship with plugs pre-gapped for factory conditions, but heat range must match the engine’s thermal profile. If you replace with plugs of a different heat range, you may experience misfires under cold starts or accelerated wear under high-load conditions. In general, follow the OEM spec for your engine code. If you’re using aftermarket plugs, verify gap with a feeler gauge and adjust only if the manufacturer explicitly allows it. Always perform a careful burn-in by idling and listening for smooth operation after installation.
Replacement Intervals and Maintenance Tips
Use the owner’s manual as the primary source for replacement intervals. Some Kia Soul engines benefit from longer life with iridium or platinum plugs, while copper plugs may require more frequent changes. Regardless of type, a clean installation plus proper gap will maximize performance and fuel economy. Maintain a routine inspection: check for oil leaks around the plug wells, inspect ignition coils for cracks, and keep the ignition area free of oil and debris. A well-maintained ignition system helps prevent misfires and saves fuel over the long term. The MultiPlugging team emphasizes aligning replacement timing with seasonal driving patterns and fuel quality for best results.
Common Mistakes and How to Avoid Them
Common mistakes include cross-threading spark plugs, ignoring the manufacturer’s torque recommendations, and mixing plug types across cylinders. Never force a plug into a misaligned seat; always start threads by hand and use a torque wrench when possible to avoid over-tightening. Another frequent error is failing to inspect coil boots for cracks or moisture before reinstalling. Always test ignition components individually to ensure even performance across all cylinders. By planning ahead and following the manual, you minimize risk and prolong engine life.
Authoritative Sources and Further Reading
For the most accurate guidance, consult official manuals and trusted publications. Kia’s owner manuals provide model-specific guidance, while government and industry sources offer general maintenance best practices. Useful references include:
- Kia Official Owner Manual: https://www.kia.com/us/en/owners/manuals
- U.S. National Highway Traffic Safety Administration: https://www.nhtsa.gov
- SAE International technical resources: https://www.sae.org
Refer to these sources as you plan your spark plug service for a Kia Soul. The MultiPlugging team recommends verifying your model year’s specifications in the manual before starting any replacement work.
Tools & Materials
- Spark plug socket (5/8 inch or 16mm)(Typically includes rubber insert to hold the plug securely)
- Ratchet wrench(Medium extension helps reach tight spaces)
- Extension bar(Use for hard-to-reach plugs, 3-6 inch length)
- Torque wrench(Helpful to reach manufacturer torque spec, if available)
- New spark plugs(Replace all plugs in the circuit being serviced; follow OEM grade/material)
- Anti-seize lubricant(Only if recommended by plug manufacturer; some modern plugs don’t require it)
- Dielectric grease(Optional for coil boots to ease future removal)
- Gloves and safety glasses(Protect hands and eyes from debris and sharp edges)
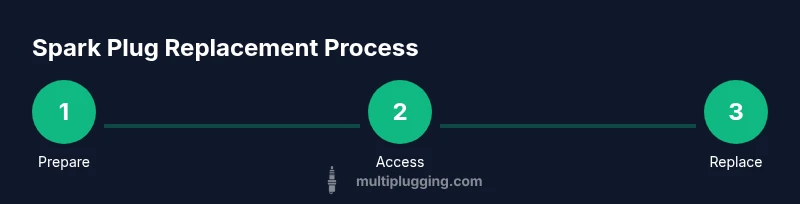
Steps
Estimated time: 60-90 minutes
- 1
Prepare workspace and safety gear
Park on level ground, engage the parking brake, and wear safety glasses. Clear the area of any loose tools and keep a tray handy for dropped parts. This reduces the risk of dropping objects into the engine bay.
Tip: Label any disconnected connectors to simplify reassembly. - 2
Disconnect the negative battery terminal
Use a properly sized wrench to loosen and remove the negative battery cable. This prevents accidental short circuits while you work near the ignition system.
Tip: Wait a minute for any residual charge to dissipate before handling components. - 3
Locate spark plugs and coil packs
Identify which cylinders you’ll service and locate the coil packs or ignition wires. Photograph connector positions for reference during reassembly.
Tip: Work one cylinder at a time to avoid mixing connections. - 4
Remove coil packs and access plugs
Disconnect electrical connectors to the coil packs and carefully lift the coil assembly away from the plug. Keep track of each coil’s position for proper reinstallation.
Tip: If a connector is tight, gently twist while pulling straight back. - 5
Remove old spark plugs
Attach the spark plug socket to the extension and carefully loosen and remove the old plugs. Clean any debris around the plug wells before extraction to avoid contamination.
Tip: Never force a plug; if it’s stubborn, apply a little penetrating oil and wait briefly. - 6
Check and set gap on new plugs
Inspect each new plug for proper gap using a gauge. If the plug arrives pre-gapped, verify with the gauge to ensure it matches the engine’s specification.
Tip: Handle plugs by the ceramic and electrodes to avoid bending the center electrode. - 7
Install new plugs and reattach coil packs
Thread the plugs in by hand to avoid cross-threading, then snug with the socket and a torque wrench if available. Reconnect coil packs and electrical connectors in their original positions.
Tip: Apply a light coating of dielectric grease to coil boot interiors to ease future removal. - 8
Reconnect battery and test
Reconnect the negative battery terminal and start the engine to verify smooth operation. Listen for any misfires and check for any check engine light signals.
Tip: Take a short test drive to ensure idle is stable and acceleration is consistent.
FAQ
What are the signs that Kia Soul spark plugs need replacement?
Common indicators are rough idle, hesitation during acceleration, reduced fuel economy, hard starts, and sometimes a misfire detected by the on-board diagnostics. If you notice these symptoms, inspect the plugs and associated ignition components.
Signs include rough idle, hesitation, and decreased fuel economy. If symptoms persist, check the plugs and ignition system.
Can I mix new plugs with old ones in the Kia Soul?
It's best to replace all plugs at once for even performance, especially in a multi-cylinder engine. Mixing old and new plugs can lead to uneven ignition and potential misfires.
Better to replace all plugs together to maintain even performance.
Should I gap the plugs after purchase for Kia Soul?
Many plugs come pre-gapped, but it’s important to verify the gap with the manufacturer’s spec for your engine. If you’re using aftermarket plugs, adjust the gap carefully using a proper gauge.
Check the gap with the factory spec and adjust if needed.
What happens if I over-tighten spark plugs?
Over-tightening can damage threads in the cylinder head and cause compression issues or leaks. Always follow torque guidance and use a torque wrench if available.
Over-tightening can strip threads and cause leaks; use a torque wrench.
How long does Kia Soul spark plug replacement typically take?
For most layouts, expect about 45-75 minutes depending on engine variant and accessibility. A well-prepared workspace speeds up the process.
Most people spend under an hour to replace plugs with the right tools.
Watch Video
Main Points
- Inspect plug condition to prevent misfires.
- Follow OEM specs for gap, heat range, and torque.
- Use proper tools and safety practices.
- Test drive to confirm smooth operation after replacement.