How to Make Spark Plug Wires: A DIY Guide
A practical, safety-focused guide to making spark plug wires at home. Learn materials, tools, step-by-step construction, testing, and troubleshooting for reliable ignition.

Goal: Learn how to make spark plug wires by selecting a high-temperature conductor, robust silicone insulation, and end boots, then measure, cut to length, terminate, and test for proper resistance. This DIY guide covers safety precautions, required tools, material options, and step-by-step instructions to help you succeed. Whether you’re restoring a classic engine or tuning for reliability, follow these precise actions.
Why DIY spark plug wires might appeal to you
DIY spark plug wires can be attractive for car owners and hobbyists who want to customize wiring for unique engine bays, patch aging insulation, or work on classics where aftermarket cables aren’t readily available. The goal is reliable ignition without surprising resistance or misfires. According to MultiPlugging, starting with heat-resistant conductor and insulation is essential, and you should only attempt this if you have a solid grounding in electrical work and safe handling practices. This section lays the groundwork for understanding when a DIY approach makes sense and how it aligns with your project goals.
Key design choices for DIY ignition wires
When you design and assemble spark plug wires yourself, you must balance electrical performance with heat resistance and durability. Pick a conductor core with good conductivity and a layer of silicone insulation that withstands automotive engine temperatures and exposure to oil and fuel vapors. The outer jacket should protect from abrasion, moisture, and chemical attack. Expect to manage resistance along the length to maintain consistent spark delivery, and plan boot and terminal configurations that fit your engine’s spark plugs and distributors. These choices impact longevity, performance, and ease of service.
Testing and quality checks you should perform
Before installing any DIY wire, verify continuity is intact and there are no open circuits. Use a multimeter or dedicated spark plug wire tester to check resistance approximate to the designed length, and confirm that there is no insulation breakdown when flexed. Inspect the boot ends for a tight seal against moisture and verify that the connectors seat firmly on the spark plug terminals. If any test fails, re-check the insulation, crimps, and routing to eliminate edge-case failures that could lead to misfires.
Safety, reliability, and practical cautions
Working with ignition system components involves high voltage and hot components. Always disconnect the battery and follow lockout/tagout practices when working on the engine bay. The MultiPlugging team emphasizes using automotive-grade materials and protecting exposed conductors to reduce arcing risks. DIY wires can be a rewarding project for experienced hobbyists, but they should be used only when you understand the hazards and have a reliable testing method in place.
Authority sources and further reading
For safety standards and best practices related to electrical work and automotive maintenance, refer to official sources such as OSHA safety guidelines, SAE International resources on ignition systems, and NIOSH safety information. These references provide general guidance on handling electrical components, high-temperature materials, and safe workshop practices. In all cases, follow the engine manufacturer’s recommendations and local regulations when working on ignition wiring.
Authority sources
- OSHA: https://www.osha.gov
- SAE International: https://www.sae.org
- NIOSH (CDC): https://www.cdc.gov/niosh
Tools & Materials
- High-temperature conductor core (automotive-grade copper wire, 18-20 AWG)(Select wire rated for ignition temperatures; avoid standard house wiring.)
- Heat-resistant silicone insulation tubing/jacket(Outer insulation must withstand engine heat and oil exposure.)
- Silicone dielectric sleeve(Used to protect the conductor where it passes through insulation layers.)
- Boots and crimp terminals(Choose ends compatible with your spark plugs and coil/distributor.)
- Heat shrink tubing(For securing joints and providing extra protection.)
- Spark plug boots(Ensure a snug, moisture-proof fit on the plug terminals.)
- Crimping tool or suitable soldering setup(Use the tool recommended by the terminal manufacturer for a solid termination.)
- Wire stripper/cutter(Fine-tipped stripper helps avoid nicking the conductor.)
- Ohmmeter / multimeter for continuity(Check that each wire shows continuity and reasonable resistance for its length.)
- Spark plug wire tester (optional but recommended)(Gives quick feedback on insulation integrity and arc resistance.)
Steps
Estimated time: 90-120 minutes
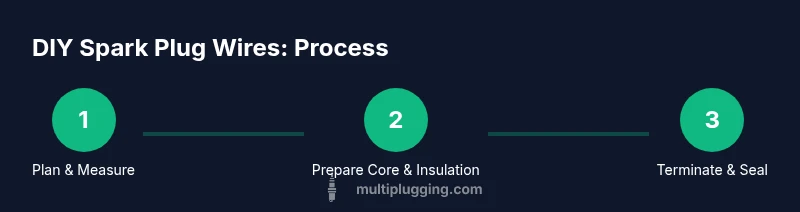
- 1
Plan wire lengths and routing
Measure from the ignition coil or distributor to each spark plug hole, adding extra slack for routing around brackets and hoses. Mark each length clearly on the conductor before cutting. This planning reduces guesswork and minimizes the need to rework the assembly.
Tip: Double-check routing to avoid sharp bends or rubbing against hot surfaces. - 2
Prepare conductor core and insulation
Cut the conductor to length, deburr edges, and slide on the inner insulation. Ensure there are no nicks or exposed copper that could lead to arcing. Keep the work area dry and clean to maintain insulation integrity.
Tip: Inspect every length for cracks or frayed strands; replace if you see any damage. - 3
Terminate ends with boots and terminals
Attach the terminal ends to the conductor using a proper crimp tool or solder as required by the terminal type. Ensure a tight fit that won’t pull loose under engine vibrations. Test fit on the spark plug boot prior to final assembly.
Tip: Crimp evenly and verify that the connector seats flush against the boot. - 4
Add outer insulation and protective jacket
Slide the outer silicone insulation over the assembled core and boots. Apply heat shrink tubing over joints for extra protection and shrink it with controlled heat. Route the wire to minimize exposure to moving parts.
Tip: Start from the boot end and work toward the connector to avoid trapping air. - 5
Test continuity and insulation integrity
Use an ohmmeter to verify continuity of each wire and check for abnormal resistance. If you have a spark plug wire tester, perform a high-voltage test to ensure insulation holds under load. Document results for each wire.
Tip: Record resistance per length to help with future maintenance and replacement planning. - 6
Install and perform a functional engine test
Reconnect the battery, secure routing away from hot zones and moving parts, and install the wires onto the distributor and spark plugs. Start the engine and listen for hesitation or misfires. If issues appear, recheck each connection and insulation integrity.
Tip: Perform a controlled test in a safe area and be ready to shut off power quickly if you smell burning insulation.
FAQ
Is it safe to make spark plug wires at home?
Working with ignition components involves high voltage. With proper safety gear, dry environment, and tested materials, a careful DIY approach can be attempted by experienced hobbyists. If unsure, seek professional guidance.
It’s risky to work with ignition wires; proceed only if you’re experienced and follow safety guidelines.
What tools are absolutely required?
At minimum, you need an insulated conductor, heat-resistant insulation, terminal boots, a crimp tool, wire stripper, and a multimeter for continuity checks.
You’ll want the essential tools like insulated wire, proper boots, a crimp tool, and a tester.
How do I know when a wire is bad?
Signs include misfires, rough idle, visible insulation damage, or arcing sounds. If you notice any of these, inspect or replace that wire.
Look for misfires and insulation wear as the main clues a wire is compromised.
Can I reuse old boots?
Reusing old boots is not recommended; worn boots may leak moisture and fail to seal, increasing resistance and risk of misfires.
Typically better to replace worn boots for reliability.
Are there legal restrictions on making ignition wires?
DIY ignition components aren’t typically illegal, but improper work can breach safety standards or warranties. Check local regulations and manufacturer recommendations.
Check local rules and follow safety guidelines when DIY-ing ignition components.
Should I consider factory-made wires instead?
For most drivers, factory or reputable aftermarket ignition wires are safer and tested. DIY cables should be reserved for experimental setups or legacy projects with appropriate testing.
Factory wires are generally safer; DIY is for experienced projects with strict testing.
Watch Video
Main Points
- Plan wire lengths before cutting to avoid waste.
- Use heat-rated materials and reliable terminations.
- Test each wire for continuity and insulation integrity before engine use.
- DIY spark plug wires are best for experienced hobbyists and non-critical applications.