Honda Pilot Spark Plug Replacement: A DIY Guide
A clear, step-by-step DIY guide to Honda Pilot spark plug replacement by MultiPlugging. Learn the tools, safety tips, gap checks, and torque guidance for reliable engine performance.

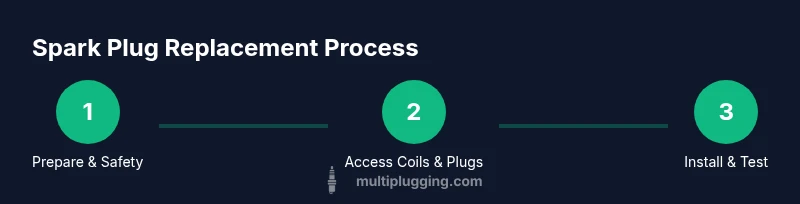
The honda pilot spark plug replacement is a straightforward DIY task when you understand the layout, use the right tools, and follow OEM specs. In this quick guide you’ll learn the exact steps, safety tips, and common pitfalls for Honda’s coil-on-plug setup. According to MultiPlugging, a well-planned approach saves money and keeps your engine healthy. Expect roughly 60-90 minutes for a typical V6 engine, depending on access and experience.
Understanding spark plugs in the Honda Pilot
Spark plugs ignite the air-fuel mixture inside each cylinder. In the Honda Pilot’s V6, there is one plug per cylinder controlled by coil-on-plug ignition. Worn or fouled plugs can cause rough idle, misfires, reduced fuel economy, and slower acceleration. Replacing them restores spark strength and improves combustion efficiency for smoother performance across driving conditions. For the honda pilot spark plug replacement, using the correct heat range and type is essential to avoid glazing or pre-ignition. The Pilot’s access bays are relatively compact, so plan your approach and organize plugs and coils in order to minimize handling time and reduce cross-threading risk. Always inspect coil boots for cracks or moisture before removal; damaged boots can cause misfires even with new plugs. According to MultiPlugging, using OEM specs ensures longevity and reliability.
Before you start: safety and planning
Safety matters more than speed when working on an automotive ignition system. Begin with a cool engine and a well-lit workspace. Disconnect the negative battery cable to prevent accidental sparks while removing coils and plugs. Gather the right tools and a clean workspace, and set aside a clear area for used plugs to prevent contamination. Label each ignition coil lead and keep track of which coil came from which cylinder to preserve firing order. Review Honda’s service guidelines for your model year to confirm spark plug type, gap specification, and torque values. MultiPlugging’s team emphasizes following OEM specs to reduce cross-threading and prolong plug life. Wear eye protection and gloves, and keep a fire extinguisher nearby as a precaution.
Tools and parts you’ll need
Here’s a comprehensive list to prep for a clean job:
- 6 spark plugs of the correct heat range for the Honda Pilot
- Spark plug socket (magnetized) with a 3/8" drive
- Deep-well extension bar and standard ratchet
- Torque wrench calibrated to OEM specs
- Gap gauge or feeler gauge for checking plug gaps
- Dielectric grease for coil boots
- Anti-seize compound (optional, depending on manual)
- Shop towels and a magnetic tray for fasteners
- A small pick or flat blade to release ignition coil connectors
- Protective gloves and eye protection
Using the right tools helps ensure a professional finish and minimizes the risk of cross-threading. Remember to keep parts organized by cylinder to preserve firing order.
Engine layout of the Honda Pilot: coils and plugs
The Honda Pilot uses a coil-on-plug design, where each cylinder has its own ignition coil directly above the spark plug. This arrangement reduces coil wiring complexity but makes access a bit trickier in some engine bays. You’ll typically locate six coil packs, each connected to a spark plug inside a dedicated well. Understanding this layout helps you plan the sequence for removing and re-installing coils and plugs without mixing up cylinders. When you work in the wells, keep dirt out of the plug holes and avoid prying on coil boots, which can crack and cause misfires. A clear headlamp and a mirror can help you spot plug wells and coil connectors more easily.
Step-by-step overview you should know
The Honda Pilot spark plug replacement involves safely disconnecting power, accessing each coil, removing old plugs, checking or adjusting the gap on new plugs, seating the new plugs without cross-threading, and reassembling the ignition coils and electrical connectors. Plan to work cylinder-by-cylinder to minimize confusion. While this overview isn’t a substitute for the full steps, it helps you anticipate the flow and potential tricky moments such as coil boot removal and plug seating. MultiPlugging notes that preparation and organization are half the battle for a clean replacement.
Accessing coils and removing them safely
Start by locating each ignition coil above its respective spark plug. Carefully disconnect the electrical connector, then gently lift the coil straight up to avoid bending the boot. Set each coil aside in the order you removed it, and keep track of which cylinder it belongs to. If a coil is stubborn, use a small flat tool to gently lift the boot from the plug area without applying excessive force. Inspect the coil boot for cracks or moisture before continuing. A clean workspace reduces the risk of dropping dirt into the plug wells, which can compromise sealing and performance.
Gap, torque, and sealing: prepping new plugs
New plugs often arrive pre-gapped to OEM specifications, but it’s essential to verify. Use a gap gauge and compare against Honda’s recommended spacing for your model year. If a gap adjustment is needed, make it carefully and recheck. Thread the plug by hand to avoid cross-threading, then snug it with a torque wrench to the manufacturer-specified value. Apply a small amount of dielectric grease to the inside of the coil boot and to the threads if recommended, to improve future removal and sealing. Remember that a well-seated plug without over-torquing protects the cylinder head threads.
Installing the new plugs and reattaching coils
Lower the new plug into the plug well, thread by hand, and then tighten with a torque wrench to the OEM spec. Reinstall each ignition coil in the correct position and reconnect its electrical connector. Double-check that all coils are seated firmly and that there are no loose wires. Once all plugs and coils are reinstalled, visually inspect for any tools left behind and ensure the coil boots are fully attached. Reconnect the negative battery cable as the final power-step before starting the engine.
Post-install tests and initial start-up
With everything reassembled, start the engine and listen for a smooth idle without misfires. If the check engine light flickers or a misfire is detected, turn off the engine and recheck the relevant coil connections and plug seating. A brief road test at moderate RPM helps confirm acceleration smoothness and fuel economy consistency. If misfires persist, inspect ignition coils and boots for damage or reinstall plugs to confirm proper seating. MultiPlugging notes that a careful, methodical approach reduces the likelihood of post-replacement issues.
Common symptoms of worn plugs and when to replace
Worn plugs can produce rough idle, reduced power, poor acceleration, and lower fuel economy. If you notice misfires, hesitation, or difficulty starting in cold weather, it may be time to inspect the plugs and coils again. Visual checks for oil fouling, heavy carbon build-up, or worn electrodes help you decide if replacement is needed. Remember: using the correct heat range and type per Honda’s guidelines is crucial for optimal burn and longevity. The MultiPlugging team emphasizes sticking with OEM specs to avoid performance problems.
Maintenance tips to extend spark plug life
To maximize plug life, follow the recommended service intervals in your owner’s manual and use the right plug type for your engine. Keep ignition coils and boots clean and dry, and prevent oil or coolant leaks from reaching the plug wells. Regularly inspect the ignition system and perform periodic gap checks if you’re using performance or aftermarket plugs. And always maintain clean air and fuel systems to support efficient combustion. MultiPlugging’s analysis suggests that reliability grows with consistent maintenance and documentation of service history.
Maintenance schedule and record-keeping
Maintain a simple service log that records the date, mileage, plug type, and any notes about coil condition or torque values. This habit helps you track plug life and plan replacements before performance declines. Use OEM spec plugs and record the exact part number used for future reference. As you accumulate service history, you’ll be better prepared for future maintenance decisions and potential warranty considerations. The right records give you a clear picture of your Honda Pilot’s ignition health.
Tools & Materials
- 6 spark plugs (correct heat range for Honda Pilot)(OEM or OEM-equivalent; pre-gapped unless manual says otherwise)
- Spark plug socket (magnetized) with 3/8" drive(Deep-well style for reaching wells)
- Deep-well extension bar(Keeps socket aligned)
- 3/8" drive ratchet(Solid grip, avoid impact tools)
- Torque wrench(Set to OEM specification from manual)
- Gap gauge or feeler gauge(Verify pre- or post-gap as needed)
- Dielectric grease(Apply to coil boot contact surfaces)
- Anti-seize compound (optional)(Use only if manual requires or suggests)
- Shop towels(Keep wells clean and dry)
- Small pick or flat blade(Release coil connectors without damage)
- Gloves and eye protection(Safety first)
- Replacement ignition coils (optional)(Only if coils show wear or damage)
- Clean rags or microfiber cloth(Wipe surfaces and protect the engine bay)
Steps
Estimated time: 60-90 minutes
- 1
Disconnect the negative battery terminal
Begin by turning off the ignition and disconnecting the negative battery terminal to prevent arcing while you work. This step reduces the risk of short circuits when removing coil connectors.
Tip: Wait 2-3 minutes after disconnecting to allow any residual charge to dissipate. - 2
Remove the engine cover if present
Remove the engine cover to access coil packs. Keep mounting bolts in a labeled tray so you don’t mix them up during reassembly.
Tip: Take a photo of the layout before removing to reference during reassembly. - 3
Identify and disconnect ignition coil connectors
Gently disconnect each ignition coil’s electrical connector. Work one coil at a time to avoid mixing coils and cylinders.
Tip: Use a small pick to release any stubborn tabs without harming the wiring. - 4
Remove ignition coils
Lift each coil straight up to free it from the plug well. Place coils in order so you can re-install them in the same position.
Tip: Do not bend the coil boots; inspect for cracks or moisture. - 5
Remove old spark plugs
Carefully thread the spark plug socket into the plug well and lift the worn plug out. Use a slow, steady motion to avoid cross-threading.
Tip: If a plug resists, stop and re-check alignment to prevent thread damage. - 6
Check/adjust new plug gaps
Verify that each new plug is pre-gapped to Honda’s spec. If adjustments are needed, use the gap tool precisely.
Tip: Do not force a gap beyond the suggested tolerance. - 7
Install new plugs by hand and torque
Thread the new plugs by hand to avoid cross-threading, then tighten with a torque wrench to the OEM spec.
Tip: Do not overtighten; reaching the right torque protects the cylinder head. - 8
Reinstall ignition coils and reconnect wiring
Place each coil back into its corresponding cylinder and reconnect the electrical connector. Ensure a snug, click-like seating.
Tip: Wipe boot surfaces with a dry cloth before reinstall. - 9
Reconnect battery and check the system
Reconnect the negative battery terminal and visually inspect for loose connections or tools left in the bay.
Tip: Turn the ignition to accessory then start to confirm systems without load on the starter. - 10
Start engine and perform basic test
Start the engine and listen for a smooth idle. Take a short test drive to verify there are no misfires.
Tip: If misfires occur, recheck coil connections and plug seating.
FAQ
Do I need to remove the engine cover to access the spark plugs on a Honda Pilot?
Some Honda Pilot models require removing the engine cover for coil access; others allow access without removing it. Check your model year and remove if necessary to gain a clear path to the coils and plug wells.
Some models need the engine cover removed for better access; others don’t. Check your year’s guidance and remove the cover if needed.
Are spark plugs pre-gapped when I buy them for the Honda Pilot?
Most OEM or OEM-equivalent spark plugs come pre-gapped. Always verify with a gap gauge before installation and adjust only if the manufacturer specifies a tolerance.
Most plugs come pre-gapped, but always verify with a gauge and adjust if your manual calls for it.
Can I reuse old spark plugs to save money?
Reusing old plugs is not recommended. Worn electrodes and fouling reduce ignition performance. Replace with new plugs that match Honda’s specifications.
Reusing old plugs isn’t advised; replace with new plugs that meet Honda’s specs.
How do I know which spark plug type to choose for my Honda Pilot?
Choose the plug type and heat range recommended in your owner’s manual or by Honda’s service guidelines for your model year. Using the wrong type can affect performance and longevity.
Pick the type and heat range Honda recommends for your model year, per the manual.
What should I do if I see a misfire after replacement?
If a misfire appears after replacement, recheck the coil connectors and ensure the plug is properly seated. Inspect boots for cracks and confirm the correct firing order.
If misfire pops up, recheck coils and plug seating, and inspect boots for damage.
Is anti-seize always necessary when replacing spark plugs?
Anti-seize is optional and depends on the plug design and manual instructions. Follow the OEM guidance; over-application can affect torque.
Anti-seize is optional; follow Honda’s guidance and don’t over-apply.
Watch Video
Main Points
- Disconnect battery before starting
- Use OEM-spec plugs and correct torque
- Keep track of coil order to avoid misfires
- Check plugs for proper seating and gaps
- Test drive and verify engine smoothness after replacement