Honda GX160 Spark Plug: Replacement, Gap, and Maintenance Guide
Learn how to identify, inspect, and replace the Honda GX160 spark plug with proper gap, torque, and maintenance steps to keep your small engine running smoothly.

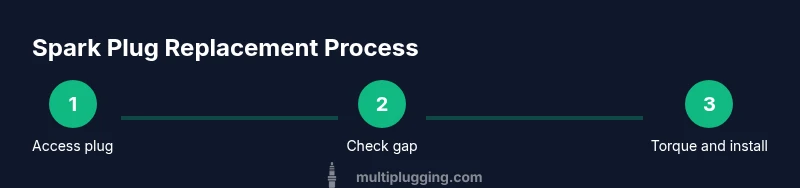
This guide shows you how to identify the correct Honda GX160 spark plug, inspect its gap and condition, and perform a safe replacement. Gather a spark plug socket, gap tool, wrench, anti-seize, and a clean rag, then follow the step-by-step instructions to ensure proper fit and reliable starting.
Why the GX160 Spark Plug Matters
The Honda GX160 small engine relies on a healthy spark plug to ignite the air-fuel mixture. A fouled or worn plug can cause hard starts, rough idle, misfires, reduced power, and increased fuel consumption. Regular inspection and timely replacement keep ignition consistent and protect the carburetor from improper combustion by ensuring clean ignition timing and stable combustion. This section reviews how the GX160 spark plug interacts with ignition systems, what symptoms signal trouble, and how to plan a maintenance routine that minimizes downtime. According to MultiPlugging, the spark plug is a critical touchpoint for GX160 performance and starting reliability. Understanding its role helps you diagnose issues quickly and avoid unnecessary disassembly. Even small engines like the GX160 benefit from a simple, repeatable inspection routine, especially in dusty or high-dust environments. Keeping a clean plug seat and proper gap is a quick win for reliability and longevity, whether you’re mowing, generating, or powering tools.
Understanding Spark Plug Types and Heat Range
Spark plugs come in different heat ranges and electrode designs. For the GX160, you’ll want a plug that matches the engine’s ignition needs and thermal performance. In practical terms, choose a plug recommended by the engine manufacturer or a trusted brand that supports small gasoline engines. The heat range affects how quickly the plug heats up and cools down, influencing starting performance and misfires under heavy load. This section helps you interpret common indicators like fouling patterns, deposits, and electrode wear, and explains how to select a plug type that minimizes fouling and improves combustion efficiency. The key takeaway is to align the plug with the GX160’s operating temperatures and fuel conditions for reliable starts and smooth operation.
Inspecting the GX160 Spark Plug
Regular inspection of the GX160 spark plug is a quick, high-leverage maintenance task. Remove the spark plug cap, inspect the porcelain for cracks or deposits, and check the electrode gap visually with a gauge. Fouling, oil on the electrode, or heavy deposits signal replacement or a tune-up of the air and fuel side of the engine. If the plug shows wear on the ground electrode or a burned appearance, it should be replaced. This section walks you through safe inspection steps, how to recognize signs of improper combustion, and how to document plug condition to plan future maintenance with consistency. As noted by the MultiPlugging team, consistent plug inspection improves starting reliability and overall engine health.
Gap, Torque, and Installation Considerations
Gap measurement is essential before installation. Use a gap tool to verify the spark plug gap matches the GX160’s specification in the manual or the plug manufacturer’s guide. When installing, thread the plug by hand to avoid cross-threading, then snug with a torque wrench to the recommended specification. Clean the seat area on the cylinder head to ensure a proper seal, and avoid over-tightening which can damage the threads. This section emphasizes the practical steps to get a precise fit and reliable compression seal, which protects against compression leaks and misfires. The goal is consistent ignition timing and minimal risk of thread damage over time.
Replacing the Spark Plug: Safe Practices and Maintenance Rhythm
Replacing the GX160 spark plug is a routine task that, when done correctly, yields noticeable improvements in starting and efficiency. Remove debris from around the plug area before removal to prevent dirt from entering the combustion chamber. Install a new plug with anti-seize compound if recommended by the manufacturer, and torque to spec. Reconnect the spark plug wire and perform a quick idle test to confirm proper function. Finally, reassemble any housing or covers and dispose of the old plug properly. In practice, establishing a regular replacement interval and documentable checks will help you avoid extended outages and keep the GX160 performing at its best.
Maintenance Tips to Prolong Spark Plug Life
To extend spark plug life, couple plug care with overall engine maintenance. Use clean, stable fuel, replace air filters on schedule, and keep the cooling fins clear of dust. Regularly inspect oil and fuel quality, as poor fuel or oil contamination can foul plugs faster. After replacing, monitor engine behavior during first starts and look for signs of misfires or rough idle. A simple, repeatable maintenance ritual reduces downtime and helps you diagnose issues quickly, saving time and fuel in the long run. The MultiPlugging team emphasizes that disciplined maintenance is a practical way to keep GX160 engines dependable across seasons.
Tools & Materials
- spark plug socket(6-point or 12-point preferred; ensure it fits GX160 plug size)
- gap tool / feeler gauge(To verify and adjust the plug gap to spec)
- wrench or ratchet(For loosening/tightening the plug and accessories)
- torque wrench(To apply the manufacturer-recommended torque)
- anti-seize compound(Optional; use only if recommended by plug or engine manual)
- rag or brush(Clean around the plug seat to prevent debris entry)
- new spark plug (correct heat range)(Always use a new plug when replacing)
- owner’s manual or spark plug guide(Reference for gap and torque specs)
Steps
Estimated time: 15-25 minutes
- 1
Power off and disconnect
Turn off the engine and disconnect the spark plug wire to prevent accidental starting. This minimizes the risk of shock or injury during the replacement.
Tip: Work in a well-lit area and keep the prop at a safe distance from moving parts. - 2
Access the spark plug
Remove any obstructing covers or the air intake housing to access the spark plug. Clear the area around the plug seat to avoid debris falling into the cylinder.
Tip: Take photos before disassembly to help reassembly later. - 3
Remove the old plug
Use the spark plug socket with a ratchet to loosen and remove the old plug. Do not force it if it resists; mis-threading can damage the cylinder head.
Tip: Turn slowly and evenly; if it’s stuck, apply a small amount of penetrating oil and wait a few minutes. - 4
Check/adjust the gap
Measure the new plug’s gap with a feeler gauge and adjust to the GX160 specification using the gap tool. Replace if the plug comes pre-gapped within tolerance.
Tip: Avoid bending the ground electrode; even small deformations impact performance. - 5
Install the new plug
Thread the new plug by hand to avoid cross-threading, then tighten to the specified torque with a torque wrench. Clean the seat area to ensure a proper seal.
Tip: If using anti-seize, apply a small amount to the threads only. - 6
Reconnect and test
Reconnect the spark plug wire, reassemble any covers, and start the engine to test for smooth operation and proper ignition.
Tip: Listen for a stable idle and observe exhaust for normal smoke levels. - 7
Dispose of the old plug
Dispose of the used plug according to local regulations. Keep the workspace clean to prevent contamination.
Tip: Store the new plug in a protective container until installation.
FAQ
Do GX160 engines require anti-seize on spark plugs?
Anti-seize is optional and depends on the plug and cylinder head materials. If the manufacturer recommends it, apply a thin film on the threads. Otherwise, a clean, dry thread may be sufficient. Always follow the manual.
Anti-seize may be optional. Check the manual, and apply a light coating only if recommended by the manufacturer.
How can I tell if my GX160 spark plug needs replacement?
Look for fouling, oil on the electrode, heavy deposits, a dull electrode, or a misfiring symptom. If the plug shows wear or the gap is out of spec, replace it.
If you see fouling, deposits, or misfires, it’s time to replace the plug.
What torque should I use for GX160 spark plugs?
Torque should be set to the engine’s specified value in the owner’s manual or plug maker’s guide. Use a torque wrench for consistency and avoid over-tightening.
Use the manual’s torque spec and a torque wrench for accuracy.
Can I reuse an old spark plug if it looks clean?
Even if the old plug looks clean, it’s generally best to replace it with a new one to maintain reliable ignition and avoid unknown wear.
Even clean-looking plugs can wear; replace for reliability.
How often should I replace the GX160 spark plug?
Follow the maintenance schedule in the manual. If you operate under harsh conditions, inspect more frequently and replace as needed.
Check the manual for intervals and adjust for harsh conditions.
What are common symptoms of a bad spark plug on GX160?
Hard starting, rough idle, misfires, loss of power, or increased fuel consumption are typical signs that the spark plug may be failing.
Hard starting or rough idle can indicate a bad plug.
Watch Video
Main Points
- Inspect plug condition before every seasonal use
- Match heat range and gap to GX160 specifications
- Torque plug to spec and avoid cross-threading
- Combine plug care with air and fuel system maintenance