Spark Plug Gap for Can-Am X3: A Complete DIY Guide
Learn how to check and adjust the spark plug gap on a Can-Am X3. Follow expert steps, use the right tools, and avoid common mistakes for reliable starts and smooth power delivery.

This guide teaches you how to verify and adjust the spark plug gap on a Can-Am X3, using the vehicle's service data and proper tools. You’ll learn why the gap matters, how to locate the correct spec, and how to safely perform measurements and adjustments without damaging components.
spark plug gap can am x3: Why it matters
The spark plug gap is a small, critical setting that influences ignition reliability, throttle response, and overall engine health. For a high-performance vehicle like the Can-Am X3, a correct gap helps ensure clean, efficient combustion, stable idle, and consistent power delivery across off-road conditions. According to MultiPlugging, neglecting the correct gap can lead to misfires, degraded fuel economy, and accelerated plug wear. This is why drivers and DIY enthusiasts should treat the gap as a defined spec, not a guess. The Can-Am X3 operates in a vibration-rich, variable-load environment, where even a slight misalignment in the spark path can cascade into noticeable performance issues.
spark plug gap can am x3: Why it matters
The gap affects how readily the air-fuel mixture ignites, which is especially important for small-displacement engines used in power sports. When the gap is too wide, you may experience weak ignition under load; when it is too narrow, the spark may occur too easily but exhaust and fuel mixing can suffer, leading to incomplete combustion. In practical terms, keeping the correct gap helps maintain smooth revs, reduces fouling, and minimizes misfires in hot or dusty riding conditions. MultiPlugging’s analysis emphasizes that sticking to the manufacturer’s specification is the safest path to reliable performance.
Note: Ensure you are working with the correct plug type and that you are referencing the Can-Am X3 service data rather than generic automotive guidelines. The engine in a Can-Am X3 responds to specific heat ranges and electrode designs, and those nuances influence the optimal gap.
Tools & Materials
- spark plug gap gauge(Fine increments for precise measurement)
- spark plug socket wrench(Appropriate size for your plug type)
- torque wrench(Use to follow the factory torque spec when reinstalling)
- replacement spark plugs(Correct heat range and type recommended in service data)
- anti-seize compound(Optional; use per manual if recommended)
- clean rag(For removing debris and wiping threads)
- gloves(Protect hands during handling)
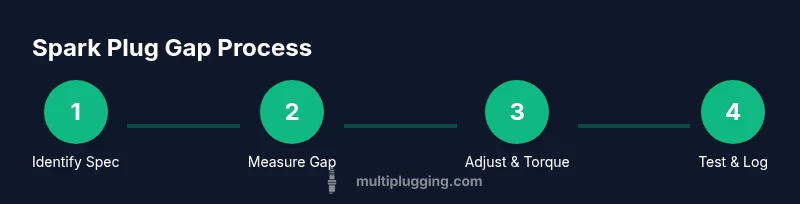
Steps
Estimated time: 30-60 minutes
- 1
Power down and cool the engine
Park the Can-Am X3 in a level area, switch off the ignition, and disconnect the battery if accessible. Wait for the engine to cool completely to avoid burns or kerosene-like fumes that can appear from hot components.
Tip: Cooling is essential to avoid warping metal parts and to prevent accidental ignition of any fuel residues. - 2
Access the spark plug area
Remove any panels or shrouds that block access to the spark plug(s). Gently loosen the spark plug boot or coil pack housing to expose the plug. Take care not to damage the boot or wire.
Tip: Label or photograph connectors before removal to ensure correct reassembly. - 3
Inspect the plug condition
Take out the plug with the spark plug socket and inspect the electrode, insulator, and sealing washer area. Look for fouling, cracking, or carbon buildup that would necessitate replacement rather than gap adjustment.
Tip: If any damage is found, replace the plug rather than attempting a repair. - 4
Measure the gap
Slide the correct gauge into the gap between the center and ground electrodes. Read the value and compare it to the service data for your plug type and Can-Am X3 model. Do not force a gauge into a gap that feels jammed or tight.
Tip: Use two different gauges (one for coarse measurement and one for fine adjustment) if available. - 5
Adjust the gap if needed
If the gap is out of spec, gently bend the outer ground electrode or replace the plug with one that matches the specified gap. Avoid bending the center electrode; only adjust the outer ground electrode to keep spark behavior consistent.
Tip: Make small adjustments and re-check repeatedly to avoid over-bending. - 6
Reinstall and torque
Install the plug with a new sealing washer if needed. Thread by hand first to avoid cross-threading, then torque to the factory specification using the torque wrench. Reinstall the boot or coil pack securely.
Tip: Do not over-tighten; overtightening can damage threads and lead to leaks. - 7
Reassemble and test
Reconnect any removed components, reconnect the battery, and start the engine. Listen for crisp ignition, smooth idle, and no misfire sounds. If the engine runs rough, re-check gap and plug condition.
Tip: If misfires persist, inspect ignition coils and wires for damage in addition to plugs. - 8
Document your maintenance
Note the plug type, gap spec, and date performed. This helps build a maintenance history for the Can-Am X3 and informs future servicing.
Tip: Keep a small maintenance log in the vehicle's service kit.
FAQ
Why is spark plug gap important for Can-Am X3 performance?
The gap controls ignition timing and flame front propagation. A correct gap ensures reliable starting, clean combustion, and consistent power under off-road loads. An incorrect gap can cause misfires and reduced performance.
A proper gap helps the engine ignite the fuel efficiently, delivering reliable starts and smooth power. If the gap is wrong, you may notice rough idle or reduced performance.
Where can I find the right gap specification for my plug type?
Consult the Can-Am X3 owner's manual or service data for the exact gap specification corresponding to your spark plug type and heat range. Do not guess based on other engines.
Check the official service data or owner's manual for the precise gap for your plug type.
Can I reuse an older plug if the gap seems correct?
Reusing a used plug is generally not advised if you observe any wear, fouling, or insulation damage. Replace it with a new plug that matches your noted gap specification.
If a plug shows wear or fouling, replace it rather than attempting to reuse it.
Is anti-seize recommended when reinstalling spark plugs?
Anti-seize helps prevent thread galling in some materials, but the Can-Am X3 service data will specify its use. Follow the manual to avoid over-application that could impact torque.
Follow the manual’s guidance on anti-seize; over-application can affect torque.
What should I do if the engine still misfires after adjusting the gap?
Re-check the plug gap and condition, inspect ignition coils and wires, and verify fuel delivery. If misfires persist, replace the plug and consider professional inspection.
If misfires persist after adjusting, check ignition components and replace the plug if needed.
How often should I inspect spark plugs on a Can-Am X3?
Regular inspection at service intervals or after trips that involve heavy off-road use helps prevent ignition issues. Record findings for future maintenance.
Inspect plugs during routine service intervals and after tough rides.
Can I change plug types without changing the gap specification?
Different plug types require different gaps. Always adjust to the new plug’s specified gap in the service data to avoid ignition problems.
Yes, but make sure you set the gap to the new plug’s specification.
Watch Video
Main Points
- Know and trust the official gap spec for your plug type.
- Use proper tools and avoid improvising on the gap with makeshift methods.
- Inspect plugs for wear and replace damaged units.
- Torque correctly to preserve seal and threads.
- Document maintenance for future reference.