Which Spark Plug Wire Goes to Which Cylinder: A DIY Guide
Learn how to map spark plug wires to cylinders, identify firing order, label and route wires, and test for misfires with practical steps for DIY enthusiasts.

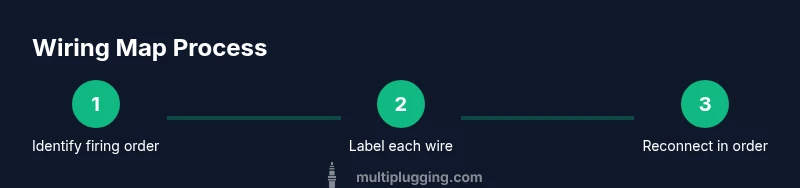
In this guide you will learn how to determine which spark plug wire goes to which cylinder, locate the correct firing order for your engine, and map wires safely. You’ll verify cylinder labeling, route wires away from heat and moving parts, and test the ignition after wiring to ensure even firing across all cylinders.
Why wiring order matters
The firing order and the corresponding spark plug wire sequence are not arbitrary. They determine which cylinder fires first and how the rest of the cylinders follow in time. When you ask which spark plug wire goes to which cylinder, you’re asking for the correct mapping of every cylinder to its plug wire. If miswired, you can experience rough idle, hesitation, loss of power, and increased exhaust emissions. According to MultiPlugging, accurate wire mapping is essential for reliable starts and optimal engine performance. In most engines, the correct wiring order ensures that each cylinder receives a spark at the right moment, maintaining smooth torque and efficient combustion across the entire RPM range. This article will equip you with the fundamentals to identify firing order, locate cylinder numbers, and route wires safely so you know which spark plug wire goes to which cylinder for every engine.
Understanding engine layouts and firing order
Engines come in inline, V, and flat configurations, and each layout has a specific firing order. For example, a typical four-cylinder inline engine follows a left-to-right order along the bank, while a V6 or V8 engine presents two banks with a defined sequence across banks. Knowing the cylinder numbering in your engine is essential to map the wires correctly. Your service data will show the firing order (e.g., 1-3-4-2 for a common four-cylinder) and which cylinder number corresponds to each spark plug boot. The goal is to connect each spark plug wire to the cylinder it is intended to ignite, following the exact firing sequence prescribed by the manufacturer.
How to locate cylinder numbering and firing order
Start by turning off the engine and pulling the hood to access the engine. Look for stamping on the cylinder head or engine block that marks cylinder numbers (1, 2, 3, …). Your vehicle’s owner manual or service manual lists the firing order in a dedicated section. If you have coil-on-plug, each coil corresponds to a specific cylinder; in distributor-based systems, the distributor cap label shows the order and which wire feeds which plug. When in doubt, rely on the manufacturer’s diagram rather than guessing, as incorrect mapping can cause misfires and poor efficiency.
Wire routing strategies and labeling
A clean wiring route reduces heat exposure and protects each boot from wear. Decide whether to route over or under engine components to avoid heat shields and moving belts. Use numbered labels on the wires themselves or on the boots to indicate their cylinder destination. If you’re working on a four-cylinder engine, begin with cylinder 1 and trace the wire to the next cylinder in the firing order; for a six- or eight-cylinder engine, follow the sequence across banks. The key is to maintain a consistent, documented order that you can re-check after any maintenance.
Symptoms of miswired ignition
When the spark plug wires aren’t mapped to the correct cylinders, you’ll notice signs of misfires. Rough idle, hesitation on acceleration, a drop in fuel economy, and sometimes a check engine light can appear. Some engines will run, but with reduced power and uneven torque. In extreme cases, you may hear a popping sound from the exhaust or feel vibration as misfires occur. Diagnosing starts with confirming the wiring sequence matches the manufacturer’s firing order and cylinder numbering.
Visual mapping method: labeling and testing
A practical approach is to label wires before disconnecting any boots. Use masking tape and a fine-tip marker to record the current cylinder destination on each wire, or place numbers on the boots themselves. After labeling, compare the mapped sequence to the firing order from service data. With the key off, you can gently pull each wire one at a time to verify connection integrity and avoid pulling cables from the distributor or coil packs. This method reduces the chance of crossed wires and helps you catch mistakes before you attempt a start.
Safety and tool use basics
Always work with the engine cool to avoid burns. Wear gloves and eye protection, and disconnect the negative battery lead before touching spark plug wires to minimize the risk of shock or accidental shorting. Use insulated tools and keep metal parts away from the spark plug wells. When removing plugs or wires, avoid forcing stubborn boots. If you encounter resistance, twist slightly while pulling—not tugging straight out. Dielectric grease on the boots can improve weather sealing and ease future removal.
Special cases: distributor systems vs coil-on-plug
Distributor systems route a single coil signal to multiple spark plugs, while coil-on-plug uses a separate coil for each cylinder. In distributor setups, the firing order is driven by the distributor rotor; in coil-on-plug, the ECU controls timing precisely. When mapping wires, treat these systems differently: in a distributor system, you may need to align the rotor position to the first cylinder of the firing order, while in coil-on-plug you simply connect each wire to the corresponding cylinder as per the diagram. Always consult the exact diagram for your vehicle.
Miswiring prevention: maintenance and color-coding
Prevention starts with a clear labeling system and regular inspection. Color-code wires or boots by bank and cylinder, and keep a simple diagram in the vehicle’s tool kit. Replace aging wires in matched sets rather than mixing brands to avoid impedance mismatches. Periodically inspect boots for cracks and ensure dielectric grease is present to prevent moisture intrusion. A small note pad or digital log can help you track replacements and ensure future maintenance doesn’t get confusing.
Quick-reference and internal checks (for 4-, 6-, 8-cylinder engines)
4-cylinder engines typically use a straight, single-bank sequence; 6- and 8-cylinder engines often use two banks with a central crossfire. Use your service data to confirm the exact order and cylinder mapping. For vehicles with distributor caps, verify rotor alignment when reassembling. It’s helpful to photograph the wiring arrangement before removal and label each wire. When in doubt, pause and re-check the diagram rather than forcing a wrong connection.
Verifying wiring with a spark plug wire tester and engine test
A spark plug wire tester can confirm that each wire is carrying a spark to its intended cylinder when the engine is not cranking. With the engine off, you can observe the tester’s indicator for each spark path in sequence. After wiring, a careful start and run test will verify that all cylinders ignite in the correct order and that exhaust flow remains smooth. If the tester shows a weak or missing spark on any cylinder, re-check the route and connections for that wire.
Final checks before you call it done
Before you attempt a start, double-check that all wires are firmly seated, routed away from hot components, and not in contact with moving parts. Confirm that the firing order aligns with the service data and that the boot seals are intact. Keep your notes in a repair log and be ready to repeat the process if any symptoms persist. With careful labeling, a clean route, and verified connections, you’ll know which spark plug wire goes to which cylinder and why it matters.
Tools & Materials
- Spark plug socket with ratchet(Typically 5/8 inch or 16mm)
- Spark plug wires(Replace as a matched set if you suspect wear)
- Torque wrench(To torque spark plugs to the manufacturer’s spec)
- Dielectric grease(Helps seat boots and seal moisture)
- Wire labels or masking tape(Label wires by cylinder destination)
- Electrical contact cleaner(Clean connectors if corroded)
- Shop rag(Keep surfaces clean and dry)
- Owner/service manual or wiring diagram(Always rely on diagram for firing order)
- Torque-friendly gloves(Protection while handling hot parts)
- Safety glasses(Eye protection during work)
- Digital camera or phone for photos(Document wiring setup before changes)
- Replacement plugs (optional)(Only if replacing plugs during service)
Steps
Estimated time: 60-90 minutes
- 1
Prepare and safety
Ensure the engine is cool, disconnect the negative battery, and gather your tools. This minimizes the risk of shocks and burns while accessing the spark plug wires.
Tip: Double-check battery disconnect to avoid shorts when touching wiring. - 2
Gather service data
Locate the firing order and cylinder numbering in your manual or a trusted online diagram. This data determines the correct wire-to-cylinder mapping for your engine.
Tip: Print or save the diagram for quick reference during the job. - 3
Identify cylinder numbers
Find the cylinder numbers on the engine block or head, or use the manual’s map. Mark cylinders clearly if you’ll be re-routing wires.
Tip: Take a photo of the stock setup before making changes. - 4
Disconnect wires one at a time
Carefully loosen and remove each boot one by one, keeping track of which wire belongs to which cylinder. Do not yank; twist gently if needed.
Tip: Label each wire before removal to prevent mix-ups. - 5
Label and verify
Apply labels to each wire indicating its cylinder destination and cross-check against the firing order. Recheck as you go before reconnecting.
Tip: Label on both the wire and boot for redundancy. - 6
Reconnect in order
Reconnect wires to cylinders following the exact firing order. Do not swap positions. For coil-on-plug, match each boot to its cylinder per diagram.
Tip: Use dielectric grease for a better seal and easier removal next time. - 7
Route wires safely
Tuck wires away from hot manifolds, belts, and moving parts. Ensure there’s no tension that could loosen a boot.
Tip: Keep wires off sharp edges; use protective loom if available. - 8
Double-check connections
Inspect each boot, ensure full seating, and confirm there are no stray tools or rags in the engine bay.
Tip: Re-check torque on spark plugs if you removed them. - 9
Test the system
With everything reconnected, reconnect the battery and start the engine. Listen for smooth idle and watch for MIL or misfire codes.
Tip: If you hear misfires, recheck the mapping and boots for proper seating.
FAQ
What does it mean to map spark plug wires to cylinders?
Mapping wires means assigning each spark plug boot to its designated cylinder according to the firing order. Proper mapping prevents misfires and ensures efficient combustion.
Mapping means connecting each wire to the cylinder in the correct firing order so the engine runs smoothly.
How can I find my engine's firing order?
Check your vehicle's service manual or a trusted online diagram. The firing order is engine-specific and differs between inline, V, and flat configurations.
Look up the firing order in the manual or a reliable diagram for your exact engine.
What are common signs of miswired spark plugs?
Rough idle, acceleration hesitation, reduced fuel economy, and potential misfire codes. You may also hear popping sounds from the exhaust.
Common signs are rough idling and poor power; you might also see a misfire code.
Can I swap wires if I connect them to the wrong cylinder by mistake?
No. Swapping wires without following the firing order can worsen misfires and damage the catalytic system. Re-map in order and test.
It’s not safe to swap without rechecking the correct order; re-map and test.
Is there a risk to starting the engine if wires are misrouted?
Starting with misrouted wires can cause hard starts, backfires, and potential engine damage. Always verify firing order before starting.
Yes. Misrouted wires can cause misfires or damage; verify first.
How do I test wiring after replacement?
Use a spark tester or observe engine performance after starting. If misfires persist, re-check each wire’s cylinder destination and seating.
Test with a spark tester or by listening for a smooth, steady running engine.
Watch Video
Main Points
- Map wires to the correct cylinders using the firing order.
- Label and secure each wire to prevent misrouting.
- Route wires away from heat and moving parts for longevity.
- Test after wiring to confirm smooth engine operation.