Spark Plug Cable Guide: Replacement, Diagnostics & Care
Learn to inspect, replace, and maintain spark plug cables for reliable ignition. This guide covers cable types, diagnostics, and safe installation for reliability.

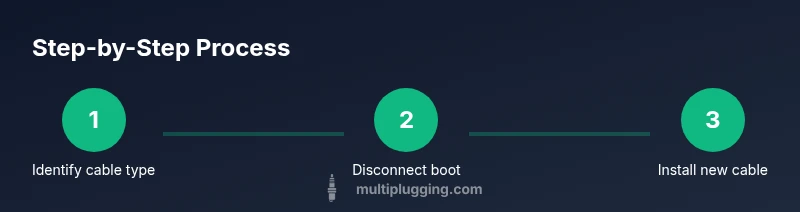
Replace or diagnose your spark plug cable to restore ignition reliability and fuel efficiency. The quick steps are: identify the correct cable type for your engine, safely disconnect the old boot, inspect for wear, install a new cable with dielectric grease, and verify performance by starting the engine and checking for smooth idle. This guide covers cables, diagnostics, and safe installation for reliability.
What a spark plug cable does and why it matters
The spark plug cable delivers the high voltage from the ignition coil to the spark plug, creating the spark that starts combustion. According to MultiPlugging, keeping this cable in good condition is a practical, often overlooked part of engine maintenance. A healthy spark plug cable minimizes misfires, reduces rough idling, and supports fuel efficiency. The insulation and boot design protect the conductor and provide a reliable seal against moisture and dirt. If you notice arcing, cracks, or stiff boots, test or replace the cable promptly. Regular checks help you avoid early ignition failures and odd engine behavior that can creep up as your mileage climbs.
Cable types and selecting the right one for your engine
Spark plug cables come in several constructions, including carbon-core, copper-core, and silicone-wrapped boots for heat resistance. The choice depends on engine configuration, spark energy, and impedance requirements. For modern engines, OEM cables are calibrated to minimize resistance and prevent signal loss. When in doubt, match length, boot style, and connector geometry to the original spark plug cable. The goal is a snug boot with a clean electrical path and a secure ground reference. This is where the experience of the MultiPlugging team helps DIYers choose the right part the first time.
Inspecting wear and diagnosing failure signs
Look for visible cracks in insulation, softened or cracked boots, corrosion on terminals, and any oil or coolant contamination around the boot. A simple resistance test with a multimeter can reveal degraded conduction, but the most telling signs are misfires, rough idle, and reduced throttle response. If the inner conductor is exposed or the boot feels brittle, replace the cable. Remember that a failing spark plug cable can also cause coil damage over time.
Replacement options: OEM vs aftermarket and how to choose
OEM spark plug cables are designed for specific engines and may offer the best reliability, but aftermarket alternatives can be cost-effective if they match impedance and boot geometry. When comparing cables, verify impedance, conductor material, boot type, and the length to maintain correct firing order. Look for high-quality silicone boots and heat resistance ratings. If your vehicle is under warranty, check coverage before purchasing premium options, as some warranties require OEM parts for electronics compatibility.
Preparation and safety before replacement
Before touching ignition components, disconnect the negative battery terminal and wear eye protection. Gather the necessary tools and have anti-seize and dielectric grease on hand for installation. Work in a well-lit, dry area and keep track of which spark plug wire goes where to avoid cross-connecting. Label cables if your engine bay uses multiple similar cables.
Maintenance practices to extend life
Clean and inspect cables at least every 6 months or 6,000 miles, whichever comes first. Keep boots clean and free of oil, and reapply dielectric grease to boot lips during installation or reassembly. Avoid bending cables at sharp angles; use loom or clips to route cables neatly away from hot surfaces and moving parts. A well-organized ignition bay reduces wear and makes future servicing easier.
Common mistakes and how to avoid them
Common mistakes include pulling cables by the boot instead of the boot, using excessive force, and neglecting to check boot integrity after removal. Always disconnect the battery and wear eye protection. Confirm you have the correct cable for your engine and double-check that connectors seat fully. After installation, perform a quick idle test to ensure there are no misfires.
Troubleshooting scenarios and quick checks
If the engine misfires only under load, inspect the affected cylinder's boot and connector for damage or looseness. A noticeable misfire at idle with no visible damage may require a wiring resistance check or testing the ignition coil as a system. Perform a baseline spark test if available, and verify that spark color and consistency meet your vehicle’s specifications.
Safety considerations and tools you need
Safety first: disconnect the battery before any ignition work, wear eye protection, and work in a dry area away from open flames. Tools like a spark plug socket, boot puller, dielectric grease, anti-seize, and a torque wrench can save time and prevent damage. Keep a clean workspace and avoid mixing old and new cables, which can lead to poor connections and misfires.
Tools & Materials
- Spark plug boot puller(Safely detach cable boots without tearing insulation.)
- Spark plug socket & ratchet(Needed if you also remove spark plugs.)
- Replacement spark plug cable(OEM-equivalent or matched impedance for your engine.)
- Anti-seize compound(Optional on metal threads for corrosion protection.)
- Dielectric grease(Apply to inner boot for a better seal.)
- Torque wrench(Use for precise torque if recommended by OEM.)
- Gloves and eye protection(Personal safety gear.)
- Multimeter (optional)(For resistance checks if you want diagnostic precision.)
Steps
Estimated time: 60-90 minutes
- 1
Identify the correct spark plug cable
Consult your vehicle manual or the existing cable to confirm the exact match. The length, boot orientation, and connector type must align with the engine’s firing order.
Tip: Double-check part numbers before purchasing to avoid mismatches. - 2
Disconnect the old cable safely
Disconnect the negative battery, loosen any hose clamps or clips, and gently release the boot from the spark plug. Do not yank; twist slightly to loosen.
Tip: Use a boot puller to avoid damaging the boot or wire. - 3
Inspect the plug end and boot
Check the connector for corrosion and the boot for cracks or stiff movement. Any damage here means replacement is necessary.
Tip: If the boot is brittle, replace the entire cable to prevent future failures. - 4
Prepare the new cable
Apply dielectric grease to the inner lip of the new boot to improve sealing and ease future removal. Do not overapply.
Tip: Ensure the portion near the connector is clean and dry. - 5
Install the new cable
Seat the boot firmly onto the spark plug until you hear or feel a click. Route the cable along the same path as the old one to avoid interference.
Tip: Keep cables away from hot surfaces and moving parts. - 6
Reconnect and test
Reattach any clips, reconnect the battery, and start the engine. Listen for a smooth idle and watch for warning lights or misfires.
Tip: If available, perform a quick spark test on the engine. - 7
Final check and clean up
Inspect the area for any fuel or oil leaks around the boot. Recycle packaging responsibly and wipe hands clean of grease.
Tip: Document the maintenance in your vehicle log for future reference.
FAQ
How do I know if my spark plug cable is bad?
Common signs include misfires, rough idle, visible cracks, and insulation damage. A resistance test can help verify conductivity.
Look for misfires or rough idle, and inspect the insulation for cracks. If in doubt, replace the cable.
Can I reuse my old spark plug cable?
If the insulation is intact and the boot seats firmly, you may reuse once. Persistent cracking or stiffness means replacement.
If the boot is cracked or stiff, replace it. Otherwise reuse is possible with caution.
Do I need to replace cables when replacing plugs?
Not always, but replacing in sets ensures consistent ignition timing and prevents future failures.
You can replace plugs separately, but replacing the cables at the same time reduces future issues.
What’s the difference between OEM and aftermarket spark plug cables?
OEM cables are tuned to the engine; aftermarket can save money but ensure they match impedance and boot geometry.
OEM parts fit best; aftermarket options are fine if they meet impedance and boot specs.
How can I test a spark plug cable without a tester?
Visually inspect for cracks, and perform a basic resistance check if you have a multimeter. If uncertain, replace.
Visual inspection is a quick check; for precise results, use a multimeter.
Watch Video
Main Points
- Inspect cables regularly before long trips
- Use OEM-like cables for best compatibility
- Don’t force boots—gentle twist is enough
- Keep cables routed away from heat and moving parts
- Test engine after replacement for immediate confirmation