Mercury Outboard Spark Plug Replacement: DIY Guide 101
Learn how to diagnose, replace, and optimize a mercury outboard spark plug with a practical, safety-first approach. This guide covers plug selection, gap, and torque basics for reliable performance in 2026.

With this guide you will identify the correct Mercury outboard spark plug, gather the right tools, and complete a safe replacement. You’ll learn how to verify gap, apply antiseize, torque correctly, and test the engine after installation. Always reference your engine manual for OEM specs and local safety practices. This quick plan helps DIYers avoid misfires and costly repairs.
Mercury Outboard Spark Plug Basics
A Mercury outboard spark plug is the small, cylindrical component that delivers a precise spark inside the combustion chamber. It must withstand marine conditions, resist fouling, and match the engine's heat range. For Mercury engines, OEM plugs are usually recommended, but aftermarket options can work if they meet the same heat range and thread specifications. Keep in mind that spark plugs affect starting, fuel economy, and emissions, so choosing the right type matters for long-term performance. When replacing, consider the environment (salt air, humidity) and ensure the area around the plug is dry before removal. This knowledge lays a foundation for reliable starts and smooth running on the water.
Diagnostics: When to Replace a Mercury Plug
Symptoms of a worn or fouled spark plug on a Mercury outboard include rough idle, misfiring, hard starting, and reduced power under load. If you notice a drop in engine torque or poor acceleration, inspect the plug well and consult the service manual. A simple visual check can reveal oil fouling, carbon buildup, or a white-gray insulator indicating overheating. Remember, even plugs that look fine can foul over time in marine fuel blends; testing with a spark plug tester can confirm ignition quality. Regular checks during seasonal maintenance help prevent unexpected failures on the water.
Choosing the Right Plug and Gap for Mercury Engines
Your Mercury outboard's manual specifies the correct plug type, heat range, and gap. When in doubt, choose OEM plugs from trusted brands and ensure the thread diameter and reach match your model. Gapping is important: an incorrect gap can reduce combustion efficiency and cause misfires. Use a proper gap tool and verify the value before installation. If you use anti-seize on the threads, apply a light coat and avoid over-tightening. Always re-check torque after installation using a torque wrench set to the manufacturer's spec. Marine environments demand attention to corrosion protection, so consider dielectric grease on the terminal boot to improve connection reliability.
Safety and Maintenance Best Practices
Before touching any spark plug, work in a well-ventilated area away from fuel supplies and open flames. Disconnect the battery ground when performing maintenance on an outboard to prevent sparks. Use insulated tools and wear eye protection. After removal, inspect the plug boot and ignition coil connections for wear and replace any damaged parts. Store used plugs properly to avoid contamination. Finally, run the engine after replacement and listen for smooth operation; check for oil leaks around the plug area. Regular maintenance with the right parts reduces downtime and extends engine life.
Tools & Materials
- Spark plug socket with magnet(Long-reach socket preferred; use a magnetized tool to hold the plug during removal)
- Torque wrench(Set to OEM spec for the model you own)
- Gap tool or feeler gauge(Used to verify the electrode gap before installing the new plug)
- Anti-seize compound(Light coat on threads to ease future removal)
- Dielectric grease(Apply to the plug boot contacts for reliable connection)
- Replacement spark plugs (OEM or approved equivalent)(Ensure correct heat range and thread size for your Mercury model)
- Rag or brush for cleaning(Keep the plug area clean and dry during replacement)
- Safety glasses and gloves(Protect eyes and hands from fuel and hot parts)
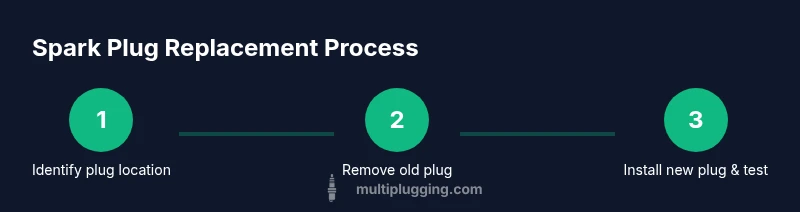
Steps
Estimated time: 25-40 minutes
- 1
Power down and access the plug
Power down the engine and disconnect the battery ground to avoid sparks. Remove any cowling or access panels to reach the plug well. Identify the correct plug position by model number and color-coded boots. Ensure the area is dry and free of fuel spills.
Tip: Label wires or take a photo of the plenum layout before removing components to avoid confusion later. - 2
Disconnect the plug boot from the plug
Gently twist and pull the boot from the plug while keeping the wire and coil intact. If the boot sticks, use small amount of dielectric grease on the next removal to ease future disassembly. Do not yank the wire from the coil to avoid internal damage.
Tip: Twist the boot rather than pulling straight off to minimize coil wear. - 3
Remove the old spark plug
Fit the spark plug socket over the plug and turn counterclockwise to loosen. Lift the plug straight out to avoid debris falling into the cylinder. Maintain an upright position to prevent fuel or oil spills.
Tip: Use a magnetized socket to help capture the plug as it comes free. - 4
Inspect and verify the gap
Visual inspect the old plug for fouling or wear. If reusing, verify the gap with a gap tool, otherwise skip to replacement. For marine engines, replacement plugs are often preferred to avoid hidden wear.
Tip: If you see heavy fouling, replace with a new plug rather than cleaning and reusing. - 5
Install the new plug and set gap
Thread the new plug by hand to avoid cross-threading, then tighten with a torque wrench to the OEM specification. Check the gap with a gap tool before final seating. Apply a light coat of anti-seize if recommended and finish with dielectric grease on the boot.
Tip: Do not over-tighten; excessive torque can strip the threads in an aluminum block. - 6
Reconnect and test the engine
Reconnect the boot, reattach any covers, and reconnect the battery ground. Start the engine and listen for smooth operation; check for any abnormal noises or fuel leaks around the plug area. If needed, run the engine under load to confirm performance.
Tip: Run the engine in a safe, controlled area before returning to the water.
FAQ
What is a mercury outboard spark plug?
A mercury outboard spark plug is a durable, marine-grade device that provides the ignition spark for Mercury engines, designed to withstand saltwater exposure and vibration.
A spark plug for Mercury outboards provides the ignition spark for your engine and is built for marine conditions.
How do I know when my Mercury spark plug needs replacement?
If the engine runs rough, misfires, or struggles to start, inspect the plug for fouling or wear. A visibly fouled or worn plug should be replaced.
If your engine runs rough or won't start, check the plug as a possible cause.
Do I need to gap every plug for a Mercury outboard?
Yes, use the OEM gap specifications for your model and verify with a gap tool before installing the new plug.
Always check and set the gap to the manufacturer’s specification.
Can I reuse a spark plug after cleaning?
Reusing a fouled or worn plug is not recommended for marine engines; replace with a new plug.
It’s generally better to replace with a new plug rather than cleaning and reusing.
What torque should I tighten the spark plug to on a Mercury outboard?
Torque should follow the OEM specification for your model; use a torque wrench for accuracy.
Always torque to the manufacturer spec with a torque wrench.
Watch Video
Main Points
- Match plugs to OEM specs for reliability.
- Always verify gap and torque before seating.
- Inspect wiring and boots for wear during maintenance.
- Test run the engine to confirm smooth operation after replacement.