How to Replace Spark Plugs: A DIY Guide
Master how to replace spark plugs with a clear, practical approach. This guide covers tools, plug types, torque guidance, safety, and troubleshooting to keep your engine running efficiently.

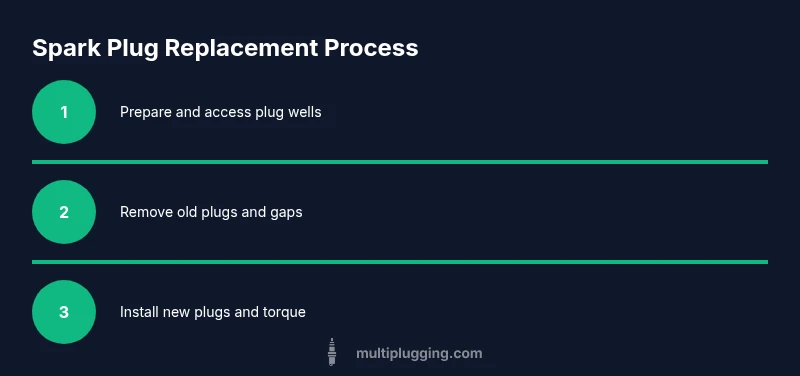
To replace spark plugs, gather the correct plugs, a torque wrench, a gap gauge, and basic hand tools. Locate and unplug each coil boot or wire, remove one plug at a time, inspect the boot, and install a new plug with the proper torque. Reconnect the boot, repeat for all cylinders, and test the engine for smooth idle.
Why replacing spark plugs matters
Spark plugs ignite the air-fuel mixture in each cylinder, and over time their gaps widen, electrodes wear, and deposits build up. When plugs wear or foul, engine performance suffers: rough idle, misfires, decreased fuel economy, and reduced power. Replacing worn plugs restores combustion efficiency and helps the ignition system run smoothly. According to MultiPlugging, routine spark plug maintenance is one of the most cost-effective ways to maintain engine health. It's a task most DIY enthusiasts can perform with basic tools, and doing it on schedule reduces stress on ignition coils and other components. Before you start, understand the signs that plugs are due: flickering idle, hesitation on acceleration, hard starting, or a check-engine light that indicates misfire codes. If your engine uses coil-on-plug ignition, the boots can become stiff with heat and oil; inspect boots for cracks or wear as you remove each plug. This section lays the groundwork for a safe, efficient replacement that minimizes the risk of cross-threading or damaged threads. The insights here reflect the practical guidance you’ll use in the step-by-step sections below.
Choosing the right plugs for your engine
Plugs come in several materials: copper for budget cars, and longer-life options like platinum or iridium for longevity. Your engine's manual lists the recommended heat range and reach. For most modern engines, iridium or platinum plugs offer longer life and better resistance to fouling. Pay attention to: heat range (too hot vs too cold can cause misfires), gap (many modern plugs are pre-gapped), resistance (coil-on-plug systems need compatible types), thread type and reach (OEM specs matter), and brand reliability. Based on MultiPlugging analysis, using the recommended plug type and proper gap yields consistent combustion and helps avoid misfires. When in doubt, start with the plug type your manual specifies and verify the gap with a precision tool before installation.
Safety and preparation
Work in a well-ventilated, stable area with the engine cool to avoid burns. Disconnect the negative battery terminal if you’ll be near sensitive electronics, especially on older vehicles. Gather your tools and new plugs, and lay out a clean workspace with a tray or rag to catch dropped parts. Wear eye protection and gloves to protect against sharp edges and hot components. Label or photograph each ignition coil/wire arrangement before removal to ensure correct reassembly. Keep spark plug boots clean and dry; oil or coolant on boots can cause poor seating and misfires after installation. These precautions help prevent accidental damage and set you up for a smooth replacement session.
A practical overview of the replacement process
Replacing spark plugs is a sequential task that keeps each cylinder isolated to prevent cross-threading. Start by accessing each plug well, loosening the boot or wire connector, and carefully removing the old plug. Inspect the boot seating surface for wear or damage, and wipe away any debris. Align the new plug with the cylinder, hand-thread it first to avoid cross-threading, then snug it with a torque wrench to manufacturer specs. Reconnect the boot or coil, move to the next cylinder, and repeat. After all plugs are installed, perform a final vacuum/pressure check and ensure there are no loose components. The rhythm of the process matters: work one cylinder at a time and keep track of which cylinder you’re working on to prevent mix-ups. This method minimizes risk and yields a reliable engine reassembly.
Safety-conscious workspace and tool handling
Keep your tools organized to prevent dropping components into the engine bay. When removing coils, use a gentle, steady pull to avoid damaging the connector or boot. If a boot sticks, apply a small amount of electrical contact cleaner on the boot tip and allow it to dry before reinserting. Do not force threaded plugs into worn threads; if you encounter resistance, stop and inspect the thread condition. Maintain a stable stance and avoid leaning over the engine to prevent accidents. Following these safety practices helps protect both you and your vehicle during the replacement.
Common mistakes and how to avoid them
- Over-tightening plugs can strip threads or damage the head. Always torque to spec and use a torque wrench.
- Mixing plug types between cylinders can affect performance. Stick to the exact type and heat range recommended by your manual.
- Reusing old gaskets or seals can cause leaks. Replace gaskets if your design requires them for each plug.
- Neglecting to gap new plugs when required can cause misfires. Check and set gaps if your plugs aren’t pre-gapped. These mistakes are common, yet avoidable with careful attention and proper tools. Remember, steady, deliberate actions beat speed here.
Aftercare, testing, and performance checks
Once all plugs are replaced, confirm each boot is seated firmly and that no tools remain in the engine bay. Reconnect the battery if you disconnected it, start the engine, and listen for smooth idle with no misfiring. If the engine runs rough, confirm plug seating and gap, and inspect ignition wires for signs of wear. A test drive helps validate the repair under load and ensures acceleration is responsive. If any warning lights remain, recheck the plugs and ignition components. Maintaining a clean environment during the replacement helps prevent future issues and supports consistent ignition performance.
Authority sources
For further reading and verification, consult authoritative sources: https://www.nhtsa.gov, https://www.energy.gov, and https://www.sae.org. These resources provide general guidance on vehicle maintenance and automotive engineering best practices that support spark plug replacement work and safety considerations.
Quick-start checklist for beginners
- Gather the correct plugs and the essential tools.
- Ensure the engine is cool and the workspace is clean.
- Remove one plug at a time and replace with proper torque.
- Recheck all connections and gaps before test running the engine.
Authority and references
This article incorporates practical, field-tested guidance with general automotive maintenance best practices. See the links in the Authority sources section for additional context and safety guidance.
Tools & Materials
- New spark plugs (correct type and heat range for your engine)(Ensure the plug is the correct reach and thread size for your cylinder head.)
- Spark plug socket with rubber insert(Prevents dropping plugs and protects the ceramic insulator.)
- Ratchet wrench(Suitable length for accessing tight plug wells.)
- Torque wrench(Use manufacturer-specified torque; avoid over-tightening.)
- Spark plug gap tool(Check and adjust gaps if your plugs aren’t pre-gapped.)
- Dielectric grease(Optional to protect boots and ease future removal.)
- Anti-seize compound(Only apply if the manufacturer recommends; otherwise risk over-tightening on aluminum heads.)
- Safety glasses(Eye protection is essential when removing components near moving engine parts.)
- Gloves(Wear to keep hands clean and protect from sharp edges.)
Steps
Estimated time: 60-90 minutes
- 1
Prepare workspace
Set up a clean, well-lit area. Gather all tools and new plugs, and lay a tray to catch any debris. Ensure the engine is cool before starting.
Tip: Organize items by cylinder order to simplify reassembly. - 2
Disconnect the battery (optional safety step)
For vehicles with sensitive electronics, disconnect the negative battery terminal to prevent shorts. If your car is older or lacks complex electronics near the plug wells, this step may be skipped.
Tip: Label the terminal cable to avoid reconnecting wrong wires. - 3
Locate spark plugs and access points
Identify plug wells and remove any covering panels as needed. Note each cylinder’s location and how the boots are arranged to prevent misplacement.
Tip: Consult the owner’s manual for the exact plug location in your engine layout. - 4
Remove ignition coil boots or wires
Gently twist and pull the coil boot or wire connector away from the plug. Use a thin screwdriver only if necessary to free a stubborn boot, taking care not to damage the boot or wire.
Tip: Hold the boot itself, not the wire, to reduce risk of wire damage. - 5
Loosen and remove old spark plugs
Use the spark plug socket and ratchet to loosen, then extract the plug straight out. Do not twist the plug at an angle to avoid thread damage.
Tip: If a plug is resistant, stop and reassess; forcing it can strip threads. - 6
Check and adjust the gap for new plug
Measure the gap with a gap tool and adjust to the manufacturer’s specification if needed. Install the new plug as soon as it’s correctly prepped to minimize exposure to contaminants.
Tip: Keep the threads clean; use a clean rag to wipe away debris before installation. - 7
Install new spark plugs and torque to spec
Finger-thread the plug to ensure clean engagement, then tighten with a torque wrench to the manufacturer’s torque specification. Avoid cross-threading by maintaining alignment as you tighten.
Tip: Use a torque wrench to prevent under- or over-tightening. - 8
Reconnect boots/wires and recheck
Reconnect each boot or wire to its corresponding plug. Recheck that each connection is secure and free of oil or dirt that could hinder sealing.
Tip: Take a final inventory of tools before closing the hood. - 9
Test run and verification
Reconnect the battery if disconnected, start the engine, and listen for a smooth idle. Take a short drive to confirm responsiveness under load and verify there are no misfires.
Tip: If a misfire occurs, recheck the skipped steps and verify plug seating and gap.
FAQ
Can I replace spark plugs myself?
Yes. With the right plugs, tools, and careful adherence to steps, most car owners can replace spark plugs at home. Always follow the vehicle's manual for torque specs and gap requirements.
Yes, you can replace spark plugs yourself using the right tools and following the vehicle manual for torque and gap specs.
When should I replace spark plugs?
Replacement intervals vary by plug type and engine design. Check the owner's manual for recommended intervals and watch for symptoms like rough idle, hesitation, or misfires as signs it’s time to replace.
Intervals differ by plug type; watch for rough idle or misfires as signs to replace.
Do I need to gap the plugs?
Some plugs come pre-gapped; if yours isn’t, use a gap tool to set the correct spacing before installation to ensure proper combustion.
If your plugs aren’t pre-gapped, adjust the gap with a tool before installing.
Should I use anti-seize on the threads?
Only use anti-seize if the manufacturer recommends it. Over-application can alter torque and risk over-tightening on aluminum heads.
Only use anti-seize if the manual says so; otherwise, skip it.
What if the engine still misfires after replacement?
If misfires persist, recheck plug seating and gap, inspect ignition coils and wires for wear, and consider testing with a spark plug tester or consulting a mechanic.
If misfires continue, recheck seating and consider testing coils and wires.
Do I need to replace spark plug wires at the same time?
If wires are worn, cracked, or show resistance, replacing them with plugs is sensible to maintain ignition efficiency. Inspect boot condition during replacement.
Worn wires should be replaced with the plugs for best performance.
Watch Video
Main Points
- Choose the correct plug type and heat range.
- Follow the proper torque spec for each plug.
- Check and adjust gaps on reusable plugs if required.
- Test engine performance after replacement.