How to Replace Spark Plug on Your Car: A Practical Guide
Step-by-step instructions to replace spark plugs on most gasoline engines. Gather the right plugs and tools, gap to spec, torque correctly, reinstall, and test for smooth running.

To replace a spark plug on most gasoline engines, gather the right spark plugs and tools, locate the plugs, and prepare the workspace. Remove the ignition coil or lead, extract the old plug, inspect the cylinder, gap and install a new plug to the correct torque, reattach the coil, and test the engine for smooth running.
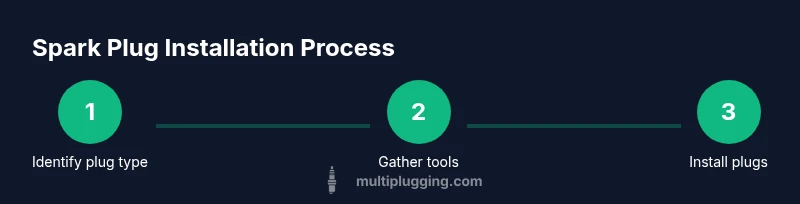
Identify the correct spark plug type for your engine
Choosing the right spark plug starts with your engine's specifications. Check your owner's manual or the manufacturer’s parts catalog to determine heat range, thread size, and reach. If you’re unsure, a local parts store can look up the correct part using your vehicle identification number (VIN). According to MultiPlugging, using the proper plug type is essential for reliable ignition and fuel efficiency. For engines with different cylinders, ensure each plug matches the cylinder’s requirements. Using the wrong plug can worsen misfires and emissions. This step sets the foundation for a successful replacement and helps you avoid costly mistakes later.
Gather the right tools and parts
Before you touch the engine, assemble the required tools and parts so you won’t pause mid-task. Essential items include the correct spark plugs, a spark plug socket, a ratchet with a short extension, a torque wrench, and a gap gauge. Optional but helpful items include anti-seize compound (if your vehicle manual allows it), dielectric grease for boots, and a plug boot puller. Having a clean work area, proper lighting, and a shop rag reduces the risk of dropping parts into the engine bay. Double-check every plug type against your manual as you lay out the parts.
Safety first: prepare your workspace
Engine bays can be hot and hazardous. Park the vehicle on a flat surface, engage the parking brake, and disconnect the negative battery terminal if you’ll be near electrical components. Wear eye protection and gloves to protect against sharp edges and hot surfaces. Work in a well-ventilated area and keep a fire extinguisher nearby as a precaution. If you’re uncertain about anything, stop and consult the service manual or a professional. This phase minimizes injuries and helps you handle plugs safely.
Step 1 — Locate the spark plugs
Open the hood and trace each ignition coil or spark plug boot to the corresponding plug well. In many engines, one coil per cylinder sits atop a plug. Take your time to map each wire to its cylinder, labeling if needed to prevent mix-ups. Clean the surrounding area to avoid debris from falling into the combustion chamber during removal. If you’re working on a newer engine with coil packs, you may need to unclip a release tab or disconnect a connector before lifting the pack.
Step 2 — Disconnect the coil or boot
Gently twist and pull the spark plug boot or coil connector from the plug. Do not yank; a firm, steady pull with a slight wiggling motion is usually enough. If a boot feels stubborn, use a dielectric grease-friendly boot puller or a small flat tool to loosen it. Keep track of the boot orientation and note any differences between plugs. Damaged boots or connectors can cause misfires or poor seating after replacement.
Step 3 — Remove the old spark plug
Use the spark plug socket on a ratchet to back out the old plug. Use minimal force; if the plug won’t turn, stop and reassess to avoid stripping threads. Keep the plug straight to prevent cross-threading. Once free, inspect the old plug for signs of wear, fouling, or oil residue, which can indicate engine issues beyond a simple replacement. Place the old plugs in a designated container for disposal.
Step 4 — Inspect and gap the new plugs
Check each new plug for correct gap if your plugs aren’t pre-gapped. Use a gap gauge and adjust as needed to the manufacturer’s specification. If you’re unsure of the correct gap, consult the vehicle manual or the plug packaging. Inspect the threads on the new plug for any debris or protective coating and wipe clean. A clean plug seat improves sealing and prevents air leaks that affect combustion.
Step 5 — Apply the right lubrication and install the new plugs
If your manual allows anti-seize, apply a light coating to the threads before installation to ease future removal. Thread the plug in by hand to avoid cross-threading, then snug it with the socket. Do not overtighten; when you reach resistance, stop and verify alignment. A gentle, final seat with a torque wrench to the manufacturer’s torque specification ensures a proper seal without damaging the threads.
Step 6 — Reconnect the ignition coil/boot
Gently push the coil or boot onto the plug until you feel or hear a firm seating click. Reattach any connectors or clips that were removed earlier. Ensure each boot sits straight and doesn’t bind against engine components. If you used anti-seize on the threads, skip applying more lubricant to the boot to avoid slipping or poor contact.
Step 7 — Repeat for all cylinders and verify
Proceed to the remaining plugs, repeating steps 1 through 6 for each cylinder. Keep track of which plug corresponds to which cylinder, especially on engines with staggered firing orders. Once all plugs are installed, reconnect the battery if you had disconnected it, and perform a careful engine start to verify smooth operation and no misfires. A quick idle check can reveal obvious issues before a longer test drive.
Step 8 — Final checks and test drive
With the replacement complete, perform a short test drive to feel how the engine responds. Listen for misfires, rough idling, or hesitation during acceleration. If you notice any abnormal symptoms, recheck the most recently installed plug and the coil connection. Properly torqued plugs should seat evenly and maintain a tight seal, contributing to steady idle and consistent power delivery.
Troubleshooting common issues after replacement
If the engine runs rough after replacement, consider these common causes: a misfired coil boot, a loose boot, or a damaged thread in the cylinder head. Double-check the torque on the last installed plug and inspect all boots for proper seating. Fouled plugs may indicate fuel, ignition, or compression problems beyond the replacement task. If symptoms persist, consult a professional technician for a diagnostic check.
Maintenance tips to extend spark plug life
To maximize spark plug life and maintain engine performance, follow regular maintenance intervals, use the correct plug type for your engine, and avoid aggressive driving immediately after replacement as the engine settles. Keep ignition components clean and free of oil or carbon buildup. Periodically inspect plug wells for debris, and replace worn boots or wires as part of a holistic maintenance approach.
Tools & Materials
- Spark plugs (correct type for your engine)(Check owner's manual or OEM specs for heat range, thread size, reach, and gap)
- Spark plug socket(Typically 5/8 in or 13/16 in; use with a small extension if needed)
- Ratchet with extension(3-6 inch extension is common for tight spaces)
- Torque wrench(Use manufacturer torque spec; verify across all plugs)
- Gap gauge or feeler gauge(Check final gap on each new plug if not pre-gapped)
- Anti-seize lubricant(Optional; follow vehicle manual guidance if used)
- Dielectric grease(For boots/wires to ease future removal and improve seal)
- Plug boot puller(Helpful for stubborn boots; avoid tearing boots)
Steps
Estimated time: 60-90 minutes
- 1
Power down and prepare
Park on a flat surface and disconnect the negative battery cable if you’ll be near electricals. Gather tools and wear eye protection and gloves. This reduces the risk of sparks and injury while you work.
Tip: Keep a clean tray for old plugs to avoid losing parts in the engine bay. - 2
Identify cylinder layout and map plugs
Locate each plug and its corresponding coil or boot. Label or photograph connections if needed to prevent mix-ups during reassembly.
Tip: Knowing which plug goes where prevents cross-wiring and firing order mistakes. - 3
Disconnect coil/boot safely
Twist and pull the boot or coil connector straight off the plug. If stuck, use a boot puller or gentle prying tool to avoid damaging components.
Tip: Avoid pulling on the wire; focus on the boot to prevent internal wire damage. - 4
Remove the old spark plug
Fit the spark plug socket, apply steady pressure, and back out the old plug. Keep the plug straight to prevent thread damage.
Tip: If resistance is high, stop and inspect for cross-threading before continuing. - 5
Inspect and gap new plugs
Inspect the new plugs for manufacturing debris and measure the gap if needed. Adjust to the manufacturer’s spec using a gap gauge.
Tip: Do not force a gap that’s outside the recommended range. - 6
Install the new plugs
Hand-tighten the plug, then use a torque wrench to reach the recommended torque. Ensure the plug seats evenly without cross-threading.
Tip: Avoid using anti-seize on certain modern engines unless specified by the manual. - 7
Reconnect coil/boot
Push the boot firmly onto the new plug until it seats with a click. Reattach any connectors and ensure alignment.
Tip: If using anti-seize on threads, keep the boot free of lubricant to ensure proper contact. - 8
Repeat for all cylinders
Proceed to each cylinder, following the same process. Keep track of which plug belongs to which cylinder.
Tip: Work methodically to avoid skipping plugs or mixing components. - 9
Test run and verify
Reconnect the battery, start the engine, and listen for smooth idle and power delivery. Address any misfires or odd noises promptly.
Tip: A quick diagnostic check helps catch issues early before a longer drive. - 10
Dispose of old plugs properly
Place used plugs in a suitable container and recycle or dispose according to local regulations.
Tip: Never throw metal plugs into regular trash; recycle where possible.
FAQ
Do I need to replace spark plug wires every time I replace the plugs?
Not always. If the wires or boots show wear, cracking, or resistance, replacing them alongside plugs is wise. Otherwise, you may reuse existing boots if they seat properly and show no damage.
Wires don’t always need replacement with plugs, but inspect for wear. Replace if cracked or poor contact is detected.
How do I know which spark plug to buy for my engine?
Consult the owner’s manual or the vehicle’s parts catalog for the correct heat range, thread size, and reach. If in doubt, use a reputable parts lookup with your VIN.
Check your manual or parts catalog to pick the right plug; a VIN lookup helps confirm the exact part.
Should I gap the spark plug before installation or are they pre-gapped?
Many plugs come pre-gapped, but some require checking with a gap gauge. Always verify the gap to the manufacturer specification to prevent misfires.
Check the gap with a gauge if not pre-gapped; install only when it matches the spec.
What should I do if a plug won’t come out or threads are damaged?
Stop and reassess. Pulling hard can strip threads. Use penetrating oil, heat if appropriate, and consider professional help if threads are damaged.
If a plug is stuck or threads are damaged, stop and seek help to avoid engine damage.
Is it safe to drive after replacing spark plugs?
Yes, once all plugs are installed securely and tests show normal operation. If you notice rough idle or misfires, recheck the last plug and wiring.
Drive normally after a proper install; if you notice issues, re-check the last plug.
Watch Video
Main Points
- Identify the correct plug type before starting
- Use the right tools and follow safe practices
- Gap, torque, and seating are critical for a successful install
- Test the engine after replacement to confirm success
- Dispose of old plugs responsibly