Coil on Spark Plug: Diagnosis, Testing & Replacement Guide
Learn how to diagnose, test, and replace a coil on spark plug (COP) to fix ignition misfires. Practical steps, tools, safety tips, and maintenance guidance from MultiPlugging for DIYers.

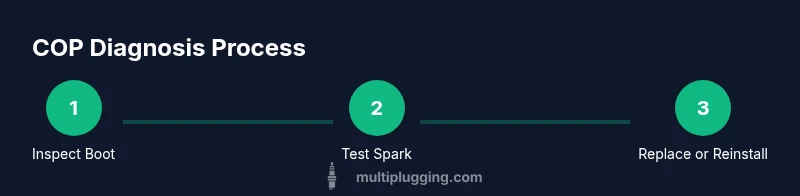
By diagnosing a coil on spark plug (COP) issue, you’ll identify whether the spark coil is failing or if wiring and connectors are at fault. This guide shows how to test COP hardware, interpret symptoms, and replace a faulty coil safely. You’ll need a multimeter, a spark tester, basic hand tools, and eye protection. The steps below cover safety, testing order, and verification after installation.
Understanding COP Systems
A coil on spark plug (COP) system places a dedicated ignition coil directly on each spark plug boot. This layout minimizes energy loss and improves spark delivery, especially in modern engines with tighter ignition timing. According to MultiPlugging, COP designs reduce parasitic loads and simplify diagnostics by localizing faults to a single cylinder. When the COP coil or its wiring fails, you’ll typically notice a misfire specific to one cylinder, rough idle, or reduced throttle response. In many engines, a COP assembly also integrates a cam or crank signal sensor to synchronize timing; damage here can mimic coil faults. Recognizing the COP arrangement helps you target the correct components during diagnosis and ensures you don’t waste time chasing unrelated fuel or compression issues. As you work, remember that the coil is a high-energy device and should be handled with care to avoid shock or accidental compression of the high-voltage boot.
Understanding the COP setup sets the foundation for precise testing. You’ll want to confirm you’re dealing with a COP rather than a traditional coil-on-plug system with a separate ignition coil pack, especially on older vehicles where terminology can blend. In all cases, the key signal path runs from the ignition module or ECU to the spark plug boot via the COP coil, then across the spark gap inside the plug itself. The integrity of the spark plug boot and its connection to the coil is just as critical as the coil’s internal windings. This means you should inspect the boot for cracks, carbon tracking, or oil contamination, which can mask a bad coil by providing an alternate leakage path.
When conducting COP diagnostics, plan your approach around safety, predictable tests, and repeatable results. The COP system’s design makes it feasible to perform targeted checks cylinder-by-cylinder without removing all coils at once, provided you have access to the relevant tools. Always start with a visual inspection, then proceed to electrical tests with proper equipment. If you find a faulty COP, you may replace just that coil or consider balancing a set if you notice multiple failures. The MultiPlugging team emphasizes documenting your findings so you can compare before-and-after performance and determine if a full set replacement is warranted.
noteLabel":"Section supports COP fundamentals and sets the stage for diagnostics"},{
Tools & Materials
- 12-point or socket wrench set(Preferred sizes: 10mm or 12mm, plus a ratchet and short extension for tight bays)
- Spark plug socket(Appropriate size for your engine’s spark plugs (often 5/8 inch or 16mm))
- Torque wrench(To torque COP bolts to manufacturer spec (check service manual))
- Multimeter(For resistance and continuity testing of the coil primary/secondary windings)
- Spark tester(For live spark verification without risking your engine components)
- Dielectric grease(Optional but helps seal boots and improve contact at the coil/plug interface)
- Replacement COP coil (if needed)(Match exact coil part number to your vehicle for best results)
- Screwdrivers (flat and Phillips)(Used for prying connectors carefully if needed)
- Safety gear (gloves, glasses)(Protective gear to handle hot engine parts and high-voltage components)
Steps
Estimated time: 45-90 minutes
- 1
Power down and disconnect the battery
Before touching any ignition components, switch off the engine, remove the key, and disconnect the negative battery terminal. This reduces shock risk and prevents accidental ignition of vapors. Give the system a minute to discharge residual voltage.
Tip: If you must work near the battery, wear insulated gloves and keep tools away from exposed terminals. - 2
Access the COP coil(s)
Locate the COP coil on the affected cylinder. You may need to remove engine covers or intake plenums. Make sure the engine is cool before touching any parts.
Tip: Label or photograph connectors to avoid mixing up wires later. - 3
Disconnect the electrical connector
Carefully release the locking tab and pull the connector straight off the COP boot. Avoid pulling on the wire harness. Inspect the connector for corrosion or damage.
Tip: If a connector is stiff, use a small amount of contact cleaner and re-seat after cleaning. - 4
Remove the COP mounting bolt(s)
Using the appropriate socket, remove the bolt(s) securing the COP to the engine. Keep bolts organized for reinstallation and avoid dropping them into the engine bay.
Tip: Don’t over-tighten on reassembly; use a torque wrench to reach the manufacturer’s spec. - 5
Extract the COP from the spark plug boot
Gently pull the COP straight upward until the boot releases from the spark plug. Do not twist or yank aggressively to prevent boot damage.
Tip: If the boot sticks, apply a small amount of dielectric grease at the boot’s base before reseating. - 6
Inspect the COP and boot
Check the coil boot for cracks, oil, or carbon tracking. If the windings feel soft or there’s visible wear, the COP is likely failing. Also inspect the spark plug well for fouling.
Tip: Replace the COP if you see oil on the boot or corrosion on contacts. - 7
Test the COP with a spark tester and meter
Connect a spark tester to the coil output and perform a spark test near a grounded surface. Use the multimeter to measure coil resistance per service spec and compare to a healthy coil.
Tip: Record values; a notable deviation from spec usually indicates a faulty coil. - 8
Install a replacement COP or reseat the old one
If replacing, install the new COP with the boot seated firmly on the spark plug and bolt to torque spec. If reusing, apply coat of dielectric grease and ensure a snug fit.
Tip: Run the engine briefly and listen for a clean, strong spark on the affected cylinder.
FAQ
What is a coil-on-spark-plug system and how does it work?
A coil-on-spark-plug system places an ignition coil directly on each spark plug boot. This design improves spark delivery, reduces energy loss, and simplifies troubleshooting because each cylinder has its own coil. Failures typically present as a single-cylinder misfire rather than a global ignition fault.
A COP system uses individual coils on each spark plug boot for strong sparks and easier diagnosis. If one coil fails, you usually see a misfire in that cylinder.
What are common symptoms of COP failure?
Common signs include a rough idle, frequent misfires on a single cylinder, check engine light illumination, reduced fuel economy, and difficulty starting the engine. Visual cues like a cracked boot or oil contamination around the coil boot also point to COP problems.
Look for rough idle, misfires on one cylinder, or a blinking check engine light as COP failure indicators.
Can I test COPs with a multimeter and spark tester?
Yes. Use a spark tester to observe a live spark arc and measure resistance with a multimeter per your engine’s service specs. If the readings deviate beyond tolerance, the COP is likely faulty.
You can test COPs with a spark tester for spark quality and a multimeter to check resistance against the spec.
Should I replace all COP coils at once or individually?
If multiple COPs show signs of wear or fail tests, replacing them in one session can save time and ensure uniform performance. If only one cylinder is affected, you can replace that COP and monitor for additional faults.
If several coils are weak or failing, replace them together; otherwise, fix the bad one and recheck.
How much does COP replacement cost?
Costs vary by vehicle and part quality. Budget a range for parts and labor if you’re hiring a shop, or estimate the price of a single COP coil and gaskets for DIY replacement.
COP replacement cost depends on the car and parts; expect higher costs at a shop than DIY parts only.
What safety precautions are essential when working on COPs?
Always disconnect the battery, wear eye protection, and avoid tools near the high-voltage area. Work on a cool engine and follow the manufacturer’s torque specs during reassembly.
Disconnect power, wear protection, and follow torque specs to stay safe during COP work.
Watch Video
Main Points
- Identify COP issues by cylinder-specific symptoms
- Use proper safety gear and disconnect power before working
- Test with spark tester and measure resistance against spec
- Replace faulty COP coils rather than chasing other components first
- Document results to verify post-repair improvement