Where Do Spark Plugs Sit? A DIY Location Guide for Cars
Discover where spark plugs sit in most engines, how to locate access points, and safe inspection steps. A practical DIY guide from MultiPlugging for car owners and hobbyists.

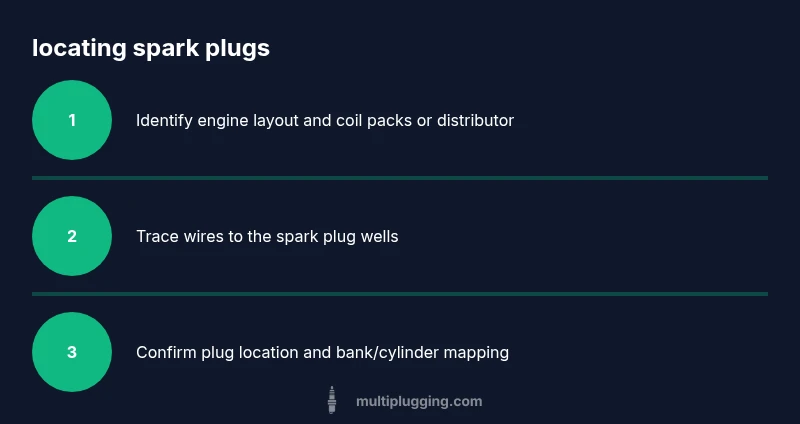
Locate spark plugs and identify accessible wells in your engine. Steps include safely cooling the engine, locating coil packs or ignition wires, and tracing routes to the spark plug wells. This guide covers the most common layouts and how to verify access points before you start any inspection or replacement.
Understanding spark plugs and why they matter
Spark plugs are tiny but essential components that ignite the air-fuel mix inside each engine cylinder. Their condition affects start-up reliability, fuel efficiency, and overall performance. When someone asks, where do spark plugs sit, the answer depends on engine design, but most contemporary cars place them in dedicated wells within the cylinder head. According to MultiPlugging, recognizing the role of plugs and their typical locations is the first step toward a successful inspection. In addition to ignition, a healthy plug helps maintain smooth idle and consistent combustion, which can prevent misfires and rough running. This knowledge is especially valuable for DIY enthusiasts who want to diagnose misfires or perform a basic check before replacing plugs. As you begin, remember that spark plugs are designed for specific heat ranges and threading, so consult your vehicle’s manual for exact specifications. The goal here is to locate the plugs with minimal disassembly while avoiding damage to ignition coils or surrounding components. By understanding the basics, you’ll save time and reduce the risk of accidental harm to the engine.
Where spark plugs live across common engine designs
In most inline and V-shaped engines, spark plugs thread directly into the cylinder head. In inline configurations (4, 6, or 8 cylinders, arranged in a line), you’ll typically find one plug per cylinder along the top of the head, often under coil packs or wire looms. In V engines (V6, V8, etc.), plugs are arranged in two banks, with wiring harnesses and coil packs positioned above or beside the valve covers. Some engines use distributorless ignition systems where individual coils sit directly over each plug well, while others rely on a coil-on-plug (COP) setup that eliminates traditional distributor components. Knowing which layout you have helps you estimate access time and the tools you'll need. The most common access points are behind the engine’s valve cover or under plastic engine covers that shield the ignition system. If your engine uses a coil pack per bank, you’ll usually see pairs of thick ignition leads or coils sitting near the cylinder head. By mapping the layout, you can plan a safe route to each plug without removing unrelated parts. This spatial awareness is the core of a successful DIY inspection and aligns with best practices from MultiPlugging.
Safety and preparation before you begin
Before you touch anything, safety comes first. Park the vehicle on a flat surface, engage the parking brake, and turn off the ignition. Wait for the engine to cool completely to minimize the risk of burns from hot manifolds or exhaust components. Gather your tools in a single place so you won’t be scrambling mid-task. Remove any loose jewelry and wear eye protection and gloves to shield your hands from sharp edges and fluids. Disconnecting the negative battery cable is optional for some procedures but can reduce the chance of short circuits when you’re working around electrical connections. For added safety, work in a well-lit area and use a flashlight to inspect dark corners and plug wells. Remember that engine interiors can retain heat for a long time, even after you’ve parked the car, so allow ample cooling time—typically 15-30 minutes for most passenger vehicles. If you’re unsure about a particular area, refer to the service manual for safety cautions specific to your engine model.
How to visually locate spark plug wells in your engine
Locating spark plug wells starts with opening the hood and identifying the ignition components near the top of the engine. In many cars, the coil packs sit on or near the valve covers, and each pack corresponds to one or more plug wells. Trace the thick spark plug wires or the coil packs to their arrival points on the cylinder head. If your vehicle uses coil-on-plug (COP) ignition, you’ll find a small coil directly above each plug well, often with a boot that connects to the spark plug. For engines with a traditional distributor and spark plug wires, follow the wires from the distributor cap toward the cylinder head; the wires will connect to the plugs at the top of each cylinder. Be mindful of hoses, air intake ducts, and wiring looms that can obscure access. A clean, well-lit area helps you see the plug wells clearly. Take note of which cylinder corresponds to each plug so you can map your inspection order. If you encounter a plastic cover or shield, carefully remove it using the correct fasteners, keeping track of screws for reassembly.
Different engine designs: inline, V, and beyond
The exact location of spark plugs varies by engine design. Inline engines (I-4, I-6) typically line up plugs along the rocker cover side of the head, with accessible wells on the top. V engines position plugs on two banks, which can appear more complex but are usually accessible from the top with a clear view of each well. Some modern engines use a “coil-per-plug” layout, where each plug has its own ignition coil directly above it, simplifying diagnosis by isolating misfires to a single cylinder. In contrast, engines with a distributor distribute high voltage through a single rotor and cap, with plug wires routed to each cylinder. Understanding these layout differences helps you estimate how much disassembly is required and what tools to bring. Regardless of design, always confirm the exact plug count and the corresponding cylinders from the owner’s manual before removing anything. This prevents misidentification and potential misrouting of replacement parts. MultiPlugging emphasizes starting with the layout, then validating each plug's position, so you don’t waste time chasing the wrong components.
Common signs you’re looking at the right spark plug area
If you’re unsure you’ve found the correct plug wells, look for consistent features: the plug wells thread into the head, there’s a coil or boot connector nearby, and a metal or ceramic tip sits inside the well. In COP systems, the coil sits directly over the plug and there’s a boot that connects to the plug terminal. If your engine uses wires, you’ll see thick insulated leads running from the distributor or coil to the plug boots. A visual cue of correct design is the presence of a metal hex or square head at the top, which indicates the plug’s external shape. You may also observe the characteristic threads that accept a spark plug. If you can see a gap where a tool can insert into the well, you’re likely in the right location. When in doubt, consult the vehicle’s service manual or reference the engine’s diagram to confirm the exact bank and cylinder order. In any case, never force a tool into a plug well and avoid prying around the surrounding components—gentle, precise movements preserve the threads and seals. This approach minimizes the risk of cross-threading and damage that could affect engine performance.
Quick sanity checks after locating plug wells
After you’ve located the wells, perform a few quick checks: ensure the plugs’ threads are clean and free of oil or residue, inspect the boots for cracks, and verify there’s no visible coolant leakage around the head gasket near the wells. If you see oil, it may indicate a leaking valve cover gasket or piston ring issue that should be addressed separately. If you spot corrosion on the plug terminals, it can signal moisture intrusion or poor contact. A clean, dry plug well is essential for accurate testing and future replacement. Finally, recheck that you’ve matched each plug to its correct cylinder position before any removal, and always keep a simple diagram or photos to guide reassembly. These steps help you locate and assess spark plug wells without unnecessary disassembly, aligning with practical DIY maintenance.
When to consult a professional for spark plug locating and replacement
Some engines present access challenges that exceed typical DIY confidence, such as tightly packed space, limited tool clearance, or specialized torque requirements. If you encounter stubborn bolts, corroded fittings, or ambiguous diagrams, avoid forcing parts or attempting a replacement without adequate guidance. In these cases, a professional mechanic or a certified technician can perform spark plug inspection and replacement using the correct torque specifications and OEM parts. When in doubt, seek professional assistance to protect your engine’s performance and avoid costly damage. Regular maintenance is worthwhile, and local shops can verify that your plug gaps and heat ranges meet manufacturer specifications.
Final notes and maintenance planning (summary for future checks)
Locating spark plugs accurately is a foundational DIY task that supports reliable maintenance practices. Keep a simple notebook or photo log mapping each plug to its cylinder, recording any signs of wear, oil, or oil residue. Use the correct socket and extension to avoid damaging the plug or head, and always torque plugs to manufacturer specifications to prevent leaks or head damage. Routine checks—every 30,000 miles or per your vehicle’s manual—help catch issues early and save on repair costs. By understanding where the spark plugs sit and how to access them, you empower yourself to perform safer inspections and timely replacements when needed. The MultiPlugging team emphasizes a methodical approach: start with layout recognition, verify access, and proceed with care to keep your engine running smoothly.
Tools & Materials
- Owner’s manual for your vehicle(Identify engine type and plug count)
- Flashlight or handheld work light(For dark plug wells)
- Gloves and eye protection(Protect hands and eyes)
- Spark plug socket wrench set with extension(Ensure compatible socket size (often 5/8" or 13/16"))
- One or more multi-grips or pliers(Used cautiously if removing tight hoses)
- Plastic pry tool or small screwdriver(For removing covers without damage)
- Replacement spark plugs (correct heat range specified)(Only if ready to replace)
- Torque wrench (optional)(Important for final torque on some engines)
- Rags or shop towels(Keep area clean and dry)
Steps
Estimated time: 15-25 minutes
- 1
Turn off engine and allow cooling
Park the car, switch off the ignition, and set the parking brake. Wait 15-30 minutes to let the engine cool before touching any components around the head or exhaust manifold.
Tip: Hot metal can cause burns; always verify the surface temperature with the back of your hand at a safe distance before touching. - 2
Open hood and locate ignition components
Raise the hood and locate the ignition coils, coil packs, or distributor cap. These components help you spot the general area where plugs reside and indicate the layout you’re dealing with.
Tip: If your engine has a plastic cover, remove it carefully following the fasteners so you don’t crack clips or grommets. - 3
Identify spark plug wires or coils
Trace back from the ignition components to the plug wells. COP setups have a coil directly over each plug; distributor-based systems use one or more thick plug wires routed to each cylinder.
Tip: Do not pull on wires; grip the boot and twist slightly to detach without damaging the connector. - 4
Trace routes to the plug wells
Follow the wires or coils to the head, noting the cylinder order. In tight engines you may need a flexible extension or shorter sockets to reach the plugs.
Tip: Keep track of which plug corresponds to which cylinder; a small diagram speeds reassembly. - 5
Confirm exact plug locations and count
Count the number of plug wells and verify you know the correct cylinder sequence before any removal. Use the manual to confirm the plug type and gap if you plan to test or replace.
Tip: Photo-document each plug’s position for reference when you reinstall. - 6
Prepare for replacement or inspection
If you’re inspecting without replacing, wipe the wells clean and inspect for oil, coolant, or corrosion. If replacing, prep the new plugs by checking the gap and ensuring the torque value matches manufacturer specs.
Tip: Do not force plugs into poorly aligned wells; misalignment can damage threads. - 7
Reassemble and verify everything
Reconnect coils or wires, reattach any covers, and hand-tighten the fasteners before final torquing per your manual. Recheck for clearance and confirm the engine bay is clean and secure.
Tip: Take a final visual check to ensure no tools are left in the engine bay.
FAQ
What are spark plug wells and why are they sometimes hard to access?
Spark plug wells are the threaded pockets in the cylinder head where plugs screw in. Access can be obstructed by coil packs, covers, hoses, or a crowded engine bay, especially in newer or high-performance engines.
Spark plug wells are the threaded spots in the engine where plugs go. Access can be blocked by coils or hoses, especially in newer engines.
Do spark plugs sit in multiple places depending on engine type?
Yes. Inline engines line up plugs along one head, while V-shaped engines have two banks. Some engines use coil-on-plug configurations, and others use traditional distributor-based systems with plug wires.
Yes. Depending on the engine type, plugs can be arranged on one head, two banks, or under coil packs.
Can I locate spark plugs without removing engine components?
Some engines allow locating plugs with minimal removal, especially COP or coil-per-plug designs. Others may require removing a cover or shield to access the wells.
In some engines you can find plugs with little removal; in others you may need to remove covers.
What tools are essential for locating spark plugs?
A spark plug socket set, a flashlight, and basic hand tools are essential. Having a torque wrench and a camera or notebook to document locations helps with reassembly.
You’ll want a spark plug socket, a flashlight, and some basic tools; a torque wrench helps for final tightening.
How can I tell if I found the correct plug location?
Cross-check with the vehicle manual for cylinder order, plug type, and thread size. Look for the exact match in the head’s pattern and ensure the coil or boot aligns with the plug.
Cross-check with your manual to confirm cylinder order and plug type, and ensure proper coil alignment.
What safety precautions should I follow when locating spark plugs?
Work with a cool engine, wear eye protection, and avoid loose clothing. Keep the area clean and organized to prevent dropping parts or tools into the engine.
Cool engine, protective gear, and a tidy workspace are key safety steps.
Watch Video
Main Points
- Identify engine layout before touching any plug wells
- Work with a cool engine and proper safety gear
- Follow exact cylinder mapping to avoid misfires
- Document locations with photos for safe reassembly
- Know when to seek professional help for difficult layouts