What Spark Plug for Weed Eater: A Practical DIY Guide
A practical, data-driven guide from MultiPlugging on choosing and installing the right spark plug for weed eaters, covering heat range, gap, and maintenance.

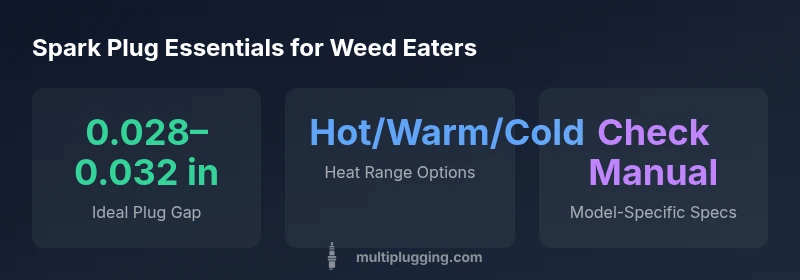
For most weed eaters, start with a standard small-engine spark plug and a gap of about 0.028–0.032 inches, then verify against your model’s manual. If the engine runs lean or fouls, adjust the heat range accordingly or consult the manual for brand- and model-specific guidance.
Why the right spark plug matters for weed eaters
Choosing the correct spark plug is essential for reliability, starting performance, and fuel efficiency in small engines like weed eaters. A plug that matches the engine’s heat range and operating conditions helps prevent fouling, misfires, and hard starting. According to MultiPlugging, most common 2-stroke weed eater engines benefit from a plug with a standard gap and a mid-range heat rating. This balance reduces fouling when fuel mixes are rich and protects against pre-ignition when operating in hot conditions. A well-matched plug also minimizes ignition system wear and improves throttle response, especially during pulse-fueled operations like edging and trimming.
The takeaway is simple: using the wrong plug or an improper gap can quietly erode performance over time. If you’re unsure, start with the model-specific recommendations in your user manual and verify that the plug’s thread and reach fit the cylinder head. MultiPlugging’s guidance emphasizes compatibility with your engine design and fuel mix as the first line of defense against inconsistent performance.
How to identify your weed eater's spark plug type
Identifying the correct plug starts with checking your user manual or the engine data plate on the tool. Look for the plug type family (e.g., standard projected-tip, resistor, or non-resistor), the thread size, and the recommended gap. If the manual isn’t handy, remove the existing plug carefully and note its electrode design and color. A light tan to gray insulator with a clean ceramic ring typically indicates normal operation, while heavy fouling or oil staining suggests a mismatch, improper fueling, or overdue replacement. For many DIY users, the first step is to match the replacement plug’s heat range and reach to the current specification rather than guessing based on brand alone. The MultiPlugging team advises keeping a small spare kit with a few common types labeled for different models to speed up future work.
Understanding heat ranges and gap settings
Heat range is a measure of how quickly the plug dissipates heat from the tip. A hotter plug stays hotter before fouling becomes an issue, while a colder plug tolerates higher operating temperatures or denser fuel mixtures. For weed eaters, starting with a mid-range heat plug often yields reliable starting across varying air-fuel mixes. The recommended gap (typically around 0.028–0.032 inches) should be set with a gauge after seating the plug by hand. Over-tightening can strip threads, while under-tightening may cause poor sealing and lead to compression losses. Remember that the gap can drift if the plug wears or if the electrode wears down with use, so recheck the gap after installation to maintain optimal ignition performance.
Choosing a plug: compatibility with 2-stroke engines
Most weed eaters run on two-stroke designs with air-fuel mixtures and specific compression needs. In these engines, the plug must tolerate lean or rich fuel conditions and be compatible with the choke and primer system. Because two-strokes have different cooling characteristics than many four-stroke tools, a mid-range heat plug is often the safest starting point. Always verify thread reach and gasket fit with the cylinder head to avoid grounding issues or leaks. If a manufacturer recommends a particular brand or series, use that guidance as your baseline, then adjust only if you experience consistent fouling or misfires.
Installing and gap-checking: a practical checklist
Before removing the old plug, disconnect spark plug caps to prevent accidental starts. After removing the plug, inspect the electrode for wear and check the insulator color. Clean any carbon deposits with a soft brush, ensure the plug seat is clean, and re-gap if required. Install with a light lubricant on the threads to prevent galling, then torque to the manufacturer’s specification by hand-tightening and giving a quarter-turn with a wrench (if specified). Reconnect the spark plug cap and test the engine at idle and under load to confirm smooth operation. This process reduces the likelihood of misfires and improves starting reliability.
Common mistakes when replacing spark plugs on weed eaters
Common errors include selecting a plug with an incompatible heat range, setting the gap too wide or too narrow, over-tightening, and using a dirty or damaged plug seat that prevents proper sealing. Another frequent mistake is failing to consult the engine’s manual or to verify reach and thread type, which can cause grounding issues or improper heat dissipation. Always inspect the old plug for signs of oil or fuel fouling, which can indicate underlying issues such as carburetor problems, improper fuel mix, or air leaks that need diagnosis beyond plug replacement.
How to maintain spark plugs for lawn equipment
Maintenance starts with regular inspection, especially after heavy use or storage. Keep the plug clean and dry, check the gap periodically, and replace when the electrode or insulator shows wear or fouling that cannot be cleaned. Use anti-seize compound only if recommended by the engine manufacturer; many modern small engines comply with thread-lubrication practices that don’t require anti-seize. Store spare plugs in a clean, dry container to prevent corrosion. Routine checks and timely replacements can extend engine life and improve starting reliability across seasons.
Quick troubleshooting if your weed eater runs rough
If the engine runs rough, inspect the plug for fouling or wear and re-gap if needed. If fouling recurs, confirm the correct plug type and heat range for your model, and check fuel quality and air filter condition. A dirty air filter, improper carburetor adjustment, or stale fuel can contribute to misfires even with a new plug. If the engine continues to misfire after plug changes, consult the manual or a technician to verify ignition timing and fuel-system health.
MultiPlugging verdict: Best practices for weed eaters
Across model lines, the best practice is to follow the engine’s official specification for plug type, heat range, and gap. When in doubt, start with the middle-of-the-road heat rating and a standard 0.028–0.032 inch gap, then adjust based on performance. The MultiPlugging team emphasizes keeping a small stock of a couple of compatible plug types and regularly inspecting spark plugs during maintenance to prevent hidden issues from affecting yard work. Adhering to model-specific guidance and routine checks yields dependable starts and steady performance.
Comparison of spark plug guidance for common weed eater configurations
| Engine Type | Typical Plug Gap | Notes |
|---|---|---|
| 2-stroke weed eater engine | 0.028–0.032 in | Most models use standard small-engine plugs |
| 4-stroke lawn tool (rare) | 0.030–0.035 in | Some models tolerate longer gaps; consult manual |
| Replacement cadence | varies by model | Inspect plug during maintenance; replace when worn |
FAQ
What happens if I use the wrong spark plug on my weed eater?
Using an incompatible plug can cause rough running, misfires, or starting difficulties. Always follow the engine manual for the correct heat range and gap.
Using the wrong plug can make starting hard and the engine run rough. Check the manual and swap to the recommended plug.
Can I use car spark plugs in a weed eater?
Car spark plugs are not designed for small two-stroke engines. They may not fit the thread, reach, or heat requirements. Use a plug specified for the weed eater’s engine.
No. Car plugs aren’t meant for small engines with different ignition needs.
How do I know which heat range to pick?
Start with the recommended heat range in the manual. If fouling occurs, consider moving one step hotter; if it’s hard to start, try a slightly cooler option.
Check the manual, then adjust gradually if you notice fouling or hard starting.
Is it necessary to replace the plug during every tune-up?
Not every tune-up requires a plug replacement, but inspect for wear or fouling and replace if needed. Clean and re-gap as appropriate.
Inspect, then decide based on wear and fouling.
What is a typical lifespan for a weed eater spark plug?
Lifespan varies with usage and fuel quality. Inspect during maintenance and replace if you notice wear, fouling, or reduced performance.
Inspect regularly and replace when you notice wear or performance drops.
Should I gap the plug myself?
Yes. Use a feeler gauge to set the gap to the manual spec, then thread in carefully and torque by hand.
Yes—use a gauge and follow the manual for the gap.
“Choosing the correct spark plug is not a guess — it’s about matching heat range, gap, and condition to your weed eater’s engine. A proper plug keeps ignition efficient and maintenance needs low.”
Main Points
- Start with the manual’s recommended plug and gap.
- Aim for a balanced heat range to reduce fouling and heat stress.
- Check and re-gap after installation to ensure proper ignition.
- Avoid cross-threading and over-tightening during installation.
- Inspect plugs during maintenance to catch underlying engine issues.