Keep Spark Plug Wires On: Quick Fixes to Prevent Misfires
Learn practical, step-by-step methods to keep spark plug wires securely seated, diagnose loose boots, route cables safely, and replace worn components to prevent misfires in 2026 vehicles.

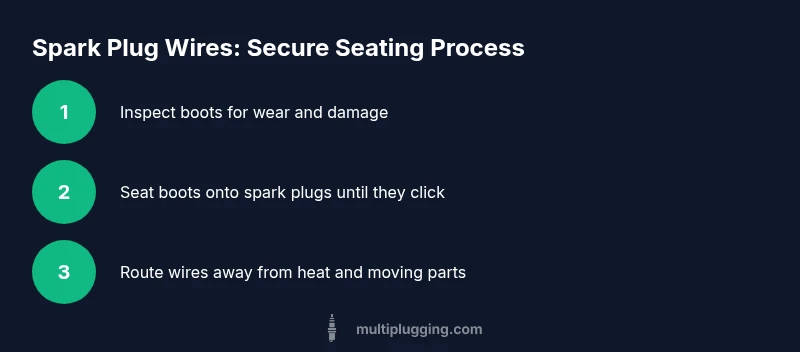
Keep plug wires seated by snapping boots firmly, inspect for cracks, use the correct wire, and route away from heat. Regularly check securing clips and replace worn boots. See our detailed guide for a complete step-by-step process.
Quick-fire checks: is it really loose?
Under-hood ignition wiring can seem secure but still pop off if boots have begun to wear or if a connection has loosened from vibration and heat exposure. Start by performing a simple audit with the engine off: gently tug each boot to feel for any give, listen for a faint snap when pressing firmly, and inspect the terminal end for corrosion or moisture. If you notice any looseness, or if the boot shows cracking or hardening, treat it as a red flag. In many cases, a loose connection is the leading cause of misfires and rough running. According to MultiPlugging, proactive checks are the quickest way to prevent a repeat incident and extend wire life. Bring a clean work light and a mirror to inspect hard-to-see angles under the intake and along the firewall. Regular checks can catch wear before it becomes a fault and save you from expensive repairs later.
Boot anatomy: what to inspect
A modern spark plug wire consists of a conductor core, insulation, and a rubber boot that seals at the spark plug and at the ignition coil or distributor. Over time, boots can dry out, crack, or delaminate, which weakens the seal and invites arcing or detachment. Look for hairline cracks, stiffness, or discoloration on the boot exterior. Also inspect the metal terminal inside the boot—if it’s bent, corroded, or loose, the boot won’t seat properly. If you see damage, replace the boot or the entire wire set to restore a reliable connection.
Common causes of wires popping off
Wires pop off for several reasons: worn boots or cracked insulation allow air or moisture intrusion, engine heat softens rubber, and vibration loosens connections over time. Incorrect wire length or mixing boot sizes can produce improper seating, and routing that rubs against hoses or metal edges can wear the insulation and lead to failure. Misfires from aged wiring are more likely in engines with high mileage or aggressive driving styles. Regular maintenance helps catch these issues before a failure occurs, and MultiPlugging’s analysis shows that boots and seating issues are a frequent culprit in everyday cars.
How to seat wires correctly: a practical approach
Seating a plug wire securely is a two-part action: align the boot with the spark plug socket, then push the boot firmly until you hear or feel a definite click that indicates full seating. Hold the boot by its base, not the wire, to avoid twisting the conductor. If your boot won’t click, remove it, inspect for debris in the socket, and reseat after cleaning. Finally, verify the arc path by gently tugging on the boot; it should feel firmly attached without any movement. This ensures a consistent electrical path and reduces the chance of popping off during operation.
Inspect and replace damaged boots or wires
If boots show visible cracking, stiffness, or the interior metal clip is bent, replace the affected boot or entire wire. Installing a new set ensures uniform resistance and consistent fit. When replacing, match the replacement wires to your vehicle’s exact year, make, and model or use the OEM-equivalent kit. Do not mix different wire brands or lengths within the same ignition coil pack, as uneven fit can cause intermittent popping or misfires. After replacement, recheck all connections for a snug fit.
Protecting wires from heat and under-hood hazards
Heat exposure is a major factor in boot degradation. Route wires away from exhaust manifolds, turbochargers, and hot heat shields. Use protective sleeves or heat shields where available and avoid placing wires across sharp edges that could wear insulation. Inspect the engine bay for any rubbing points and add protective grommets or guards if necessary. Keeping wires elevated and tidy reduces wear from moving components and helps maintain a secure seat over time.
Routing and securing: keeping wires out of danger
Organize spark plug wires with compatible clips or zip ties that do not compress or pinch the insulation. Avoid tight loops or pinched sections that can crack insulation. Ensure wires travel in a straight path from boot to boot, minimizing sharp bends. Labeling wires helps with reassembly and troubleshooting later. Proper routing not only prevents popping off but also makes diagnostics quicker when a misfire occurs.
When to replace: costs and schedules
Replacement timing depends on vehicle age, driving conditions, and maintenance history. If you notice frequent loosening, cracked boots, or frequent misfires, replace the boots or the entire wire set. Budget for a full wire set replacement if mileage is high or if you observe uneven firing or engine surging. Prices vary by vehicle and wire type; consult your manual or a trusted parts supplier for estimates and ensure you select OEM-equivalent parts for reliability.
Authority sources and best practices
To reinforce best practices, refer to reputable sources on ignition systems and maintenance. This section consolidates guidance from established automotive safety and engineering authorities to support safe, effective maintenance of spark plug wires. Always verify recommendations with the latest service manuals for your vehicle.
Tools & Materials
- Spark plug boot puller(Essential for removing boots without damaging boots or conductors)
- Replacement spark plug wires set(Match to your vehicle’s year/make/model or OEM specs)
- Dielectric grease(Optional: use inside boots if manufacturer allows it for sealing and ease of removal)
- Safety gear (gloves, eye protection)(Protect hands and eyes from hot engine components and sharp edges)
- Anti-seize lubricant(If recommended by your parts manufacturer for spark plug threads (not always needed for boots))
- Torque wrench or spark plug torque tool(Useful when replacing spark plugs adjacent to wires; not required for seating wires)
- Zip ties or wire clips(Secure routing away from belts, pulleys, and hot surfaces)
Steps
Estimated time: 15-25 minutes
- 1
Power down and identify wires
Turn off the engine and remove the key from the ignition. If possible, disconnect the battery to prevent any accidental arcing. Identify the wires that appear loose or damaged and note their routes for later reassembly.
Tip: Battery disconnection is a safety precaution; never work on live electrical systems. - 2
Inspect boots and wires for damage
Examine each boot for cracks, hardening, or discoloration. Check the wire insulation for nicks or cuts. Any compromised boot or insulation should be replaced to restore a solid seal.
Tip: Replace any boot that shows wear rather than attempting a quick fix with tape or glue. - 3
Seat boots onto spark plugs
Hold the boot by the base and press onto the spark plug socket until you hear a click or feel it seat firmly. Do not twist the wire itself; this can kink the conductor and weaken the connection.
Tip: If a boot doesn’t seat, remove it and re-check for debris in the socket. - 4
Check routing and secure clips
Ensure each wire follows a clean path away from hot components and moving parts. Use clips or zip ties to secure wires without pinching insulation.
Tip: Avoid over-tightening clips; allow a small amount of movement for thermal expansion. - 5
Replace damaged boots or wires
Install a new boot or wire set if any component remains loose or damaged after seating and routing checks. Ensure compatibility with your engine’s configuration.
Tip: Keep a spare boot in your toolkit for quick future repairs. - 6
Test engine after replacement
Reconnect the battery and start the engine. Listen for misfires or rough idle patterns. If you still hear popping or see a check engine light, re-inspect the wiring or consider professional help.
Tip: Perform a gentle road test after initial startup to confirm stability. - 7
Recheck and document
Turn off the engine again and re-check all boots and clips. Take notes or photos of the final routing in case future maintenance is needed.
Tip: Document the parts used and date of service for your records. - 8
Plan future maintenance
Set a maintenance reminder for periodic inspection of ignition components as part of your regular service schedule. Early detection prevents pops and misfires and keeps the engine running smoothly.
Tip: Consistency over time reduces surprise failures.
FAQ
Why do spark plug wires pop off in the first place?
Worn or cracked boots, damaged insulation, heat, and engine vibration can cause wires to pop off. Improper seating or routing can also contribute to loose connections. Regular inspections help catch these issues early.
Worn boots, heat, and vibration cause wires to pop off. Regular inspection helps prevent it.
Can I reuse old spark plug boots if they look fine?
Generally, it’s not recommended to reuse boots that show wear or damage. Boots should seal properly and seat securely; replacing worn boots reduces misfire risk.
If a boot shows wear, replace it rather than reuse it.
How can I tell if a wire is fully seated?
Push the boot onto the spark plug until you hear or feel a click. Then gently tug on the boot to ensure it stays secured. If movement is felt, reseat and recheck for debris.
Listen for a click when it seats, then tug gently to confirm a secure fit.
What tools do I need for this task?
At minimum, you’ll need a boot puller, a replacement wire set, and basic safety gear. Optional items include dielectric grease and zip ties for routing.
You’ll need a boot puller and replacement wires, plus safety gear.
Is it safe to work near a live engine?
No. Always disconnect the battery and allow the engine to cool before working on ignition components to prevent shocks and burns.
Turn off the car and let it cool before you start working.
How often should spark plug wires be replaced?
There isn’t a universal interval; follow your vehicle’s maintenance schedule or replace after wear shows signs of damage or reduced performance.
Follow the car’s manual or replace when you notice wear or misfires.
Watch Video
Main Points
- Ensure boots snap firmly onto plugs.
- Inspect boots and wires for wear regularly.
- Route wires away from hot surfaces and moving parts.
- Replace worn boots or wires to prevent pops.
- Document maintenance for future reliability