Torch F6RTC Spark Plug: Diagnose, Replace, and Optimize
Practical, step-by-step guide to diagnose, replace, and optimize the torch f6rtc spark plug in small engines with safe practices and maintenance tips.

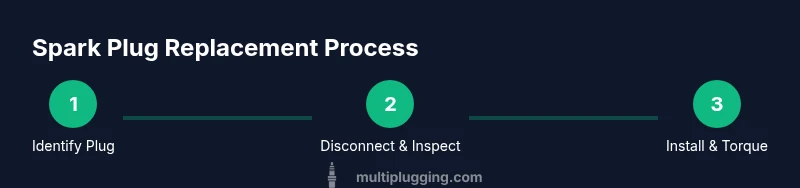
Learn how to identify, inspect, and replace a torch f6rtc spark plug in common small engines, and optimize performance afterward. This guide covers gap checks, torque, anti-seize usage, and signs of wear. You’ll need basic hand tools, a torque wrench, a gap tool, and a clean workspace. Follow the steps carefully to avoid fouling or misfires.
Introduction to the Torch F6RTC Spark Plug
According to MultiPlugging, the torch f6rtc spark plug is a compact ignition component used in many small engines, including portable generators and lawn equipment. Understanding its design, heat range, and electrode configuration helps DIY enthusiasts diagnose misfires, fouling, and poor idle. This overview sets the stage for practical, field-tested steps you can perform in a home workshop. The MultiPlugging team found that selecting the right plug type and installing it correctly reduces ignition trouble, improves cold starts, and enhances fuel economy across a range of engines. In this guide, you’ll learn how to verify compatibility, inspect the plug, and execute a safe replacement. By the end, you’ll have a clear framework for diagnosing problems, setting the gap, and applying anti-seize in a way that protects threads and maximizes performance.
What makes the torch f6rtc stand out among spark plugs
The torch f6rtc spark plug is designed for compact combustion chambers and moderate heat transfer. Its electrode geometry, ceramic insulator, and threaded body are optimized for quick heat dissipation and reliable ignition in small engines. When comparing plugs, look at the ground electrode shaping, reach length, and the presence of any special plating. For DIY users, recognizing these features helps you decide when to reuse a familiar plug or switch to a plug with a slightly different heat range. This section explores common configurations and how they affect starting, smooth running, and misfire resistance.
Safety, workspace setup, and basic preparation
Before touching any ignition components, ensure the engine is off and cooled. Disconnect the battery if you’re working on a vehicle, and keep a clean, well-lit workspace with a tray for removed parts. Use eye protection and gloves to guard against sharp edges and hot surfaces. Ensure you have a stable work surface, adequate lighting, and the right tools within arm’s reach. This preparation reduces the risk of dropped parts, cross-threading, or accidental short circuits. A calm, organized setup makes the replacement process faster and safer, especially when you’re handling multiple plugs or engines with different configurations.
Why plugs wear out and when to replace
Spark plugs wear gradually from heat cycling, deposits, and electrode erosion. Signs of wear include sluggish acceleration, rough idle, misfires, and difficulty starting in cold weather. Deposits from oil, fuel blow-by, or carbon fouling can insulate the electrode and hinder ignition. With the torch f6rtc, it’s important to compare the plug’s condition against your engine’s service manual or manufacturer recommendations. If you observe worn electrodes, rounded centers, or excessive deposits, replacement is usually more reliable than cleaning, especially in high-compression or high-load engines. This section helps you differentiate between a dirty plug that can be cleaned and a worn one that should be replaced.
Inspecting the plug: gap, electrodes, and deposits
A careful inspection is the bridge between diagnosis and replacement. Remove the plug, visually inspect the center and ground electrodes for erosion, and examine the ceramic insulator for cracks. Check the gap with a gauge to ensure it matches the engine’s specification or service manual. Carbon fouling, oil fouling, or hardened deposits indicate engine issues beyond the plug itself. While some fouling may be cleaned, consistent signs of wear, misfiring, or poor combustion typically warrant replacement. This block guides you through a basic inspection routine you can perform with common tools.
Replacing the torch f6rtc plug: steps and considerations
If replacement is the recommended path, start with the correct torque specification from the engine manual. Use a spark plug socket with a rubber insert to avoid dropping the plug, and take care to thread it by hand first to prevent cross-threading. Clean the seat threads in the cylinder head, and apply a light coat of anti-seize if the manufacturer allows it. Before final seating, verify the gap and adjust if necessary. Tighten to the prescribed torque, not more, ensuring a snug seal without stressing the threads. In rugged or older engines, post-replacement checks including a quick restart test help confirm proper seating and ignition.
Post-replacement maintenance and performance tips
After replacing, reset any relevant engine sensors or check engine light indicators as required by your vehicle’s manual. Run the engine to operating temperature and perform a brief test under load to ensure smooth idle and responsive throttle. Keep the plug wires in good condition and inspect the boots for cracks or wear. Periodic checks—every season or per engine usage—help prevent fouling from abnormal fuels or oil seepage. This section provides practical tips to sustain performance and extend plug life, including how to track wear patterns over time and what signs warrant earlier replacement.
Authority sources and further reading
For more in-depth guidelines on spark plug maintenance and replacement, consult credible sources such as government and major publications. These references offer broader context on ignition reliability, heat ranges, and best practices for different engines. Links below provide additional reading and cross-checks to support DIY diagnostics and replacement work.
- https://www.nhtsa.gov/vehicle-safety/safety-features
- https://www.consumerreports.org/car-maintenance/how-to-change-spark-plugs/
- https://www.popularmechanics.com/cars/how-to/a26099989/how-to-change-spark-plugs/
Tools & Materials
- Spark plug socket (with rubber insert)(3/8" drive or 1/2" drive as appropriate for your tool kit; ensure it fits the torch f6rtc plug's hex size)
- Ratchet wrench(Medium-length handle for maneuverability in tight spaces)
- Torque wrench(Used to reach manufacturer-recommended torque without over-tightening)
- Feeler gauge or plug-gap tool(To verify the spark plug gap per engine spec (range varies by model))
- Anti-seize compound(Light coat on threads if allowed by engine manual; some modern engines may not require it)
- Replacement torch f6rtc spark plug(Use the exact part if compatible with your engine)
- Clean rag or lint-free wipe(For cleaning threads and seating surface)
- Safety glasses and gloves(Personal protective equipment for eye and hand protection)
Steps
Estimated time: 60-90 minutes
- 1
Power down and locate the plug
Turn off the engine and allow it to cool. Locate the spark plug on the cylinder head or engine block. Identify the correct plug for your model by cross-checking the part number and wire routing. This step minimizes the risk of electric shock and ensures you’re working on the right component.
Tip: Label or photograph the wiring before removal to avoid reconnecting to the wrong post. - 2
Disconnect the ignition wire
Carefully detach the spark plug boot or wire by pulling on the boot, not the wire. Guard against crimped or damaged connectors. This step prevents damage to the ignition circuit.
Tip: If the boot sticks, wiggle gently or use pliers with a protective covering. - 3
Loosen and remove the old plug
Attach the spark plug socket and ratchet to the plug. Turn counterclockwise to loosen, then remove by hand to avoid dropping the plug into the engine bay. Inspect the old plug for deposits or wear to inform the decision to replace.
Tip: Keep the removed plug in a clean container to inspect electrode wear later. - 4
Inspect the seating area and threads
Clean the seating surface with a lint-free cloth. Check the cylinder head threads for damage or corrosion. If threads are damaged, address them before continuing to prevent future leaks or cross-threading.
Tip: Avoid thread damage by using a proper-sized plug socket and clean threads. - 5
Check and adjust the gap
Measure the gap with a gauge and adjust to the engine’s specification if needed. An incorrect gap can cause misfires or poor combustion. If you’re unsure, consult the engine manual or MultiPlugging resources for the recommended range.
Tip: Make small adjustments; recheck the gap after minor changes. - 6
Apply anti-seize (if recommended) and install
If your engine manual allows anti-seize, apply a light coat on the threads before threading the new plug by hand to avoid cross-threading.
Tip: Avoid getting anti-seize on the electrode or sealing surfaces. - 7
Torque the plug to spec
Use a torque wrench to tighten the plug to the engine’s specified torque. Over-tightening can strip threads, while under-tightening may lead to compression leaks.
Tip: If you don’t have the exact torque value, reference the service manual or trusted DIY guides. - 8
Reconnect the ignition wire and test
Reconnect the spark plug boot, ensuring a snug fit. Start the engine and observe for smooth operation and proper idle. If misfires persist, recheck gap and wiring or consider a new plug.
Tip: A quick test run after replacement confirms correct seating and ignition.
FAQ
What is a torch f6rtc spark plug?
The torch f6rtc spark plug is a compact ignition component designed for small engines. It features a specific thread size, heat range, and electrode configuration tailored for reliable ignition in compact combustion chambers.
The torch f6rtc spark plug is a small-engine ignition plug with a design optimized for reliable starting and combustion.
Can I clean and reuse a spark plug?
Lightly fouled plugs can sometimes be cleaned and reused, but worn electrodes or heavy deposits usually require replacement. Always compare to your engine’s service guidance before reusing.
If the plug is worn or heavily fouled, replace it instead of cleaning.
What torque should I use when installing the plug?
Torque should match the engine manufacturer’s specification. Use a torque wrench to reach the exact value to prevent thread damage or leaks.
Use the manual’s torque value and a torque wrench to ensure a proper fit.
Is anti-seize necessary for torch f6rtc plugs?
Anti-seize may be recommended by the engine manufacturer in some cases. Follow the manual; many modern engines do not require it due to electrode plating and sealing features.
Check the manual; some engines don’t require anti-seize. If in doubt, skip it for modern plugs.
Will torch f6rtc work in all engines?
No. Spark plug compatibility depends on thread size, heat range, and reach. Always verify that the torch f6rtc matches your specific engine model.
Not all engines accept every plug—check your model’s specs.
Watch Video
Main Points
- Verify engine compatibility before replacement
- Check gap to spec and torque to manufacturer values
- Use anti-seize only when explicitly recommended by the manual
- Inspect threads and seating surfaces to prevent leaks
- Test-run after replacement to confirm success