How to Tighten Spark Plug Without Torque Wrench
Discover how to tighten a spark plug without a torque wrench using hand-tightening cues, clean threads, and proper seating. Learn steps, tips, and safety for DIYers in 2026.

You can safely tighten a spark plug without a torque wrench by using hand snugness plus a calibrated feel, then a gentle turn to seat with a light index finger torque. Start with clean threads, chase with anti-seize if needed, and use a torque-tightness cue (about a quarter to a half turn past snug) to avoid over-tightening. Stop immediately if you feel resistance or cross-threading.
Why tightening a spark plug without a torque wrench matters
According to MultiPlugging, properly seating a spark plug is essential to engine performance, fuel efficiency, and long-term reliability. When you don’t have a torque wrench, you’ll rely on careful thread health, clean seating surfaces, and a feel-based approach to avoid under- or over-tightening. This can prevent misfires, oil leaks, or head damage. A consistent manual technique reduces risk while delivering solid sealing. Engines operate under vibration, so even small slack can become an issue over time. In 2026, many DIY enthusiasts rely on hand-tightening cues as a practical alternative when a torque wrench isn’t available, provided you follow safe steps and respect the potential engine-specific limits.
Safety and preparation
Before you begin, disconnect the battery or ensure the ignition is off. Wear gloves and work in a clean, well-lit area. Debris around the plug well can fall into the cylinder and cause damage, so keep the area spotless and tools organized. Use a clean rag to wipe threads and the plug base. Patience matters: rushing to finish a task increases the risk of cross-threading or overtightening. If you’re unsure about your engine, consult the manual before attempting seating cues.
How seating without torque wrench works and when to stop
Tightening by feel relies on sensing resistance and the plug’s seating behavior. You want the plug to be snug enough to seal and transfer heat, but not so tight that metal threads strip. Without a torque wrench, use a combination of hand snug plus a light additional turn per the manufacturer's guidance or engine manual. If you feel any gritty resistance, a loose fit, or signs of cross-threading, stop and back out a half-turn to re-align.
Common pitfalls and how to avoid them
Common mistakes include over-wrenching or forcing plugs, using excessive anti-seize, or ignoring thread cleanliness. Always inspect threads for damage before reinstalling, chase damaged threads with a thread cleaner, and verify the plug seat by visually inspecting the base. If the plug won’t thread smoothly by hand, stop and realign the threads rather than forcing. Ensure the plug type and heat range match your engine’s requirements; mismatches can affect sealing and heat transfer.
Post-install checks and verification
After reseating, reconnect the coil boot and ensure a firm but comfortable fit. Start the engine and listen for smooth idle and normal acceleration. Check for any exhaust leaks around the plug area and confirm there’s no misfire indication (rough idle, hesitation, or check engine light). If symptoms appear, switch to the manufacturer’s recommended torque value or seek a professional inspection.
Engine-type considerations and best practices
Different engines may have varying seating cues, especially modern engines with tighter tolerances. For small engines and older cars, hand-seat cues are usually sufficient, but some engines require precise torque to protect the head gasket and threads. When in doubt, use the engine manual or OEM service sheet as the final reference. The core principle remains: dead-sober seating with clean threads plus a gentle final seat, not force.
Tools & Materials
- Spark plug socket with magnetic insert (3/8" drive)(Fits 5/8" plug hex; rubber cushion helps grip)
- Ratchet wrench (3/8" or 1/2" drive)(For light, controlled tightening by hand-assisted feel)
- Extension bar (short)(Helps reach recessed plugs)
- Spark plug gap tool(Check and adjust the gap to engine spec before installation)
- Anti-seize compound (optional)(Thin coat on threads only if recommended by manufacturer)
- Torque reference (engine manual or spec sheet)(Have the torque spec handy for cross-checking seating feel)
- Dielectric grease (optional)(Inside the boot to help future removal)
- Clean rag(Wipe threads and plug base clean before installing)
- Safety gloves(Protect hands and improve grip in oily environments)
Steps
Estimated time: 30-45 minutes
- 1
Identify the correct spark plug
Consult the engine manual or diagram to identify the right plug type and heat range. Verify you are removing the same plug you plan to replace and confirm the gap is measured for the correct engine model.
Tip: Label or photograph wires before removal to avoid reattachment errors - 2
Disconnect the ignition coil or plug wire
Carefully pull the coil boot or plug wire straight off the plug. Avoid yanking the wire; twist gently if needed to free it from the boot without damaging the connector.
Tip: Keep the boot clean and free of oil or debris - 3
Remove the old plug
Use the spark plug socket to turn the plug counterclockwise until it breaks free, then lift it out straight to avoid damaging the threads.
Tip: Ensure you do not drop debris into the plug well - 4
Inspect the old plug and gap the new one
Check the electrode for wear, fouling, or cracks. If the gap isn’t within spec, adjust it with the gap tool according to the manufacturer’s recommendation.
Tip: Compare the old plug’s gap to the new plug’s gap before seating - 5
Thread the new plug by hand
Start threading by hand to feel for cross-threading. If you feel resistance, back the plug out and re-align the threads before retrying.
Tip: Never force a plug into misaligned threads - 6
Seat the plug with a gentle final turn
Once hand-threaded, use a ratchet to snug it with a small, even motion. If you know your engine’s spec, apply the recommended final feel (often a quarter to half turn past snug).
Tip: Use the feel of the plug base at the gasket—no wrenches required - 7
Reconnect the ignition boot
Push the boot straight onto the plug until you hear a click or feel it fully seated. Ensure the boot is mounted securely to prevent misfires.
Tip: Avoid twisting the boot; alignment matters for a secure seal - 8
Check torque feel and verify
Re-check seating by gently rocking the plug with your finger—there should be no looseness. If you’re unsure, reference your engine manual to confirm the correct feel.
Tip: If you suspect cross-threading, stop and evaluate the threads - 9
Start and monitor the engine
Start the engine and listen for a smooth idle. Watch for any misfire indicators and confirm there are no leaks around the plug area.
Tip: If there is rough idle, re-check the plug seats and connections - 10
Document the service
Note the plug type, gap, and the date of replacement in your vehicle’s maintenance log for future reference.
Tip: Keeping a log helps future maintenance and diagnostics
FAQ
Can I reuse a spark plug that I removed without damage?
Reuse is not recommended if the plug shows wear, fouling, or damage. Inspect closely; replace worn plugs to maintain proper ignition and heat transfer.
Reuse isn’t advised if there’s wear or damage. Check the plug and replace if needed to keep ignition reliable.
Should I use anti-seize on threads if I’m not using a torque wrench?
Anti-seize can help with corrosion on some metals, but many modern engines rely on clean threads and manufacturer recommendations. If in doubt, skip it and follow the manual.
Anti-seize can be risky unless your manual says to use it; follow manufacturer guidance.
What if the plug won’t thread smoothly by hand?
Stop, realign the threads and try again. If it still binds, inspect for cross-threading or damaged threads and seek professional help.
If it’s hard to thread, stop and realign. Don’t force it; check threads or get help.
Do I need to replace the gasket or washer every time?
Many plugs have a crush washer that should not be reused. If damaged or warped, replace the washer or plug as recommended.
Replace the washer if it’s damaged or per the manual’s guidance.
Can a loose plug cause misfires even if it looks seated?
Yes. A plug that appears seated but is loose will cause misfires. Re-check seating and connections after starting the engine.
A loosely seated plug can misfire; verify seating and boot connection.
Is it safe to run the engine after replacing plugs without a torque wrench?
If you followed careful hand-tightening cues and verified seating, it’s generally safe to run, but monitor for unusual noises or misfires and consult manual if unsure.
Yes, if you followed seating cues and verified, but stay alert for issues.
Watch Video
Main Points
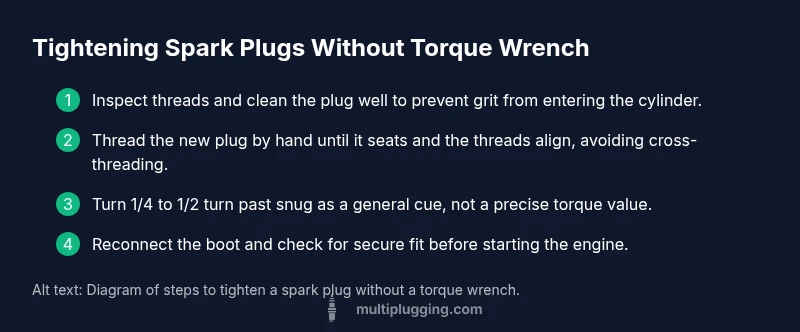
- Inspect threads before installation.
- Tighten by hand, then seat with a careful feel.
- Verify seal after installation and before starting the engine.
- Consult your engine manual for model-specific notes.
- Follow seating feel as a guide; The MultiPlugging team's verdict: rely on seating feel rather than torque when no torque wrench is available.