Spark Plug 41-962: Replacement & Diagnostics Guide
Diagnose, gap, and replace the spark plug 41-962 with confidence. This guide covers tools, torque, testing, and maintenance for reliable ignition performance.

This guide helps you diagnose, gap, and replace the spark plug 41-962 in common engines. You'll learn the correct torque specs, electrode gap, replacement procedure, and how to test ignition after installation. By the end, you can confidently service this plug type with basic tools. This quick answer orients DIYers to scope, safety, and essential steps before you dive into hands-on work.
Why spark plug 41-962 matters for engine performance
The spark plug 41-962 is a pivotal component in your engine’s ignition system. A healthy plug ensures clean, reliable ignition, smooth idling, and optimal fuel economy. According to MultiPlugging, choosing the right plug for your engine model reduces misfires and improves throttle response across driving conditions. In this section we explore how a single plug can influence compression, combustion efficiency, and emissions, and why a decision to service or replace it promptly pays off in the long run. You’ll learn how wear, fouling, and improper gap can degrade performance, and how to spot early warning signs before a breakdown. The 41-962 designation covers a particular thread size, heat range, and electrode configuration that fits a subset of engines from different manufacturers. Always verify compatibility with your owner’s manual or a trusted parts catalog before installation, because using the wrong configuration can cause pre-ignition, fouling, or thread damage. The goal is not to chase the newest plug trend but to maintain consistent, dependable ignition and stable engine timing. With the right approach, you’ll reduce rough running, improve fuel economy, and minimize emissions—benefits that accumulate drive after drive.
Model specifics: what 41-962 means and where it fits
The 41-962 designation identifies a spark plug style that appears in certain engines with specific thread dimensions, heat range, and electrode geometry. While the exact cross-compatibility can vary by manufacturer, many 41-962 plugs share a common goal: reliable ignition under a range of operating temperatures. When selecting this plug, consult your vehicle’s service manual or a trusted parts catalog to confirm fitment, gap expectations, and torquing values. The right plug helps maintain steady compression, reduces misfires, and supports efficient combustion. In practical terms, engine performance, cold-start behavior, and even emissions can hinge on choosing the correct variant for your make and model. If you are upgrading from an older plug, verify compatibility with the ignition system, coil packs, and wires, because a mismatch can create timing irregularities or fouling. Remember: a well-matched plug is a small component with a big impact on overall engine health.
Signs your 41-962 needs replacement
Even in engines that otherwise run smoothly, worn spark plugs can hide in plain sight. Look for symptoms such as rough idle, hesitation on acceleration, increased fuel consumption, or heavier exhaust. A failing 41-962 often exhibits a worn or eroded electrode, a cracked ceramic insulator, or a loose or fouled ground electrode that causes weak sparks. You may notice fouling from oil or fuel leaks, which appears as dark, sooty deposits around the tip. Misfires may show up as flashing engine warning lights or intermittent performance dips under load. If you observe any of these signs, perform a quick visual check and measure the gap against the vehicle’s specifications. Remember that even a plug that looks okay may be out of tolerance; replacing all plugs in a set is often cheaper and more reliable than replacing one at a time, especially in modern engines with precise ignition timing.
Safety and prep: setting up a clean, safe workspace
Before you touch the engine, ensure the vehicle is parked on a level surface and the engine is cool. Wear protective gloves and safety glasses to guard against sharp edges, hot components, and fuel splashes. Disconnect the negative battery terminal if you will be near electrical connections to avoid accidental shocks. Work in a well-ventilated area and lay out a small, labelled tray for old plugs or the replacement. Keep the work area organized to prevent dropping a plug into inaccessible spaces. A clean, low-dust environment helps prevent debris from entering the combustion chamber. Finally, have your service manual on hand for torque ranges, gapping guidance, and any model-specific cautions. Safety first is the quickest path to a successful, repeatable repair.
Tools and materials: essential items for 41-962 work
To service spark plug 41-962 you’ll rely on a few key tools and materials. A properly sized spark plug socket with a magnetic insert is essential for removal and installation. A torque wrench ensures you reach the specified clamping force without over-tightening. A feeler gauge or a calibrated gap tool helps verify the electrode gap to the manufacturer’s spec. For stubborn plugs, a small extension and a universal joint can help reach tight spaces. Have a microfiber cloth for cleaning the threads and a small wire brush for cleanup of any carbon buildup. You’ll also want anti-seize if your vehicle’s manufacturer recommends it (apply sparingly and only to the threads, not the seating surface). Finally, replace the ignition wires or coil packs if they show wear during inspection, and keep the new plug in a clean, dry container until you’re ready to install.
Inspecting the plug: electrodes, insulator, and threads
A thorough inspection starts with the visible tip. Look for a rounded or eroded center electrode, a worn ground electrode, or a cracked ceramic insulator. Porcelain cracks are a telltale sign that the plug is near the end of its life. Check the threads for corrosion or cross-thread damage. If the seat is damaged, you risk poor sealing and fuel leaks. Clean any carbon deposits from the plug seat and threads with a soft brush and a lint-free cloth. If the plug shows significant wear or damage, replace it rather than attempting to reuse it. A single damaged plug can disrupt ignition timing and trigger misfires that ripple through the engine.
Gap and torque basics for 41-962
Gap size and torque are two core specs that influence ignition quality and sealing. Without the correct gap, you risk misfires and inconsistent flame fronts. Proper torque prevents the plug from loosening and damaging the threads, or from seizing in aluminum heads. Since 41-962 plugs may vary by manufacturer, always refer to the vehicle manual for exact gap numbers and torque values. If you cannot locate these values, start with a conservative gap and re-check after a brief test run. When torquing, use a torque wrench in a controlled, gradual manner, and finish with a final check before starting the engine.
Replacement steps overview and best practices
Replacing the 41-962 is a straightforward process, but precision matters. Begin by cleaning the area around the plug to avoid debris entering the cylinder. Remove the old plug with a firm, steady motion, avoiding wrenches that slip. Inspect the seat for damage during removal. Clean the seating surface thoroughly before installing the new plug. Thread the new plug by hand initially to prevent cross-threading, then torque to spec using a wrench. Reconnect any wires or coil packs and recheck clearance. Finally, start the engine and listen for a smooth idle and clean exhaust. If you detect any roughness or audible misfires, stop and re-check the installation.
Post-install testing, maintenance, and troubleshooting
After installing a 41-962, verify the ignition system by performing a basic test: start the engine and observe idle quality, check for misfires under load, and confirm that there are no coolant or fuel leaks around the seat. A quick spark test with a diagnostic tool can confirm strong ignition. Schedule regular maintenance to prevent fouling: use correct fuel, keep the air filter clean, and maintain proper engine timing. If misfires persist, inspect the coil packs and wires as well as the plug’s seating and gap. Keeping a maintenance log helps you track wear patterns and plan future replacements.
Tools & Materials
- Spark plug socket with magnet (5/8 inch)(3/8-inch drive; rubber insert to hold 41-962 securely)
- Torque wrench(Capable of measuring low torque range; follow spec)
- Feeler gauge or gap tool(Set electrode gap to manufacturer spec; range varies by model)
- Ratchet with extension(For reaching tight spaces)
- Safety gloves and eye protection(Protect hands and eyes)
- Anti seize (optional)(Apply sparingly to threads only if recommended)
- New ignition wires/coil packs (if needed)(Inspect and replace if worn)
- Shop rag and degreaser(Clean seating area and threads)
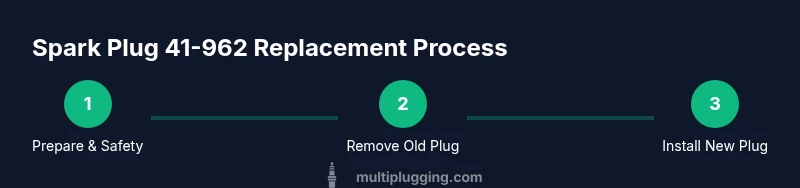
Steps
Estimated time: 60-90 minutes
- 1
Prepare workspace and safety checks
Set up your work area on a flat surface and ensure the engine is cool. Wear gloves and eye protection, and disconnect the negative battery cable if you will touch electrical connections. This reduces the risk of shocks and debris entering the cylinder. Keep a clean tray for old plugs to prevent loss in tight spaces.
Tip: Always double-check you have the right engine variant before disconnecting anything. - 2
Identify and prepare replacement plug
Locate the plug corresponding to your engine bay and inspect the new plug to confirm it matches the 41-962 specification. Keep the replacement plug in its protective cover until installation to avoid contaminants. Label tools and components to prevent mix-ups in a crowded engine bay.
Tip: Handle the new plug by the ceramic body, not the terminal end, to avoid damaging the electrode. - 3
Remove the old plug
Carefully detach any wires or coil packs connected to the plug. Use the correct socket and a steady twist to back the plug out without cross-threading. If it resists, stop and re-evaluate position to avoid stripping the seat.
Tip: If the plug is stubborn, apply a small amount of penetrating oil to the threads and wait a few minutes before retrying. - 4
Inspect seat, threads, and insulator
Visualize the seating area for corrosion, cracked insulators, or damaged threads. Clean the seat with a soft brush and wipe away debris. Do not force a damaged seat back into service; replace the plug if significant wear is evident.
Tip: A damaged seat often leads to gas leakage and misfires, so replacement is the safer route. - 5
Check gap and torque for the new plug
Measure the electrode gap with a feeler gauge and adjust if necessary per the vehicle manual. Thread the plug by hand to avoid cross-threading, then tighten with a torque wrench to the specified value. Finish with a final check for snugness.
Tip: Always torque in a ¼ turn to seat, then verify the gap again after snugging. - 6
Install and reconnect wiring
Reinstall the plug, then reattach the ignition wire or coil pack. Confirm clearance and ensure nothing rubs or interferes with the engine moving parts. Clean up any tools and hoses before starting the engine.
Tip: Don’t over-tighten; overtightening can permanently damage the threads. - 7
Initial test and observation
Start the engine and listen for smooth idle. Monitor for misfires or roughness under load. If anything seems off, recheck the plug seating, gap, and connections before taking a longer test drive.
Tip: A short test drive helps confirm the repair before a full return to service.
FAQ
What does the 41-962 designation indicate and is it compatible with my engine?
41-962 is a plug variant defined by its thread size and heat range. Compatibility varies by engine, so always consult your vehicle manual or a trusted parts catalog to confirm fit and gap values before purchasing or installing.
41-962 is a plug variant; check your manual to confirm it fits your engine before you replace it.
Should I replace all plugs when servicing 41-962, or only one?
In many engines, replacing the full set ensures consistent ignition timing and performance, reducing the chance of a mismatch. If several have significant wear or fouling, consider replacing the entire bank or set.
Usually, replace the whole set for reliability, especially on modern engines.
What torque value should I use for 41-962?
Torque values depend on the engine and head material. Always refer to the vehicle manual or parts catalog for the exact specification, and use a calibrated torque wrench for accuracy.
Check your manual for the exact torque and use a torque wrench to set it precisely.
Can I reuse old seals or gaskets when replacing 41-962?
In most cases, you should replace the plug’s sealing washer or gasket if it has one, to ensure a proper seal and prevent leaks. Inspect and replace if damaged.
Best to replace any seating gasket or washer to avoid leaks.
What are common signs that misfiring persists after replacement?
If misfires persist after replacement, inspect related components such as ignition coils, wires, and fuel injectors. Recheck the plug gap and seating distance to rule out installation issues.
If the engine still misfires after replacement, inspect ignition and fuel systems and recheck the plug.
Watch Video
Main Points
- Identify 41-962 compatibility before work
- Verify gap and torque to spec
- Inspect seat, threads, and insulator for damage
- Test ignition after installation and maintain a replacement schedule