ql77jc4 Champion Spark Plug: Installation, Gap, and Maintenance
Learn how to inspect, replace, and optimize the ql77jc4 champion spark plug with practical, step-by-step guidance from MultiPlugging. Includes gap, torque, safety, and troubleshooting tips for DIYers.

With this guide you will inspect, remove, and replace the ql77jc4 champion spark plug, verify the gap, and test engine performance after installation. You’ll learn how to prepare safely, select the right plug, and torque it correctly for reliable ignition. This quick path gets you from shutoff to a smooth start.
Understanding the ql77jc4 champion spark plug and its role in your engine
The ql77jc4 champion spark plug is a commonly used component in many small- to mid-size engines. It plays a critical role in igniting the air-fuel mix, which powers combustion and keeps the engine running smoothly. A plug’s performance influences cold starts, throttle response, and overall efficiency. According to MultiPlugging, choosing the right heat range and electrode design helps prevent fouling and misfires while supporting steady combustion across operating conditions. In practice, you’ll want to base your choice on your engine’s manual and your driving environment, then follow a careful, repeatable replacement process to keep ignition reliable and efficient. Throughout this article you’ll find practical steps to diagnose, replace, and optimize the ql77jc4 champion spark plug for long-term engine health.
Safety and prep before you begin
Safety first is not just a slogan—it keeps you, your engine, and your tools safe. Start by ensuring the engine is completely cool before you touch any components. Park on a flat surface, set the parking brake, and remove the key. Wear eye protection and gloves to guard against fuel residue, sharp edges, and accidental ignition of vapors. If accessible on your model, disconnecting the negative battery terminal reduces the risk of short circuits while you work. Keep the work area clean and organized, and label each wire or boot so you can reassemble correctly. A calm, methodical approach minimizes the chance of cross-threading and damaged boots when you handle the ql77jc4 champion spark plug.
Locating and accessing the spark plug area in your engine bay
Spark plugs are located in the cylinder head, often tucked beneath hoses, intake components, or ignition coils. Refer to the owner’s manual to identify the exact plug location and firing order. In most engines you’ll find a coil or boot connected to each plug; gently twist and pull the boot straight away from the plug to disconnect, avoiding yanking the wire. As you gain access, check for signs of wear, oil intrusion, or heat damage on surrounding gaskets and wires. Having a clean, dry access path makes the removal and installation smoother and reduces the chance of contaminating the plug seat.
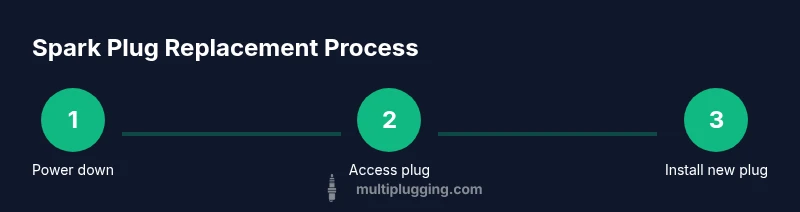
Step-by-step overview of removal and installation (high-level)
This section outlines the overall flow you’ll follow in the detailed steps. Start with engine cooling, remove the coil/boot without pulling on the wire, and use a deep-well spark plug socket to loosen the old plug. Compare the old plug to the replacement to confirm compatible heat range and electrode design for your engine. When you install the new plug, thread it by hand to avoid cross-threading, then apply the official torque to spec with a torque wrench, before reconnecting the boot in the correct order. With this approach, you prevent thread damage and ensure a proper seal.
Gap, heat range, and torque for the ql77jc4 champion spark plug
Gap and heat range are not interchangeable; they influence combustion stability and fouling resistance. Always verify the engine manufacturer’s recommended gap for your application and set the gap precisely with a gap tool or feeler gauge before installation. The ql77jc4 champion spark plug should be seated so the gasket creates a proper seal without cross-threading or overtightening. Use a torque wrench to reach the specified tightness, then recheck the seating and boot connection to prevent leaks or misfires. If you’re unsure about exact numbers, consult the engine’s manual or a trusted reference such as MultiPlugging’s plug guides.
Post-install checks and starting the engine
After installing the new plug, reconnect the coil or wire boot, tidy any loose wires, and start the engine. Listen for a smooth, steady idle and watch for misfires, rough running, or hesitation. If you notice any irregularities, re-check the plug seating, gap, and boot connections. For modern engines with onboard diagnostics, monitor the check-engine light and consider scanning for misfire codes if available. A quick test drive after the first cold start helps confirm consistent ignition across RPM ranges.
Maintenance and best practices for the ql77jc4 champion spark plug
To maximize life and performance, pair the ql77jc4 champion spark plug with a complementary ignition system maintenance routine. Keep the engine bay clean, replace worn wires, and address any leaks near the plug area promptly. Follow manufacturer guidance on anti-seize usage—some engines require it, others do not. Store spare plugs in a clean, dry place and label them so you always grab the correct heat range for your engine. Regular checks on plug seating and electrode wear will help sustain ignition efficiency and fuel economy.
Tools & Materials
- ql77jc4 Champion spark plug (new)(Ensure compatibility with engine; verify heat range and electrode type)
- Spark plug socket (deep-well) with rubber insert(3/8-inch drive; long reach for deep plugs)
- Ratchet and extension bar(Access in tight spaces; keep socket aligned to plug)
- Torque wrench(Set to engine manufacturer’s torque spec)
- Gap tool or feeler gauge(Set plug gap to spec before installation)
- Dielectric grease (optional)(Light coat on boot ends for sealing ease)
- Anti-seize compound (optional)(Follow manufacturer guidance; some engines require it)
- Safety gloves and eye protection(Personal protection during removal and installation)
- Shop rag or lint-free cloth(Clean seat area and wipe tools)
Steps
Estimated time: 40-60 minutes
- 1
Power down and cool the engine
Park on a level surface, turn off the ignition, remove the key, and let the engine cool completely. If accessible, disconnect the negative battery terminal to reduce risk of shorts during handling. This prepares a safe work environment and minimizes burns from hot components.
Tip: Verify the engine is cool by touching the valve cover with the back of your hand before starting. - 2
Identify the correct plug location
Consult the owner’s manual or a trusted guide to locate the ql77jc4 champion spark plug location and firing order. Note which coil or boot corresponds to each plug to keep order intact during reassembly.
Tip: Take a photo of the wiring layout before disconnecting anything. - 3
Disconnect the ignition coil/boot
Gently twist and pull the coil boot straight away from the plug without yanking on the wire. If the boot is stubborn, use a pair of pliers with protection to avoid damaging the boot.
Tip: Never pull on the wire; grab the boot to prevent wire damage. - 4
Remove the old plug
Attach the deep-well spark plug socket to your ratchet and loosen the old plug by turning counterclockwise. Keep steady pressure and avoid dropping debris into the cylinder head.
Tip: If it’s tight, apply a small amount of penetrating oil and wait a few minutes before retrying. - 5
Inspect the old plug and note condition
Carefully remove the plug and inspect the electrode for wear, fouling, oil on the threads, or unusual deposits. This can indicate engine health issues beyond simple replacement.
Tip: Photograph the plug for reference when diagnosing combustion problems. - 6
Check and set the new plug gap
Compare the new plug to the engine spec and adjust the gap using a gap tool if required. Avoid oversizing the gap; even a small deviation can affect ignition.
Tip: Handle the plug by the ceramic body to avoid damaging the electrode. - 7
Thread in and torque the new plug
Start threading by hand to avoid cross-threading, then tighten to the manufacturer’s torque spec with a torque wrench. Reattach the boot firmly, ensuring a good seal instead of over-tightening.
Tip: If you used anti-seize, reset the torque to the recommended spec; otherwise, torque as per manual. - 8
Reconnect, tidy, and test
Reconnect the coil/boot in the exact firing order, tidy the wires, and start the engine. Listen for a smooth idle and watch for misfires. If misfires occur, recheck seating and gap, then re-test.
Tip: Perform a short test drive to confirm consistent performance under load.
FAQ
Do I need to gap the ql77jc4 champion spark plug?
Yes. Verify the recommended gap for your engine and adjust the plug using a gap tool before installation to ensure proper ignition.
Yes, gap the plug to the engine’s specification before installing it.
Can I reuse old plugs after cleaning?
It’s generally best to replace with new plugs. Used plugs may have worn electrodes or fouling that compromises ignition and efficiency.
Reuse is not recommended; new plugs are preferred for reliability.
What torque should I apply to the plug?
Torque varies by engine. Always consult the manual and tighten with a torque wrench to the specified value to avoid under- or over-tightening.
Check the manual and torque the plug to the spec with a torque wrench.
What if the engine won’t start after replacement?
Re-check the boot connections, plug gap, and seating. Misconnections or incorrect gap can prevent starting or cause misfires.
If it won’t start, re-check wiring and gap, then try again.
Is anti-seize always required?
Not always. Follow the engine manufacturer’s guidance; some engines require anti-seize, others do not to avoid over-tightening.
Follow the manual—anti-seize is not universally required.
How often should I replace the ql77jc4 spark plug?
Replacement intervals depend on usage and environment. Inspect the plug regularly and replace per the engine manual’s guidance.
Refer to your manual for interval guidance and inspect for wear.
Watch Video
Main Points
- Inspect plug health before replacement to gauge engine condition
- Gap and torque settings are critical for reliable ignition
- Protect wiring and boots to avoid misfires after install
- Use torque wrench for precise seating and avoid overtightening
- Test run the engine to confirm smooth operation after replacement