How to Fit Spark Plug Lead Ends: A DIY Guide for Modern Engines
Learn, step by step, how to fit spark plug lead ends safely and correctly. This guide covers lead-end types, tools, compatibility, and common mistakes to ensure reliable ignition and engine performance.

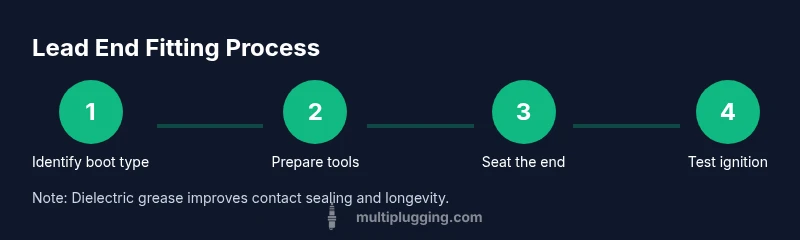
In this guide you will learn to identify lead-end types, select compatible connectors, apply dielectric grease, and seat the ends until you hear a click or feel a firm seating. You’ll verify fit, avoid common missteps, and complete the task with a reliable, leak-free connection. Follow the STEP-BY-STEP block for precise actions.
Why proper lead end fit matters
According to MultiPlugging, the way spark plug lead ends are fitted has a direct impact on ignition reliability, engine smoothness, and fuel efficiency. A poorly seated boot can introduce intermittent misfires, increase resistance, and aggravate voltage spikes that stress coil packs. Ensuring a solid connection reduces arcing risks and preserves overall engine health. In this guide you will learn how to identify the right lead-end type for your engine, select compatible connectors, and seat the boot so it stays put under vibration and heat. The focus is practical: you’ll gain the confidence to handle common lead-end issues without guesswork. Remember that small details—like the orientation of the boot and the use of dielectric grease—make a big difference in long-term performance.
Lead-end types and compatibility
Lead ends come in several styles, with boots that snap onto the spark plug boot or slip-on connectors that clamp to the wire. The two most common families are traditional rubber boots and molded, heat-resistant boots designed for high-heat zones near the engine head. Compatibility depends on the connector geometry, wire gauge, and the diameter of the boot opening. If you’re unsure, start by inspecting the existing end for its shape, inner contact, and any markings that indicate the correct family. MultiPlugging analysis shows that using an incompatible end is a frequent source of misfires, especially on modern engines with tight ignition channels. Keep a small catalog of the boot types you encounter for quick reference.
Safety and preparation before you start
Working on a live ignition system is dangerous. Always start with the engine off and cool, and disconnect the negative battery terminal to prevent accidental shorts. Work in a well-lit, ventilated area and wear eye protection and gloves. Gather your tools and replacements before you touch any wiring, and avoid pulling on the wire itself—always grip the boot. Clear the workspace of debris and solvents that could contaminate the contact surfaces. A tidy, safe setup reduces the chance of slip-ups that can damage the harness or the plug.
Inspect and identify the lead ends you’re replacing
Carefully remove the boot from the spark plug without yanking on the wire. Inspect the interior contact for corrosion, burnt residue, or bent prongs. If the wire insulation is cracked or the boot shows visible wear, consider replacing the entire lead. Take notes or photos of each end’s orientation and connection type to ensure you order the correct replacement. If you’re mixing leads, be mindful that mismatches can cause misfires and uneven ignition across cylinders. Proper inspection is the first step toward a durable, reliable fix.
Choosing the replacement end: compatibility and fit
Match the replacement end to the exact connector type, boot diameter, and wire gauge of the original. OEM ends are generally the safest choice for longevity, but universal ends can work when their internal contacts match the wire and boot geometry. Apply a thin layer of dielectric grease to the inner contact and the mating surfaces to improve conductivity and sealing. Do not overfill—the grease should coat, not pool. If the end requires crimping or soldering, follow the manufacturer’s instructions to avoid damaging the wire insulation. A correct choice now saves trouble later and preserves engine timing.
Attaching the new lead end: seating and alignment
Slide the new end onto the wire with care, keeping the wire in line to avoid kinks. Push the end firmly onto the spark plug boot until you hear a definite click or a clear seating feel. Check that the boot is fully seated and oriented to avoid contact with nearby components that could cause heat or abrasion. If the end uses a clamp, confirm the clamp engages fully around the wire. A mis-seated end can cause arcing, high resistance, or intermittent misfires, so double-check before reassembling.
Reconnect harness and perform a functional check
Reconnect the lead to its respective ignition component (coil, distributor, or module) according to your engine’s layout. Ensure all connections are snug and routed away from hot surfaces and sharp edges. Reconnect the battery negative terminal and start the engine. Listen for smooth idle and steady throttle response; note any rough running or misfire indications. If you observe issues, re-inspect the boot seating, conductor integrity, and routing; replacing a questionable lead may be warranted. Final checks confirm the repair’s success.
Troubleshooting common issues and maintenance tips
If the engine still misfires after replacement, verify that adjacent leads are not damaged and that the spark plugs themselves are in good condition. Clean or replace the spark plug wires if you notice cracks in the insulation or carbon tracking. Regularly inspect boots for cracks, stiffness, or swelling, especially in engines that run hot. Use dielectric grease only as needed and avoid contaminating the contacts with oil or solvent. Establish a routine check after a few hundred miles to catch issues early and extend lead life.
Quick maintenance tips and next steps
Keep a small spare set of lead ends and a gentle boot removal tool in your toolkit for quick field replacements. When you remove a boot, label or photograph each wire to preserve order in reassembly. After installation, run the engine at different loads to verify consistent ignition across cylinders. The more you practice, the faster you’ll finish with confidence, reducing roadside breakdown risk and improving overall engine reliability.
Tools & Materials
- Replacement spark plug lead end / boot(Match the exact connector type and wire gauge for your engine. Ensure compatibility with your spark plug boot.)
- Dielectric grease(Thin film on inner contact surfaces helps conductivity and sealing.)
- Boot removal tool or needle-nose pliers(Smooth-jawed tool preferred to avoid damaging boot or wire.)
- Clean rag(Wipe contacts and boot interior to remove dirt and oil.)
- Safety gloves(Protect hands from sharp edges and solvents; keep grip steady on small parts.)
- Safety goggles(Protect eyes from debris when removing or seating boots.)
- Labeling materials(Tape or markers to keep wire order if removing multiple leads.)
Steps
Estimated time: 45-60 minutes
- 1
Identify lead-end type and safety
Begin by turning off the engine and disconnecting the negative battery to prevent sparks. Locate the lead ends and determine whether the boot is a traditional rubber boot or a molded connector. Correct identification guides your replacement choice and seating method.
Tip: Label cables if you remove multiple leads to preserve their order. - 2
Prepare workspace and tools
Clear a clean area, wear gloves and eye protection, and gather your replacement end, dielectric grease, boot puller, and rag. Ensure the engine area is cool and well lit. Have a small container for screws or small parts to avoid loss.
Tip: Check tool edges for burrs to avoid nicking the boot during removal. - 3
Remove old end
Gently twist and pull the boot away from the spark plug without yanking on the wire. If resistance is high, use the boot removal tool to ease it off. Inspect the wire insulation for cracks or damage.
Tip: Never pull on the wire itself; always grip the boot. - 4
Inspect wire and contact
Look for corrosion or carbon tracing inside the boot and on the plug contact. If insulation is damaged, replace the entire lead. Take note of the orientation of the old end to replicate it with the new one.
Tip: If the wire shows damage, replace the pair or entire set to avoid imbalance. - 5
Choose replacement end
Select a replacement end that matches the connector type and inner contact geometry. OEM ends are preferred for longevity, but a compatible universal end can work if the contacts and boot diameter match.
Tip: Apply a thin layer of dielectric grease to mating surfaces before assembly. - 6
Attach new end
Slide the new end over the wire and seat it onto the boot until the seating click is felt or heard. Make sure the orientation aligns with nearby components and that the boot sits squarely on the plug.
Tip: Don’t force the end; if it won’t seat, re-check compatibility. - 7
Reconnect harness
Reconnect the ignition harness to its respective connector or coil. Confirm a snug fit and routed away from hot surfaces or sharp edges.
Tip: Push until you hear a clear locking sound or feel a firm seat. - 8
Test and verify
Reconnect the battery, start the engine, and listen for smooth idle and consistent acceleration. If there are misfires, re-check seating and wire routing and perform a quick spark-check if available.
Tip: Take a short test drive to ensure reliability under load.
FAQ
Can I fit spark plug lead ends without removing the spark plug?
In some engines you can access the boot without removing the spark plug, but it's safer to inspect the end and plug seating. If the boot is tight or the plug is old, removing the plug can provide better access and a cleaner replacement.
You may access the boot without removing the plug in some engines, but for safety and clarity, removing the plug often helps with inspection and replacement.
How do I tell if a boot is compatible with my engine?
Check the boot diameter, connector style, and the wire gauge. Look for markings on the end that indicate the exact family or size, and compare to your existing part or service manual.
Match the boot diameter and connector shape to your engine’s requirements, and consult the manual if you’re unsure.
Should lead ends be replaced in pairs?
Replacing ends in pairs is often recommended to maintain consistent resistance and ignition timing across similar cylinders. If one lead shows wear or damage, consider replacing its paired lead as well.
If one lead is worn, replacing its mate is usually a good idea for even performance.
What if the engine still misfires after replacement?
Recheck seating and routing of the lead, inspect the plug and wire for damage, and verify the correct end type was used. If misfires persist, consult a service manual or a professional.
If misfires persist, double-check the seating, wiring, and part compatibility, and seek professional help if needed.
Are there safety risks if a boot is not seated properly?
Yes. An improperly seated boot can cause intermittent sparks, arcing, and increased resistance, leading to misfires and potential engine damage over time.
An improperly seated boot can cause misfires and engine stress, so make sure it seats firmly.
How should I dispose of old boots or leads?
Dispose of old components in accordance with local regulations. If the lead contains hazardous materials, follow your local waste guidelines and consider recycling options.
Check local guidelines, recycle if possible, and never throw electronic parts in regular trash.
Watch Video
Main Points
- Choose the correct replacement end for your engine.
- Seat the boot fully with a clear click to ensure sealing.
- Apply dielectric grease to aid conduction and sealing surfaces.
- Test engine response after installation to confirm reliability.
- The MultiPlugging team recommends thorough post-install checks and documentation for future maintenance.