e3 36 Spark Plug Replacement Guide
Learn how to diagnose and replace the e3 36 spark plug with a practical, DIY-friendly guide from MultiPlugging. Safety, tools, steps, and tips to keep your engine firing on all cylinders.

Goal: diagnose and replace an e3 36 spark plug in your vehicle. You’ll locate the plug, remove the old unit, inspect electrodes and insulator, verify correct gap, install a new plug to the recommended torque, and test run the engine to confirm smooth operation.
What is the e3 36 spark plug?
The e3 36 spark plug is a model from E3 Spark Plugs designed for use in many gasoline engines. In DIY communities, it’s considered a versatile option for a wide range of cars and light trucks. According to MultiPlugging, compatibility depends on engine code, thread size, and heat range, so always verify that the plug matches your vehicle’s specifications before buying. If you’re unsure, compare the current plug with the e3 36’s physical size and markings, and consult your owner’s manual or a trusted parts advisor. After installation, ensure the plug is properly gapped and seated to minimize misfires and cold-start issues. These steps help you decide if the e3 36 is the right choice for your particular engine while avoiding common fitment pitfalls.
How to tell if the e3 36 is the right match for your engine?
Choosing the correct spark plug starts with your engine’s requirements. Check your owner’s manual for the correct heat range, thread size, and gap specification. Look at the existing plug’s characteristics (if you’re replacing one) and compare with the e3 36 model. MultiPlugging analysis shows that subtle differences in engine design—such as compression ratio or ignition system—can affect plug performance, so compatibility is not one-size-fits-all. If you own a modern, high-compression engine or a model with sensitive ignition timing, consult a professional or the vehicle manufacturer’s guidance before purchasing. To keep things simple, keep a record of the exact part number and use it consistently across all plugs in the engine.
Tools and safety basics
Before you touch the engine, assemble a basic safety plan. Work on a cool engine, disconnect the battery to avoid shorts, and wear eye protection and gloves. Gather essential tools and a clean workspace to prevent dropped parts or mixed-up components. A tidy setup reduces the chance of cross-threading and misalignment. Also, verify you’re using the correct replacement plug—e3 36 is a specific model, and incorrect parts can cause misfires or damage the ignition system. A quick pre-check of engine bay layout will help you plan access to each plug well and minimize time spent searching for tools later.
For many DIY enthusiasts, this stage is as important as the replacement itself, because mistaking the plug type or misplacing a wire can lead to costly mistakes. Across the MultiPlugging community, the emphasis is on careful preparation and verification before you begin the mechanical work.
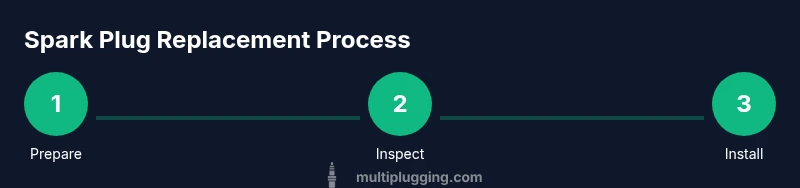
Step-by-step replacement overview
This section provides a practical overview of the replacement process. You’ll locate each plug, detach its boot, remove the old plug with a proper spark plug socket, inspect the electrode and insulator, and confirm a clean seating surface for the new plug. After checking the gap (as required by the e3 36 model and your engine), you’ll thread the new plug by hand first, then tighten to the vehicle’s specification. Reconnect the ignition boot and repeat for each cylinder. Finally, reconnect the battery and run the engine to confirm smooth operation. This overview helps you visualize the sequence before you dive into the hands-on steps.
Common mistakes and how to avoid them
Common errors include over-tightening plugs, using the wrong tools, and neglecting proper cooling time before service. Always verify the plug’s compatibility with your engine to prevent misfires or thread damage. Do not force a plug into a misaligned thread, and avoid bending or kinking ignition wires. When measuring gaps, use the correct gauge and confirm the instrument is calibrated. Finally, don’t skip testing after installation; a brief idle and light drive check can reveal misfires or binding. Learning from these pitfalls saves time and reduces the risk of engine damage.
Maintenance and care after replacement
After replacing the e3 36 spark plug, keep an eye on engine performance for the first few starts. A smooth idle and steady acceleration are good indicators that the installation was successful. Regularly inspect plug wires and boots for wear or cracks, since worn connections can trigger misfires even with a correctly installed plug. Clean tools and store spare plugs properly to ensure they stay free from debris and corrosion. For longevity, replace all plugs at the manufacturer’s recommended interval and avoid mixing plugs with different heat ranges or aging plugs in the same engine.
Troubleshooting after replacement
If you notice a rough idle, misfire, or reduced power after installation, troubleshoot by rechecking the plug gap and reseating the plug. Inspect the ignition coil and plug wires for damage or wear, as faulty components in the ignition circuit can imitate plug problems. Verify there are no oil leaks around the plug wells, which can foul new plugs quickly. If misfires persist, consult the vehicle’s manual for guidance and consider testing the ignition system with a basic spark tester. Addressing problems early saves fuel and reduces exhaust emissions.
Tools & Materials
- e3 36 spark plug (replacement)(Ensure compatibility with engine and cylinder count)
- Spark plug socket with rubber insert(Sized to fit the plug thread; avoid metal-on-ceramic contact)
- Torque wrench(Use the car’s manual guidance for seating torque; avoid over-tightening)
- Ratchet and extension(Helps reach deep plug wells)
- Feeler gauge or plug gap tool(Check gap as specified for the e3 36 model and engine)
- Anti-seize lubricant(Only use if recommended by the plug maker or vehicle manual)
- Dielectric grease(Safe to apply to ignition boot interiors to improve seal)
- Rags and cleaning solvent(Clean the plug seats and wells to prevent debris from entering the combustion chamber)
- Safety gloves and eye protection(Protect hands and eyes from sharp edges and hot components)
Steps
Estimated time: 60-90 minutes
- 1
Prepare workspace and safety
Cool the engine completely, disconnect the negative battery terminal, and gather all tools. This minimizes the risk of electrical shock and accidental starting. A clean, well-lit area reduces the chance of dropping fasteners into hard-to-reach areas.
Tip: Keep a small tray to organize bolts and the used plug, so nothing gets lost. - 2
Locate the spark plugs and boots
Follow each ignition coil boot or wire to the spark plug wells. If you have 4, 6, or 8 cylinders, label each wire as you detach to prevent cross-wiring during reassembly. Allow the engine to rest for a few minutes if it was recently run.
Tip: Take a quick photo of the coil and plug arrangement before removal to reference orientation. - 3
Remove the old plug
Carefully disconnect the boot and insert a spark plug socket onto the plug. Turn counterclockwise to unthread, applying steady pressure. Lift the plug straight up once it’s free, avoiding side loads that could damage the threads.
Tip: If the plug resists, pause and twist slightly to relieve any thread binding rather than forcing it. - 4
Inspect the old plug and seat
Examine the electrode wear, insulator color, and any signs of oil or fuel foul. A worn or fouled plug indicates engine issues beyond the plug itself. This helps you decide whether additional repairs are needed.
Tip: Take a photo of the old plug for future reference when diagnosing engine health. - 5
Gap and compare to the new plug
Check the electrical gap on the replacement e3 36 with a feeler gauge and compare to your engine’s specification. If gap adjustment is required, do so carefully with the gauge tool. Ensure the plug’s seating surface is clean and undamaged.
Tip: Mixture of old and new gaps can cause misfiring; replace all plugs if you’re refreshing the system. - 6
Install the new plug and reconnect
Thread the new plug by hand until snug to avoid cross-threading, then tighten with a torque wrench to the factory spec. Reconnect the ignition boot or wire, applying dielectric grease if desired. Repeat for all cylinders as needed, then reattach any looms and reconnect the battery.
Tip: Always double-check that each boot is firmly seated before starting the engine.
FAQ
Is the e3 36 spark plug compatible with all engines?
No. Compatibility depends on engine model, cylinder count, thread size, and heat range. Always verify against your vehicle’s manual or with a parts professional before buying.
Compatibility varies by engine; check your manual or consult a professional before purchasing.
Can I reuse old plug seals or gaskets?
In most cases, it’s best to use a new plug seal or washer if provided. Reusing seals can lead to leaks or poor sealing around the plug.
Usually you should use a new seal; reusing can cause leaks.
What if the engine still misfires after replacement?
Recheck the gap, ensure the plug is properly seated, inspect ignition coils and wires for wear, and verify there are no vacuum leaks. If misfires persist, consult a professional.
If misfires continue, recheck gap and ignition components, then seek professional help.
Should I use anti-seize on the plug threads?
Many modern engines don’t require anti-seize on spark plug threads. Follow the plug manufacturer’s guidance and your vehicle’s service manual.
Follow the manual; anti-seize is not always necessary.
How often should I replace the e3 36 spark plug?
Replacement intervals vary by engine and usage; follow the manufacturer’s recommended service intervals and monitor engine performance to decide.
Follow the manufacturer’s interval and observe engine performance.
What are signs of a faulty plug after install?
Signs include rough idle, reduced power, hard starting, poor fuel economy, and misfiring. If these occur, re-check the plug seating and gap, then inspect related ignition components.
Rough idle or misfires post-install mean you should re-check the plug and ignition system.
Watch Video
Main Points
- Verify plug compatibility with your engine before purchase
- Use proper tools to avoid damaging threads or components
- Check the plug gap and seating carefully during install
- Test engine after replacement to confirm smooth operation
- Regularly inspect ignition components for wear after service