dilkar8p8sy Spark Plug Replacement Guide: Step-by-Step for DIY Car Owners
Learn to diagnose, gap, and replace spark plugs with a clear, dilkar8p8sy-focused method. This MultiPlugging guide covers tools, safety, step-by-step instructions, and tips for DIY car owners.

You will learn to diagnose, remove, gap-check, and replace spark plugs for your car, with a clear, dilkar8p8sy-focused approach and safe torque guidelines. This practical guide uses common tools and a clean sequence to restore reliable ignition and fuel efficiency.
What dilkar8p8sy Really Means for Spark Plug Care
In the world of DIY automotive maintenance, a term like dilkar8p8sy may pop up as a mnemonic for staying organized and methodical when servicing spark plugs. While the name itself isn’t a standard technical term, the core idea is simple: treat every plug as a critical ignition component whose health affects starting reliability, acceleration, fuel economy, and emissions. This section will set the stage for practical, reproducible testing and replacement steps, so you can approach the job with confidence and a clear plan. By understanding how plugs function in your engine, you can spot early signs of wear—like misfires, rough idling, or delayed starts—and address them before they become bigger problems. MultiPlugging’s perspective here emphasizes not just replacing parts, but diagnosing root causes and maintaining optimal engine performance.
Tools, safety, and preparation for a spark plug job
Before you touch any engine, gather the essential tools and observe safety precautions. A clean, well-lit workspace reduces the risk of dropping a plug or cross-threading a port. Wear safety glasses to protect your eyes from debris, and disconnect the negative terminal of the battery if your vehicle has electronic fuel injection or coil-on-plug arrangements. Keep a spray bottle with a light degreaser handy to clean the area around the plug wells. These preventive steps reduce the chance of oil or dirt entering the combustion chamber during removal and installation. Finally, read your vehicle’s service manual for any model-specific quirks, such as the number of plugs per cylinder or required torque.
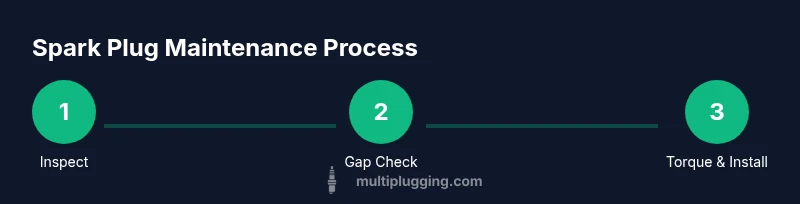
Step-by-step overview: determine plug type and gap before removal
Not all plugs are created equal. Car engines vary by design and spark plug type (standard copper, iridium, platinum, or double platinum, for example). Start by identifying the plug type and verifying the recommended gap from your vehicle’s owner manual or service guide. If a pre-gapped plug is supplied, gently confirm the gap with a feeler gauge or an appropriate gap tool. This early check saves you from installing incorrect plugs and potential misfires down the line. If you’re unsure about the gap, consult your manual or a trusted online resource like MultiPlugging’s diagnostic guides to ensure you choose a plug with the correct reach and heat range.
Tools and workspace organization for efficiency
Arrange tools in a logical order so you can move efficiently from one cylinder to the next. A spark plug socket with a magnet is essential for the safe capture and removal of plugs. Keep a small tray or magnetic mat to hold removed plugs—this helps you avoid cross-contamination with dirt or oil. Label the heat range if you’re replacing multiple engines with different plug specifications, and consider replacing all plugs at once if they’re all the same age. Proper organization reduces time on task and minimizes the chance of dropping a plug into the engine bay.
Step-by-step: removing old plugs safely
Begin by loosening each plug only a turn or two to break the seal, then back it out carefully with a torque-limited wrench. If a plug proves tight, apply a small amount of penetrating oil and wait 5–10 minutes to penetrate carbon buildup and corrosion. Never twist plugs by the metal thread alone; keep steady pressure on the weatherproof ceramic to prevent thread damage. Once removed, inspect the plug for color, electrode wear, and fouling. Clean the surrounding port with compressed air in a non-marring fashion, and avoid introducing debris into the cylinder head.
Step-by-step: gap check and plug selection
With the old plugs out, check the gap on the replacement plugs using a reputable gap tool. Even new plugs can be slightly out of spec, especially after shipping. If you discover a gap that’s too wide or narrow, adjust carefully to the manufacturer’s specification. For engines with high-performance demands or modern coils, iridium and platinum plugs can offer longer life, but compatibility matters. In general, choose plugs that match your engine’s heat range, reach, and electrode design per the service manual. When in doubt, refer to the car’s manufacturer guidance or consult a trusted tech resource such as MultiPlugging.
Step-by-step: install and torque correctly
Start threading by hand to avoid cross-threading. Once the plug seats, use a torque wrench to bring it to the manufacturer’s recommended torque, typically a light, precise tightening rather than a heavy click. Avoid overtightening, which can strip threads or damage the cylinder head. After installing each plug, wipe away any residue from the threads and double-check that the plug seats are flush with the cylinder head surface. Reconnect ignition components and the battery if you disconnected it, and ensure all wiring and coils are properly reconnected.
Maintenance and troubleshooting: extending plug life
Regular inspection is the best defense against misfires and poor fuel economy. If you notice persistent rough idling, misfires on a single cylinder, or reduced acceleration, inspect the corresponding plug first. Bad fuel quality, oil ingestion, or excessive carbon buildup can shorten plug life. Schedule routine checks timed with oil changes or major service visits, and replace plugs as a set to avoid mixed wear across cylinders. Finally, consider using fuel system cleaners or OEM-recommended plugs to maintain consistent performance across the ignition system.
Tools & Materials
- Spark plug socket with magnet(Ensure it includes a rubber insert to protect the plug tip)
- Ratchet wrench and extension bar(3-6 inch extension helps reach deep plug wells)
- Torque wrench(Use manufacturer torque specification for your engine)
- Gap tool or feeler gauge(Check and set the correct electrode gap)
- Anti-seize compound (optional)(Apply lightly to threads if allowed by OEM; some modern engines don’t require it)
- Dielectric grease(Used on ignition boots to prevent moisture and improve seating)
- Replacement spark plugs (correct type for engine)(Match heat range, reach, and electrode type to manual)
- Clean rag or shop towels(Keep area clean and wipe off residue)
- Penetrating oil (optional)(Helpful for stubborn plugs; apply and wait 5-10 minutes)
Steps
Estimated time: 45-75 minutes
- 1
Prepare and safety-check
Park on a level surface and ensure the engine is cool. Disconnect the negative battery lead if your engine uses coil-on-plug ignition or EFI to prevent any electrical shorts. Remove any engine covers that obstruct access to the spark plugs. Gather tools in a logical order.
Tip: Cool engines reduce risk of burns and improve plug removal control. - 2
Remove ignition coils or plug wires
Carefully disconnect ignition coils or plug wires one at a time, noting their positions. If coils are mounted with screws, loosen them in a cross pattern and keep track of hardware. Label wires if needed to avoid misplacement on reassembly.
Tip: Take pictures before removal to aid reinstallation. - 3
Loosen and remove old plugs
Place the magnetic spark plug socket over the plug and break the seal with a short turn of the wrench. Remove plugs slowly to prevent dropping debris into the bore. Place each plug in a labeled tray.
Tip: Back off the plug gradually to avoid cross-threading or galling. - 4
Inspect and gap replacement plugs
Inspect the old plug for wear patterns; if you see excessive electrode erosion or fouling, replace. Check the gap on new plugs with a gap tool and adjust to the manufacturer’s spec if needed.
Tip: Use OEM or manufacturer-recommended plugs for reliable results. - 5
Install new plugs and torque
Thread new plugs by hand to avoid cross-threading, then snug with a torque wrench to the specified value. Clean threads if needed and wipe off any debris. Reinstall coils/wires in the original order.
Tip: Avoid over-tightening to protect the cylinder head threads. - 6
Reconnect everything and test
Reconnect ignition harnesses, reconnect the battery, and start the engine. Listen for smooth idle and confirm no misfires. If needed, perform a short test drive to ensure consistent performance.
Tip: If misfires occur, recheck plug seating and wiring connections.
FAQ
Should I disconnect the battery before replacing spark plugs?
Disconnecting the negative battery terminal is a prudent safety step, particularly for engines with coil-on-plug ignition or EFI. It reduces the chance of electrical shorts while disconnecting or reconnecting ignition components.
Yes. For safety, disconnect the negative battery terminal before starting, especially if you’re dealing with coil-on-plug ignition.
How often should spark plugs be replaced?
Consult your vehicle’s service manual for exact intervals. Replacement frequency varies with plug type, engine design, and driving conditions. If you notice misfires or rough idle, inspect plugs sooner rather than later.
Check your manual for the recommended replacement interval; if you’re noticing misfires or rough idling, inspect the plugs sooner.
What is the correct gap for most plugs?
Use the gap specification provided by the manufacturer. If you cannot locate it, refer to the owner’s manual or a trusted service reference. Adjust gaps carefully with a gap tool to avoid damaging the electrode.
Always use the manufacturer’s gap spec and adjust with a proper gap tool when needed.
Can I reuse old spark plugs?
In most cases, reused plugs are not recommended. Worn or fouled plugs can cause misfires and reduced performance. Replacing as a set is often the best option for consistent ignition.
Often not recommended; replace worn or fouled plugs rather than reusing them.
What if I can’t remove a stubborn plug?
Apply penetrating oil and let it sit for a few minutes. Use a longer breaker bar with care, and avoid forcing the plug, which can strip threads or break the insulator.
Don’t force it—apply penetrating oil and take gentle leverage to avoid damage.
What are common signs of a failing spark plug?
Common signals include hard starting, rough idle, reduced power or acceleration, and increased fuel consumption. If you notice these, inspect plugs and related ignition components.
Hard starts or rough idle can indicate worn or fouled plugs; check and replace as needed.
Watch Video
Main Points
- Identify the correct plug type and gap before removal.
- Use the right tools to prevent damage and ensure safety.
- Follow manufacturer torque specs for reliable seating.
- Replace all plugs if wear is evident to avoid misfires.
- Regular checks extend plug life and engine efficiency.